Overview of Ramp Accounting
Overview
For finance teams and accountants, prompt book closures and insightful accounting data are essential. Ramp assists in several ways:
- Easy integration : Connect Ramp to your accounting software. It automatically tracks all expenses, from bills to card charges, ensuring they're properly categorized.
- Automate with Intelligence : Ramp offers tools to speed up expense classification. Using smart rules and suggestions, close your books faster. Learn how to automate your workflows here .
- Precision with peace of mind : Ramp uses multiple data points, card policies, and your past classifications to ensure accurate data entry. Our priority is data correctness, giving you confidence that every sync to your system is error-free.
With Ramp, you're always in control of your financial data.
How it works
Step 1: Connect Ramp to your accounting provider
Connect Ramp to your accounting system, and we'll fetch essential data like your chart of accounts for precise spend classification.
Step 2: Configure sync settings for your company
Use sync settings to map the accounts and preferences Ramp uses when syncing or exporting transaction information.
Step 3: Select the fields for your spend
Every business has its own way of categorizing spending. Ramp imports accounting fields from your provider, letting you decide which ones to use for financial transactions.
Step 4: Automate your accounting
Automate transaction classification by setting rules based on merchant details and card information.
Step 5: Start coding transactions
Find all transactions in Ramp's 'Accounting' tab for your review and categorization. Check out our Accounting Rules & Automation for more on automation.
Step 6: Sync transactions to your accounting provider
With a click, sync transactions like credit card charges and reimbursements to your accounting system.
Connect Ramp to your accounting provider
It's straightforward to connect Ramp to your accounting provider. Follow these steps based on your provider:
- Ramp native integrations
- Oracle Fusion Enterprise
- Microsoft Dynamics 365 Finance and Operations Enterprise
- Workday Financials Enterprise
- NetSuite Plus
- Sage Intacct Plus
- Microsoft Dynamics Business Central Plus
- Acumatica Plus
- Zoho Books Plus
- QuickBooks Online
- Xero
- Ramp partner integrations
- All other accounting providers
For a complete list with plan availability, see Ramp ERP integrations overview.
Settings
In Accounting settings, you can manage your accounting fields, coding rules, automation settings, and sync or export settings.
Sync settings
In Accounting settings, direct ERP integrations use Sync settings, while Universal CSV uses Export settings.
From there, choose the tab that matches the workflow you are configuring, such as Card transactions, Reimbursements, Bill Pay, Banking, Multi-entity, or Bank transactions. The exact fields vary by provider, but this is where you map accounts like your credit card account, reimbursement A/P and cash accounts, Bill Pay accounts, statement payment cash account, and other preferences such as accounting date or sync currency.
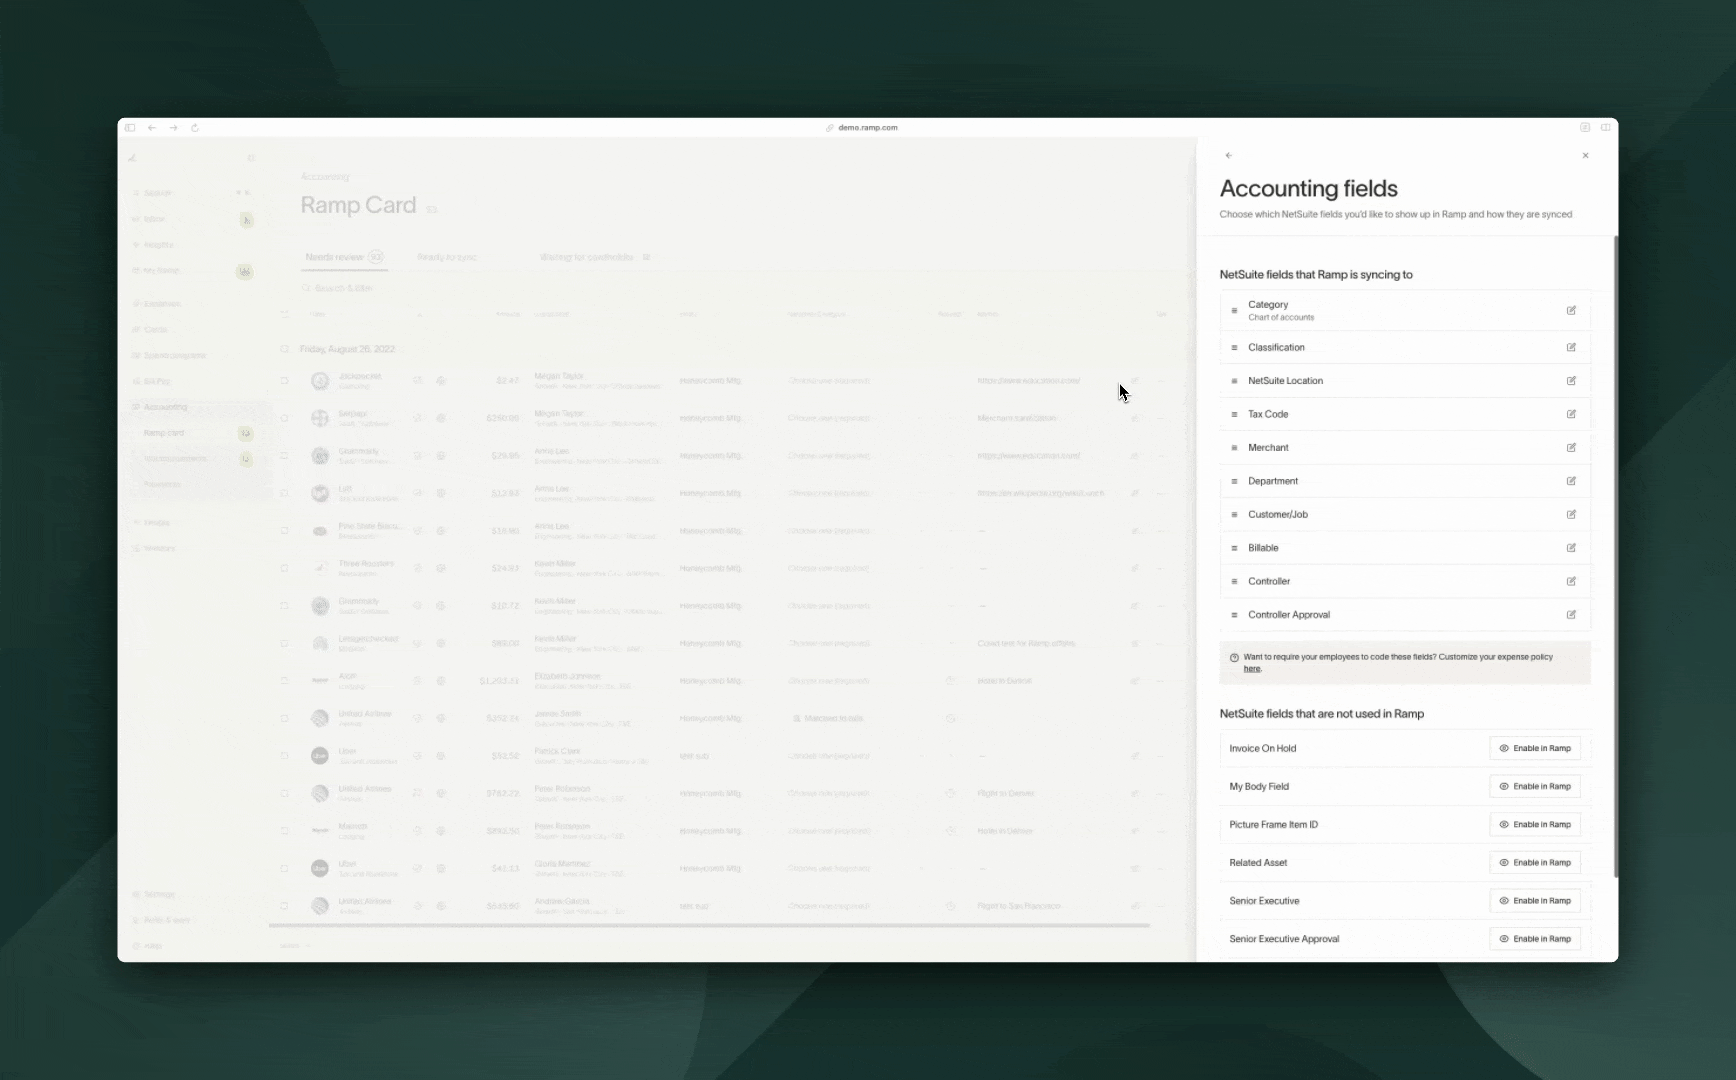
Manage accounting fields (chart of accounts)
In Accounting settings, select Accounting fields.
Customize Ramp for your team by selecting the necessary fields from your accounting system for categorizing spend. The options you'll see here vary by accounting provider and the fields that are supported currently. Please review the specific integration overview you're using (linked above) for additional details.
- Enable the accounting fields you want Ramp to automatically pull in from your provider:
- Show/Hide accounts for coding globally:
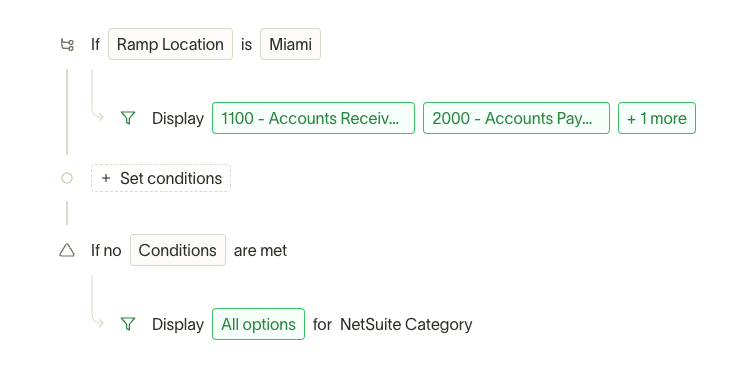
- Implement conditional logic for presenting Accounting Field Options by location, department, or other user attributes. Learn more here .
Frequently asked questions
Why can't I select a required field when submitting a receipt?
If you're unable to select a field that is marked as required during receipt submission, it usually means:
- The field is required by your company's policy,
but it hasn’t been made visible or available for users to select.
How can this be resolved?
Your Ramp Admin will need to do one of the following:
Option 1: Update the submission policy to make the field optional or remove it as a requirement.
Option 2: Adjust the accounting field settings so users can view and select the field during receipt submission.
Admin instructions to fix this:
Step 1: Go to Accounting settings.
Step 2: Select Accounting fields.
Step 3: Locate the required field that's missing during submission.
Step 4: Ensure the field is enabled and visible to users, or update its settings so it's no longer required.
Automate your accounting
In Accounting settings, use Coding rules to build mapping and advanced rules, or use Automation settings to manage auto-coding, auto-mark-ready, and overnight sync behavior.
Ramp excels in automating transaction classification, saving businesses time. Our platform is built to automate manual tasks, providing valuable features.
Learn more in Accounting Rules & Automation.
Syncing financial transactions to your accounting provider
Ramp facilitates syncing credit card charges, reimbursements, and statements (with certain providers) to your accounting system.
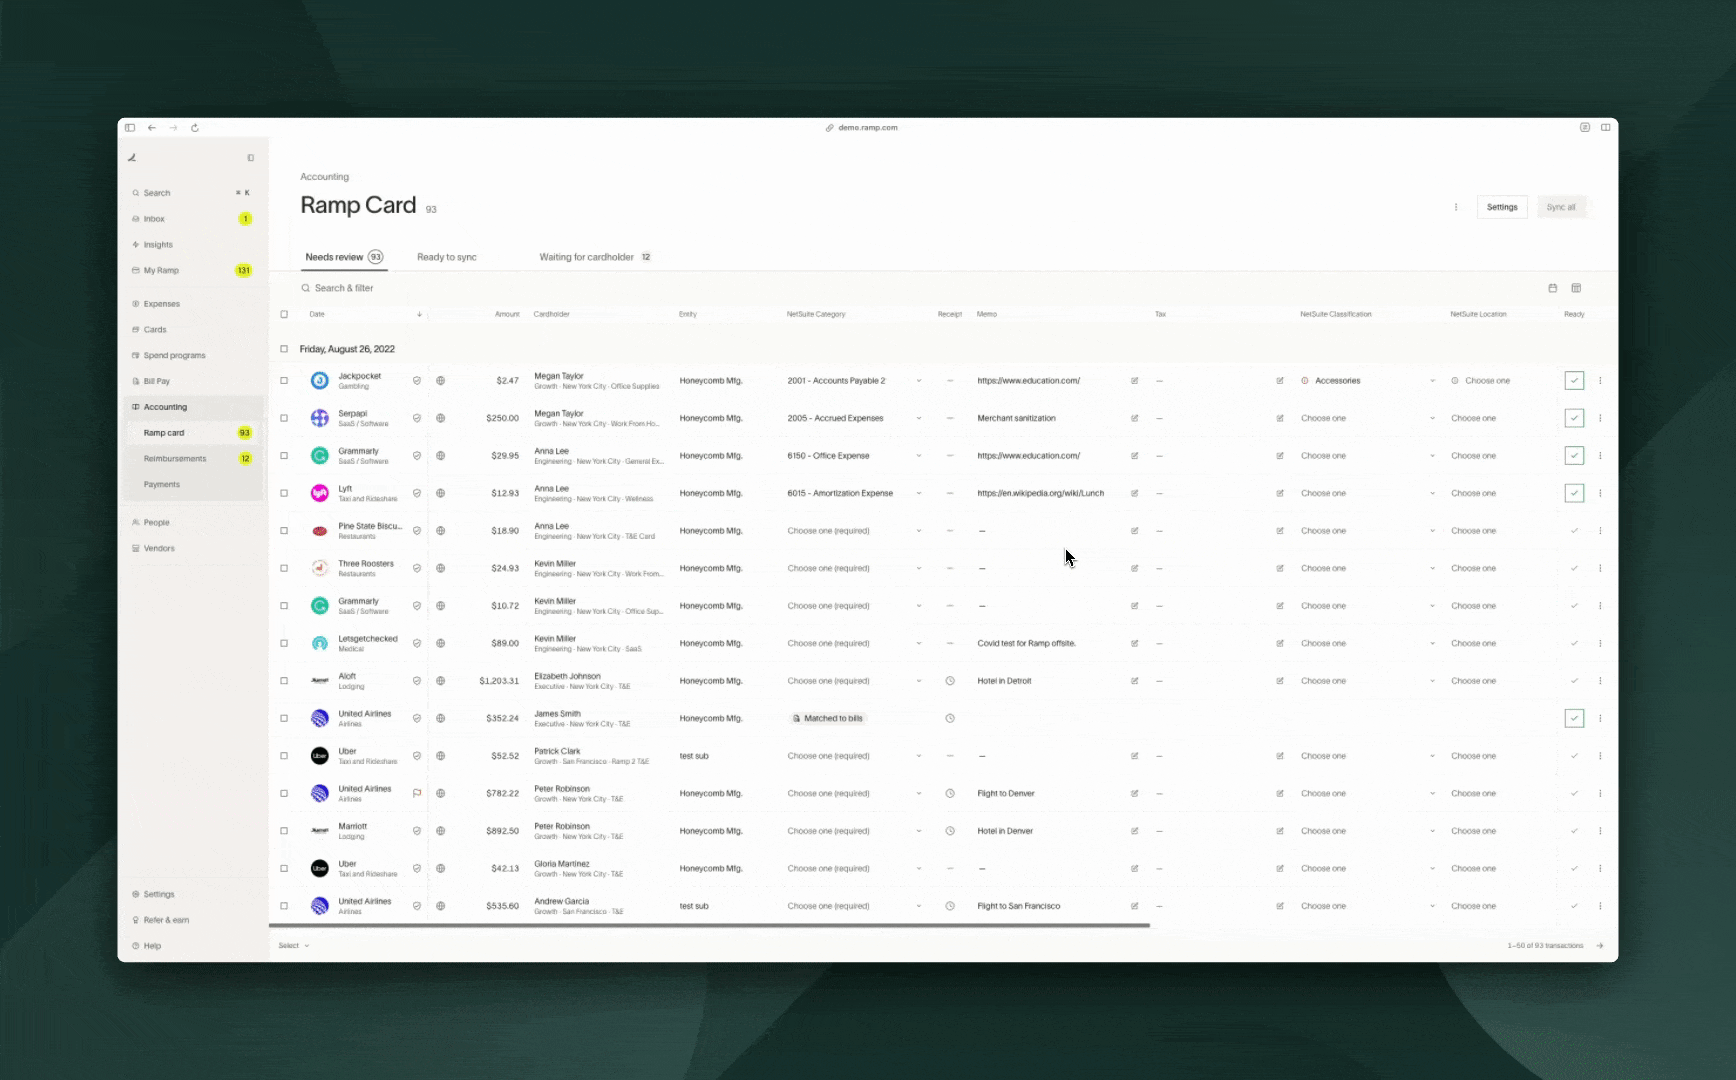
Our intuitive workflow:
- Waiting for Cardholder: Review what transactions are pending requirements.
- Needs Review: Ensure all required fields are populated, then click the icon under Ready.
- Ready to Sync: Sync all items that have been reviewed in one fell swoop by pressing Sync .
- What Gets Synced? : Ramp sends over all coded details, including the transaction/reimbursement receipt and memo.
Syncing transaction date vs. clearing date
We want to give customers the flexibility to choose what date (either clearing or transaction) to use to sync over expenses. Each has its pros and cons. This will appear as an option to customers within the settings tab.

Transaction date
Using the transaction date reflects when the expense occurred, providing accurate expense reporting. For instance, if you buy a meal on February 28th but it clears on March 1st, the transaction date will record the expense in February.
Clearing date
Using the clearing date simplifies identifying statement inclusions. You can filter transactions by month to view all charged expenses. This method aligns with bank feeds, where transactions are only posted after clearing.
Reconciliation
Accounting impact
How Ramp syncs credit card transactions:
Ramp syncs credit card transactions as credit card transactions in your accounting provider.
- Purchase is made
- Debit (increase) expense or bank account
- Credit (increase) credit card liability account
How Ramp syncs reimbursements:
Ramp syncs reimbursements as bills and bill payments in your accounting provider.
- Bill
- Debit (increase) Expense Account in original currency
- Credit (increase) Credit Card Liability Account in original currency
- Bill Payment
- Debit (decrease) the Liability Account
- Credit (decrease) The Cash/Bank Account
How Ramp syncs statement payments:
Ramp syncs statement payments using the record type supported by your accounting provider, such as checks or journal entries. Check your provider-specific overview for the exact sync behavior.
- Statement is paid
- Debit (decrease) Credit Card Liability Account: Reducing the amount you owe since you're paying off the credit card.
- Credit (decrease) Bank Account: This account represents your company's cash, which decreases when you pay off the credit card bill.
To reconcile, you will have to go to your accounting provider to match the amount that was paid to Ramp from your bank account to the total dollar transaction amount synced over from Ramp. If you go to the Transactions tab within Ramp, you can filter by the statement period to easily check which transactions were included in which statement.