Sage Intacct integration: Set up sync
Overview
Available on Ramp Plus. See Ramp Plus overview for plan details.
Ramp integrates directly with Sage Intacct. You can sync transactions anytime and leverage Ramp's automation features and receipt matching. The initial setup on Sage takes a few minutes and only needs to be done once.
You should complete all setup steps on Sage before entering your Web Services User credentials into Ramp. You'll also need full admin privileges before you begin. Lastly, please ensure Sage is set to the Production environment. Ramp does not support the development environment.
Step 1
-
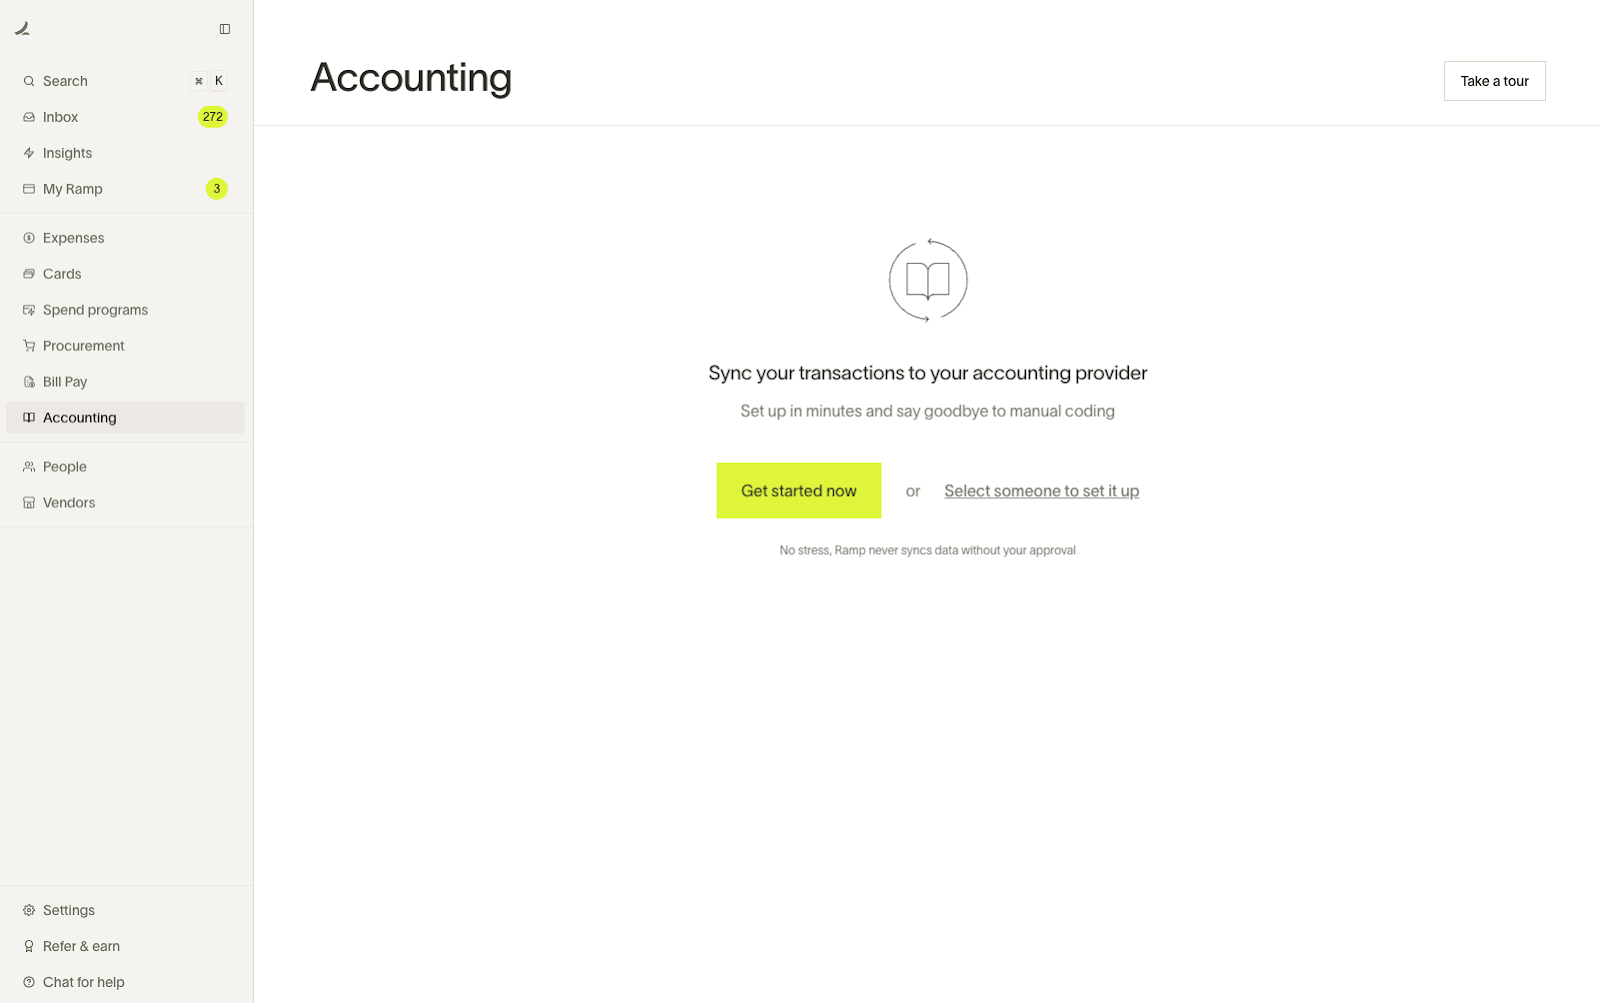
Begin in Ramp and open up the Accounting tab - click “Get Started Now”.
-
Click on “Sage Intacct” on the next page
Step 2
- Sign into your Sage Intacct, or utilize the hyperlink on the page in Ramp and navigate to Company > Admin > Subscriptions.
- Look for Web Services and turn that setting on if it is not already.
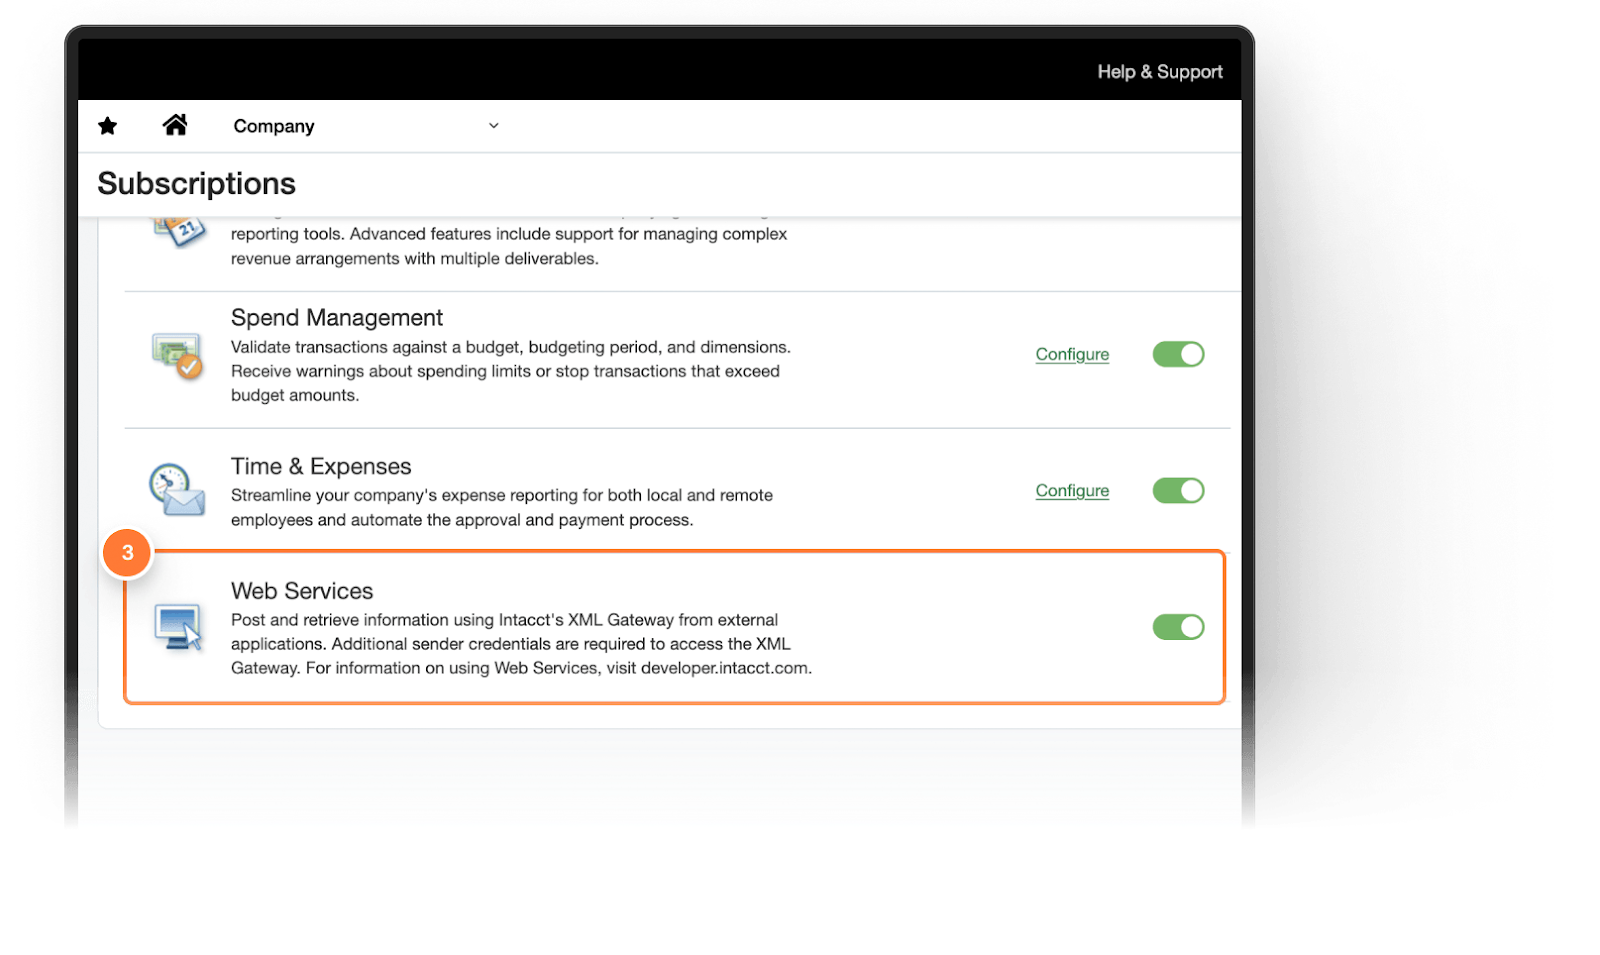
- Click Continue back in Ramp when complete.
Please note: Sage Intacct companies can be set up with user-based or role-based permissions. To confirm these settings, go to Company > Set up > Company > Scroll down to Global Settings > Check your Permission type. If role-based permissions, continue to step 3 below. If user-based permissions, skip down tostep 4.
Step 3
- Go back into your Intacct and navigate to Company > Admin > Roles and create a new role.
- Enter the following information:
- Role Name: Ramp Role
- Description: Ramp Web Services User
- Click Save
- Now open the Permissions section
- Select ALL for each permission listed. Also, scroll to the bottom of each permission page to review and make sure none of them are missing.
- Click Save
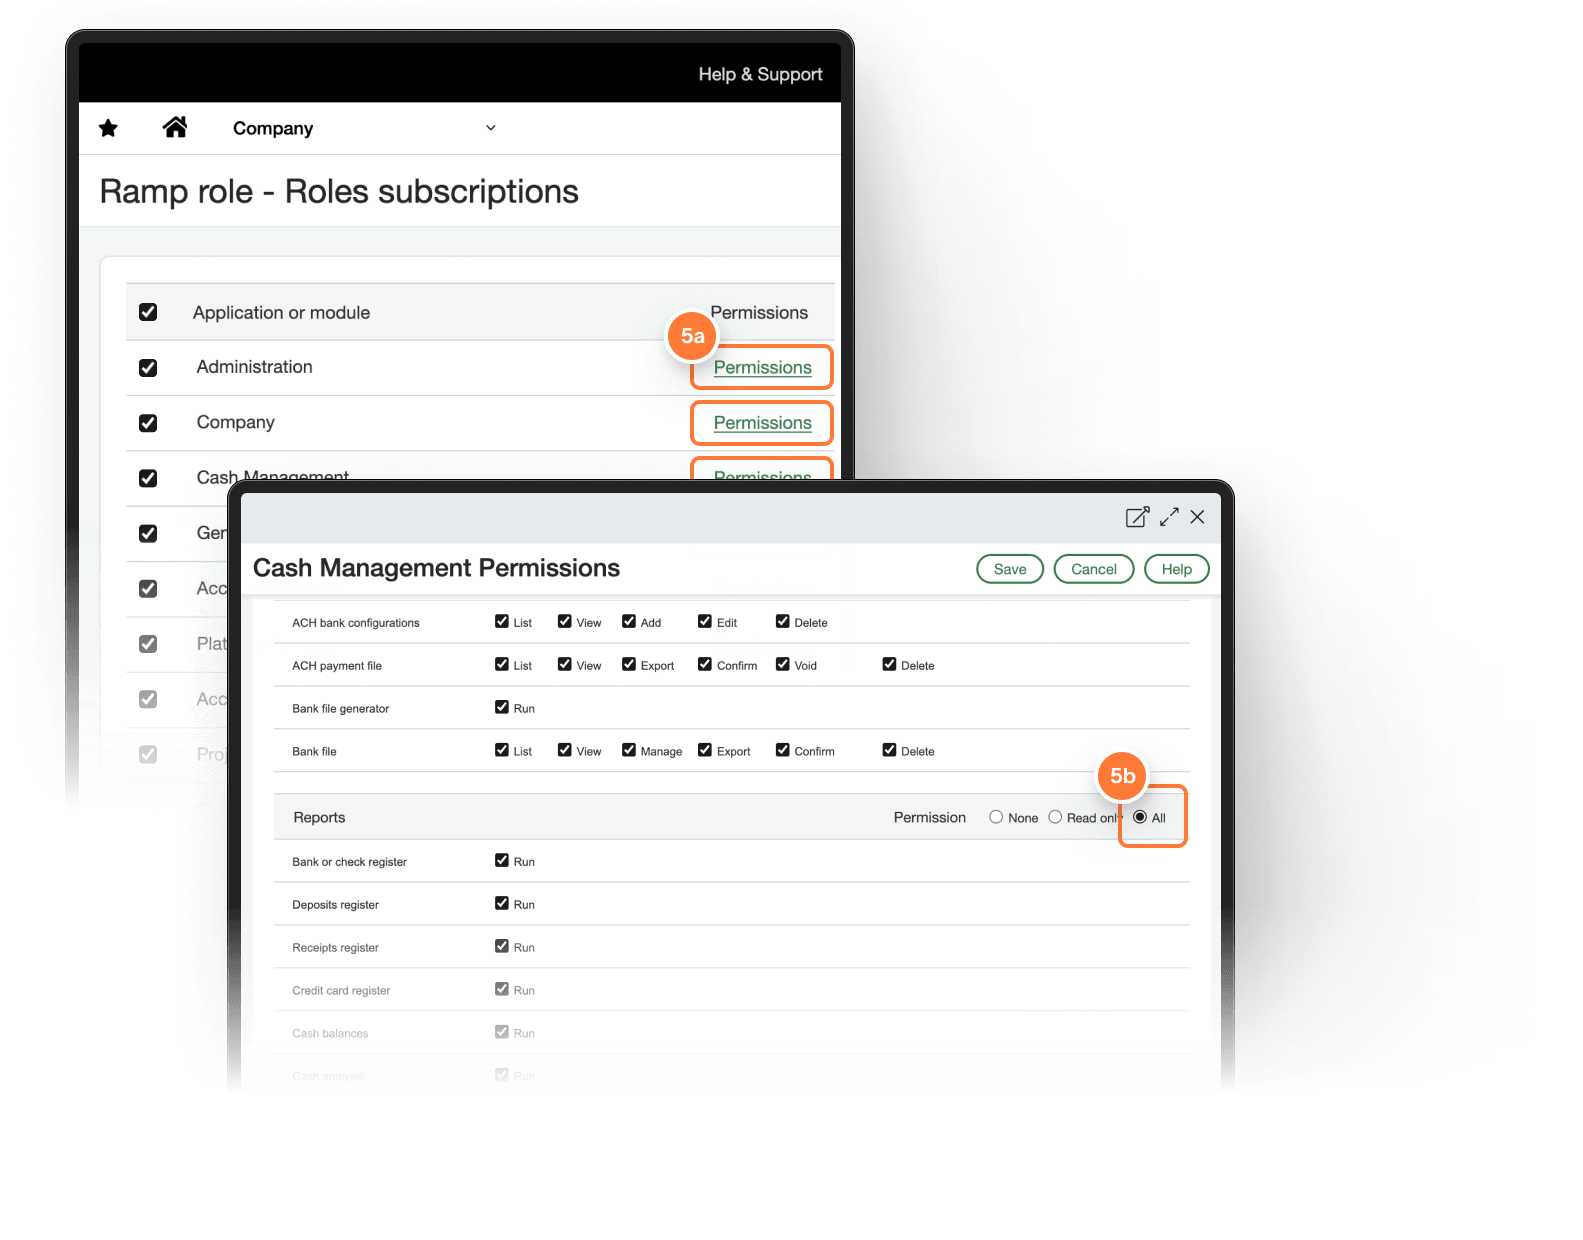
- Click Continue back in Ramp when complete
Step 4
- In Intacct, navigate to Company > Admin > Web Services users and create a new user.
- Enter the following information:
- User ID: Ramp
- Last Name & First name: use your personal information
- Email address: use your work email; Sage will send a confirmation email to this address
- User Type: Business
- Admin Privileges: Off
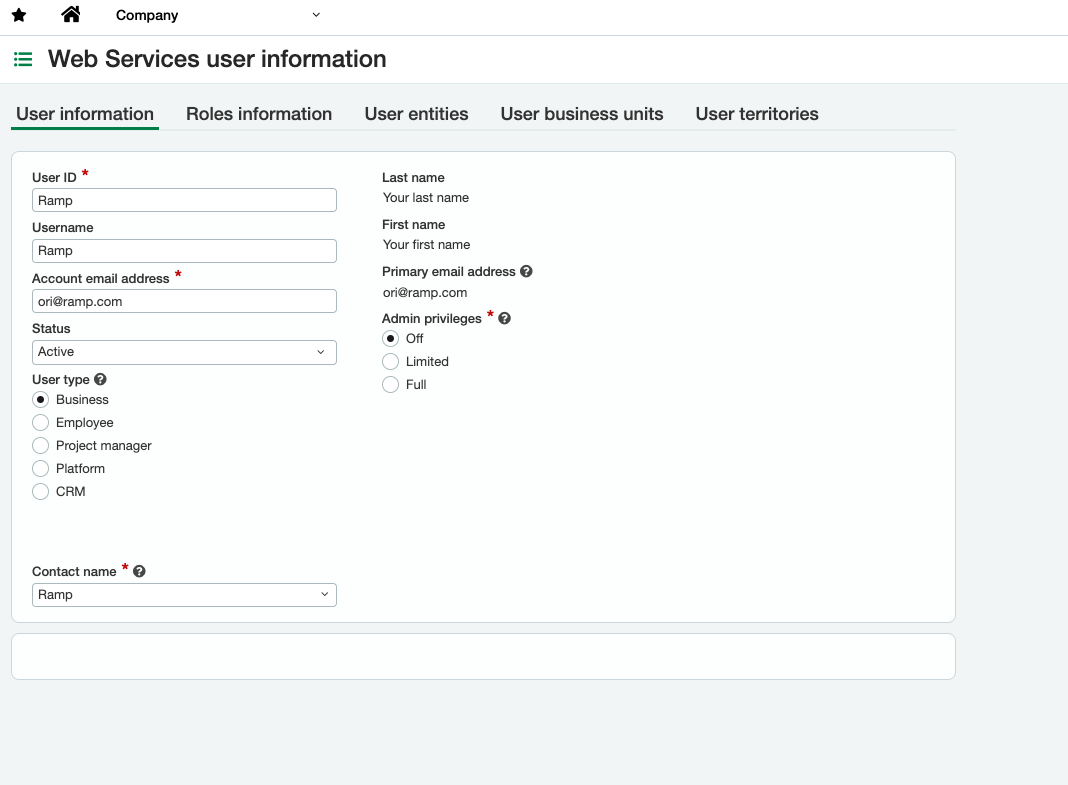
- After adding this information, navigate to the Roles Information tab and add the Ramp Role we added in the previous step.
- If this Web Services user is restricted to a single entity, under the User entities tab, select Enable access to top level. This access is required for Ramp to sync at the top level.
- If you sync at the entity level, confirm that this Web Services user can access every operating entity Ramp will sync. If Sage reports an entity-access error, follow Resolve Sage Intacct entity access or console setup issues.
- Click Save & Click Continue in Ramp when complete.
Please Note: If user-based permissions, after creating the web service user, on the right, click subscription and then do step 3.
Step 5
- In Intacct, navigate to Company > Setup > Company and click edit on the top right.
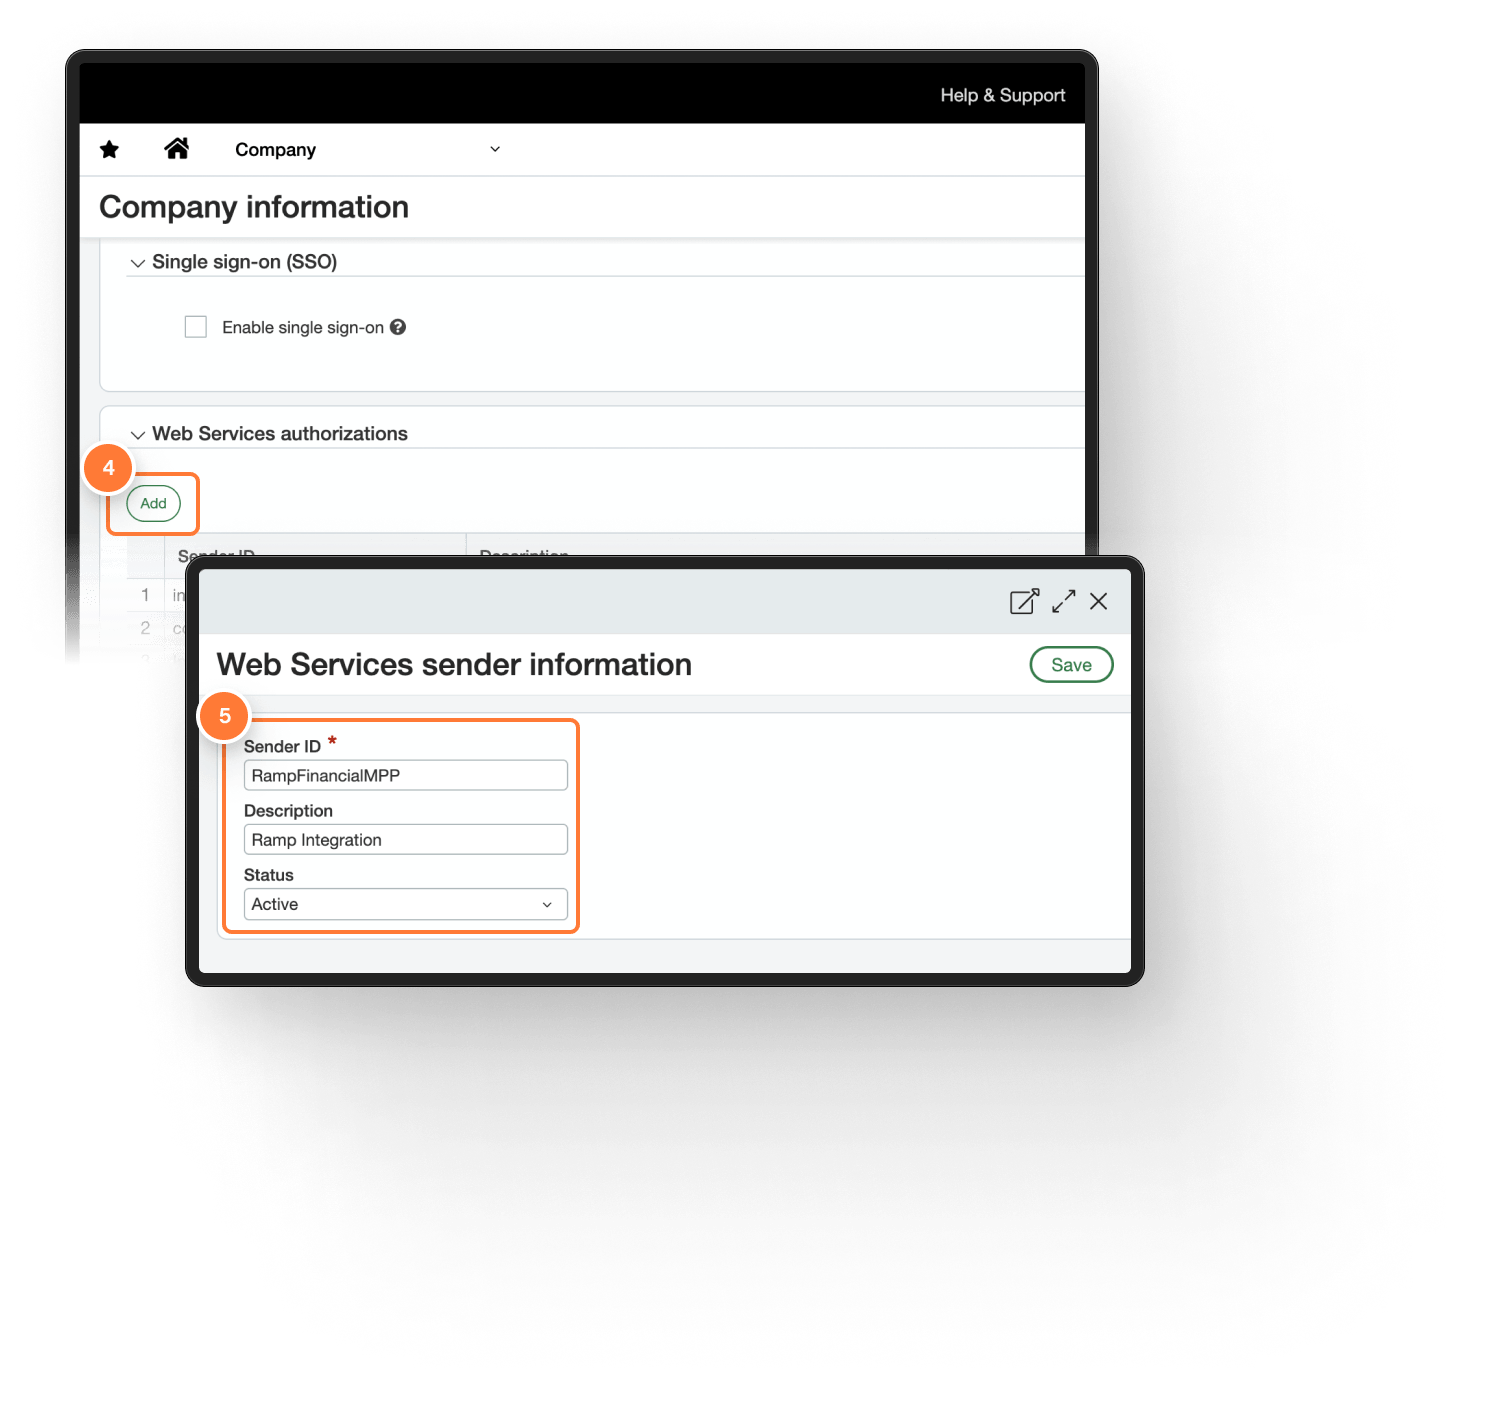
- Click Security and scroll down to the Web Services Authorizations section, and click Add to create a new Web Services Authorization.
- Enter the following information:
- Sender ID: RampFinancialMPP
- Description: Ramp Integration
- Status: Active
- Click Sage & Click Continue in Ramp when complete.
Step 6
- Answer the question on the Ramp Screen that says, “Do you have entities in Sage Intacct with different base currencies?"
- If not, you will only need to complete the remaining steps once to sync to top level.
- If yes, you will need to complete the remaining steps for each entity at entity level. When multiple base currencies are enabled, Sage Intacct restricts credit card transactions to the entity level.
- If you plan on syncing to entity level
- Create one credit card account per entity
- Create one credit card GL offset account per credit card
- If you plan on syncing to top-level
- Create one credit card account
- Create one credit card GL offset account
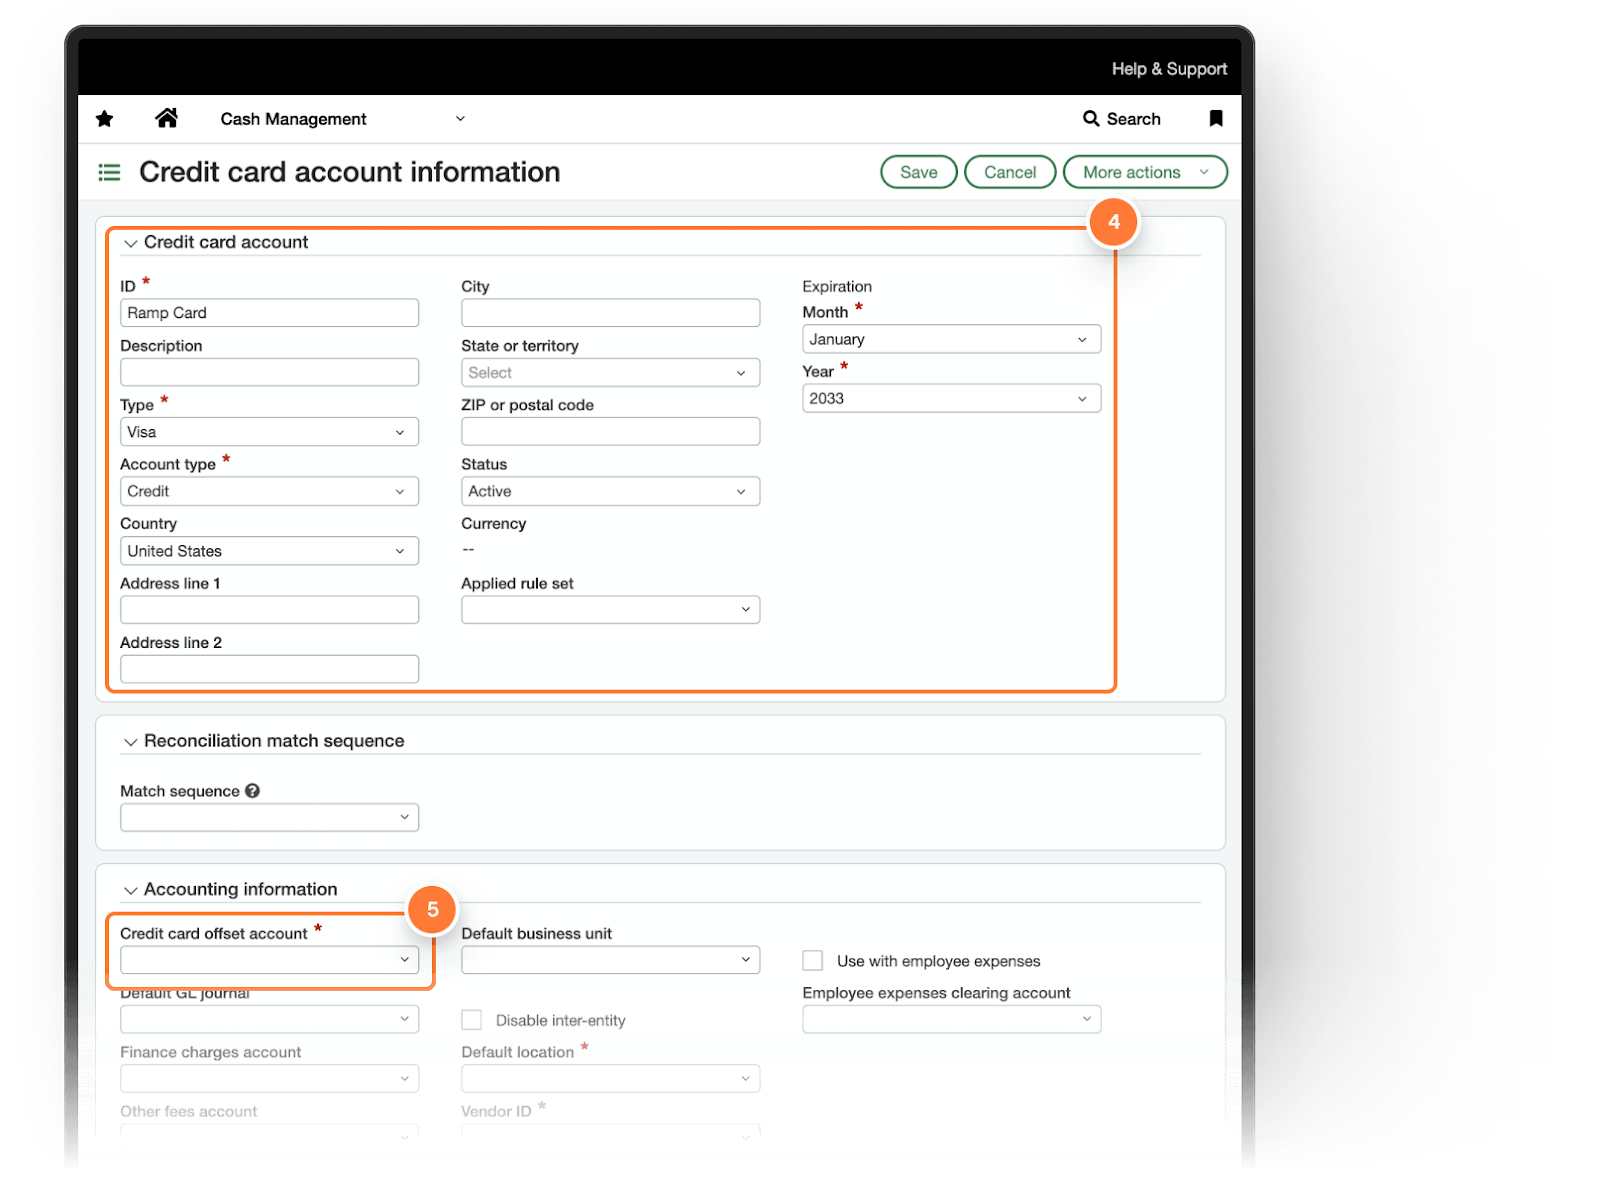
- Depending on your approach, open the top level or the applicable entity, then follow Sage Intacct's Create a credit card account instructions.
- Add a new credit card and enter the following information:
- ID: Ramp Card - Entity Name
- Type: Visa
- Payment Method: Credit
- Expiration: Set as far into the future as possible
- Add a new credit card and enter the following information:
- Go to the Credit Card Offset Account field in the Accounting Information section and create a new account for this.
- Note: Sage Intacct does not let customers use the same offset account for multiple credit cards so they will have to be unique per card.
- Go to the Default Location field and select a location.
- Note: This is required by Sage Intacct, even if it is a top level card.
- If the required Ramp vendor is not available, follow Sage Intacct's Create a vendor instructions before returning to this step.
- Go to the Vendor ID field and select the Ramp vendor created for this card.
- Note: Sage Intacct does not let customers use the same vendor for multiple credit cards so they will have to be unique per card.
- Click Save and then click Continue in Ramp when complete.
Step 7
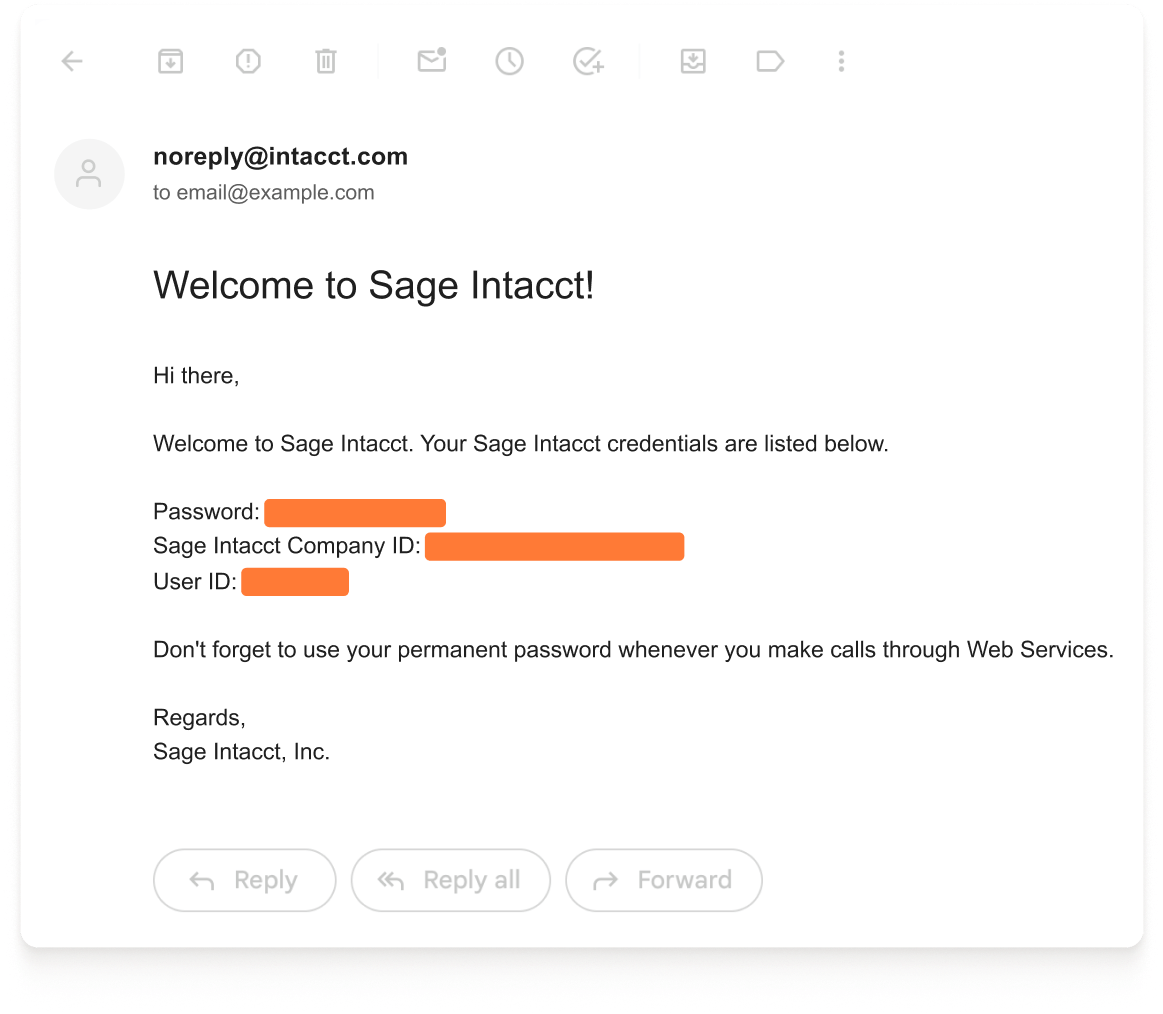
- Find the email that was sent to the Email address entered in Step 4.
- Enter the Sage Intacct Credentials from the email into Ramp and click Connect to Sage Intacct.