NetSuite integration: Set up with Ramp
Overview
Available on Ramp Plus. See Ramp Plus overview for plan details.
Before you start, make sure you are signed in as an Administrator on NetSuite and have permission to set up accounting integrations in Ramp.
If you do not have this permission, ask a Ramp Admin to grant Connect and disconnect your accounting integration in Customizing Roles and Permissions.
This article explains step-by-step how to properly set up NetSuite with Ramp.
If you are validating NetSuite's current API and authentication requirements before setup, see NetSuite integration: API and authentication requirements.
Step 1
-
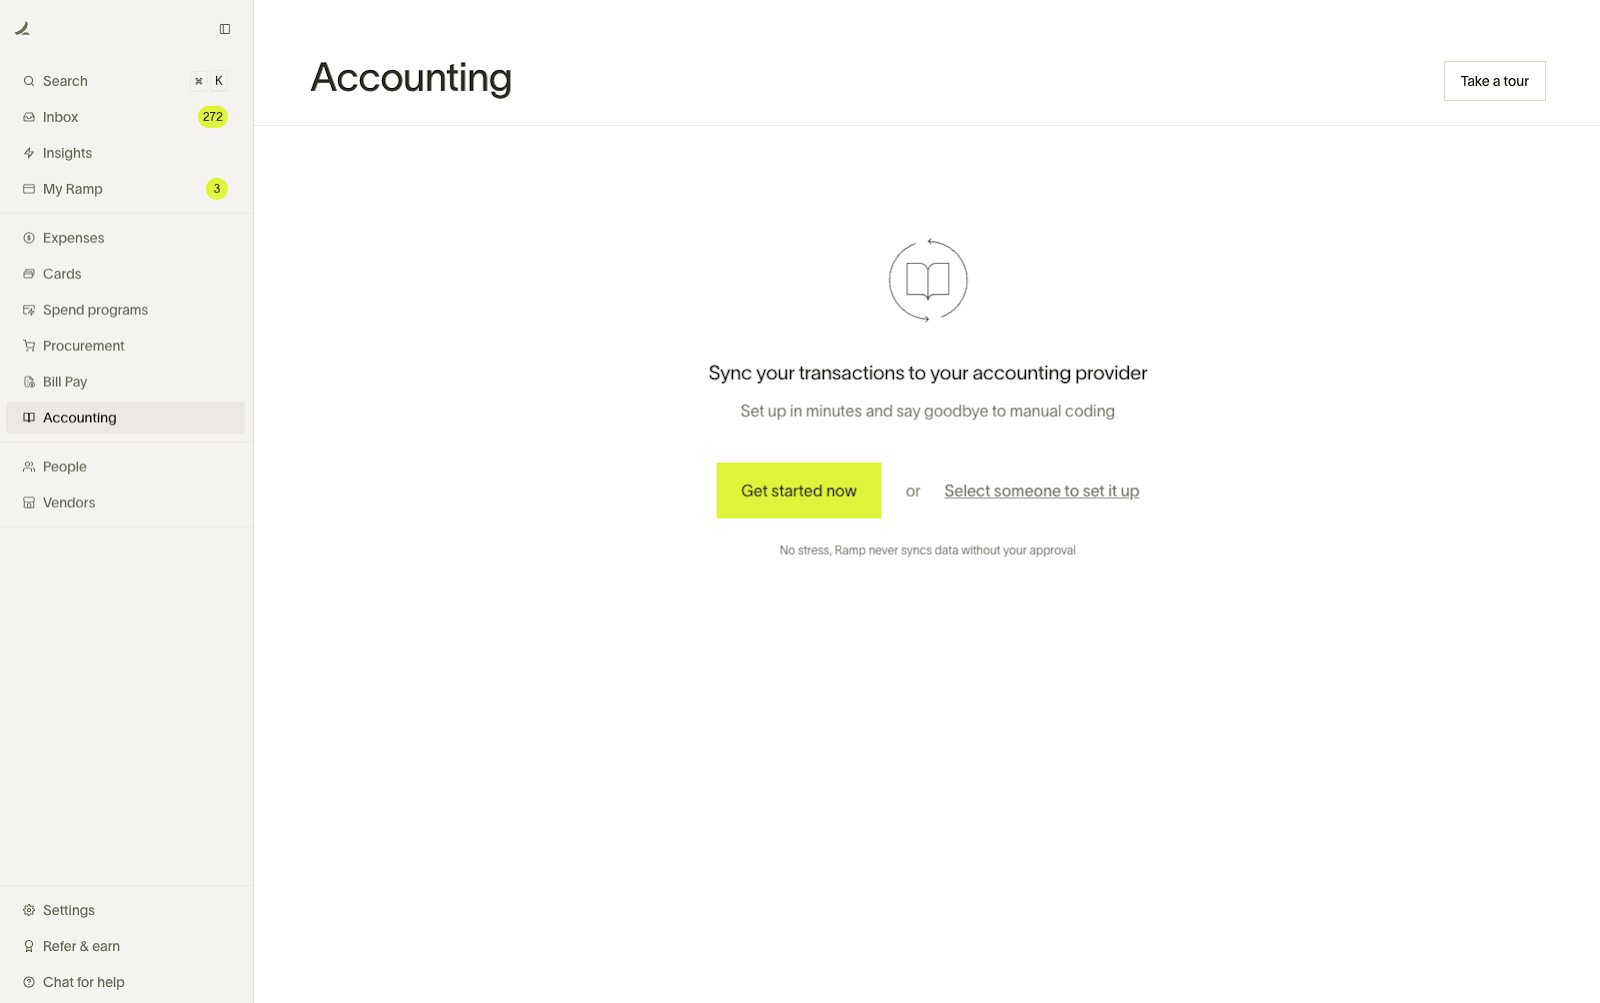
Begin in Ramp and open up the Accounting tab - click "Get started now."
-
Click on “NetSuite” on the next page
Step 2
- Open up your NetSuite account in another tab or choose the hyperlink in the setup guide
- Copy your Account ID from the URL on your NetSuite account and enter it into the NetSuite ID field in Ramp
- Navigate to Setup->Company and check if the “Subsidiary Settings Manager” option is available. If it is, select Yes, I see Subsidiary Settings Manager.
- If it is not available, select No. Ramp keeps you in the same connection flow and shows the setup steps for standard NetSuite without subsidiaries. Follow those in-product steps instead of the remaining steps in this article.
- The presence of Subsidiary Settings Manager indicates that you use NetSuite OneWorld, which the remaining steps cover.
- Click Continue when complete.
Step 3
- On the next page, click the hyperlink or navigate in your NetSuite account to Setup -> Company and click Enable Features. Then click the SuiteCloud tab.

- Ensure that the checkboxes for SOAP WEB SERVICES, REST WEB SERVICES, and TOKEN BASED AUTHENTICATION are checked (note that the latter checkbox is under 'Manage Authentication, rather than SuiteTalk)
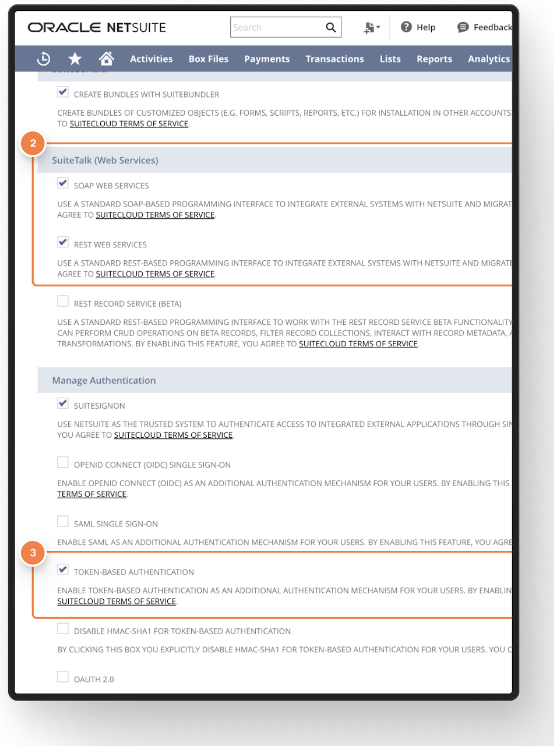
- Click Save in NetSuite and click Continue on the Ramp setup page.
Step 4
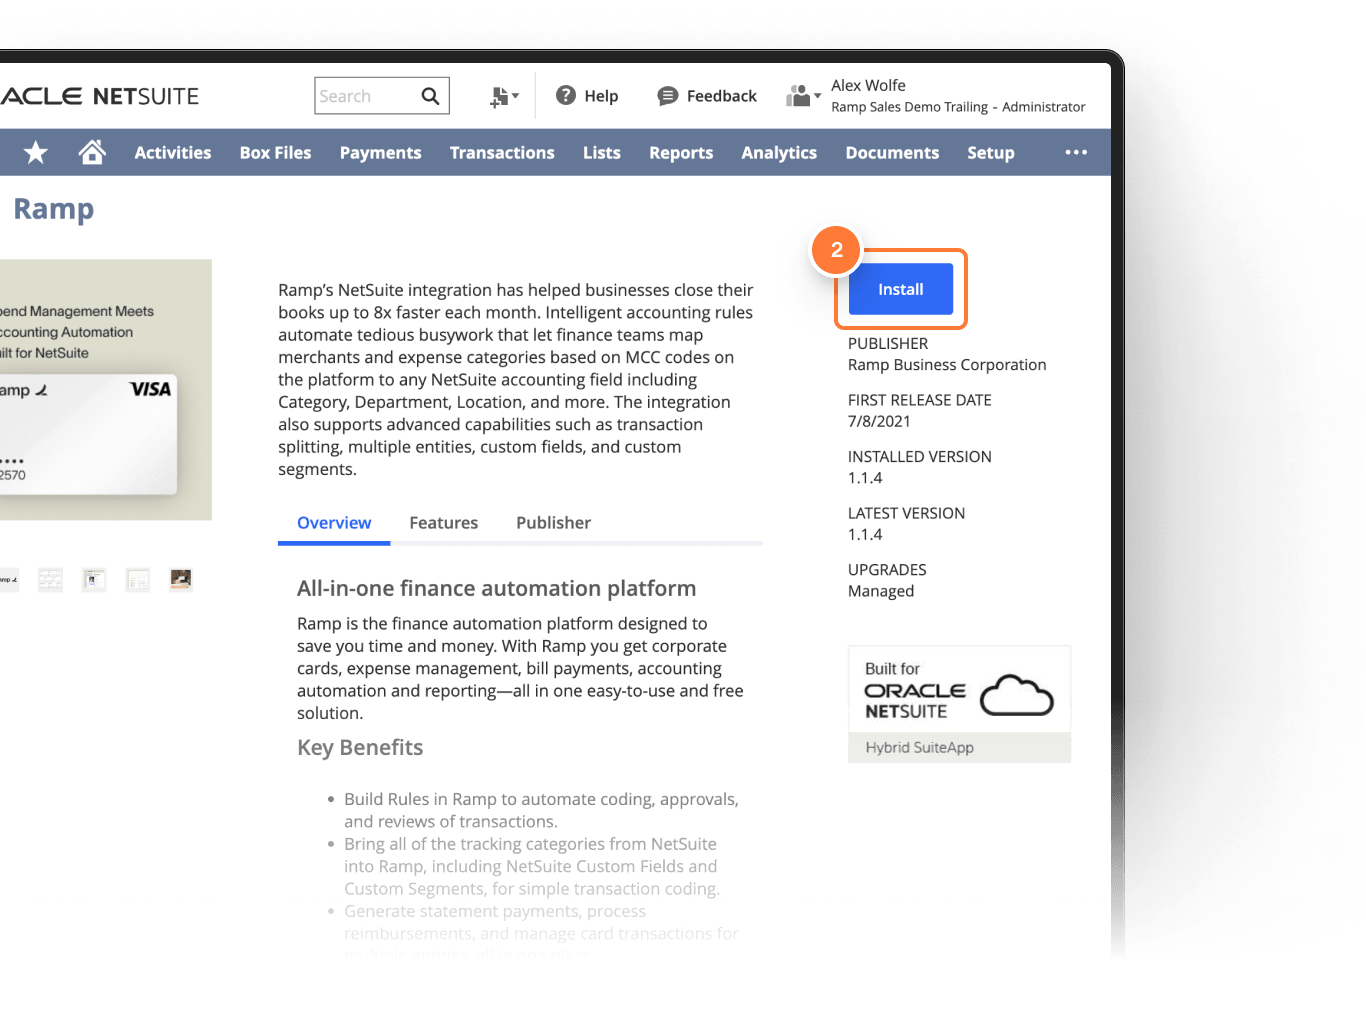
- Use the hyperlink in Ramp or open the SuiteApps button at the top of the screen in NetSuite (you may need to choose the three dots in the corner to show this option).
- Search for the Ramp SuiteApp and install it.
- Click Continue in Ramp once it has been installed.
For businesses included in the NetSuite Receivables rollout, the Ramp SuiteApp automatically updates the Receivables RESTlet script, customer and item custom fields, and role permissions for OneWorld. You do not need the manual Standard upgrade steps. Both editions still need invoice and credit-note number overrides. Check Receivables rollout access separately; installing the SuiteApp does not enable Receivables for your business.
Step 5
-
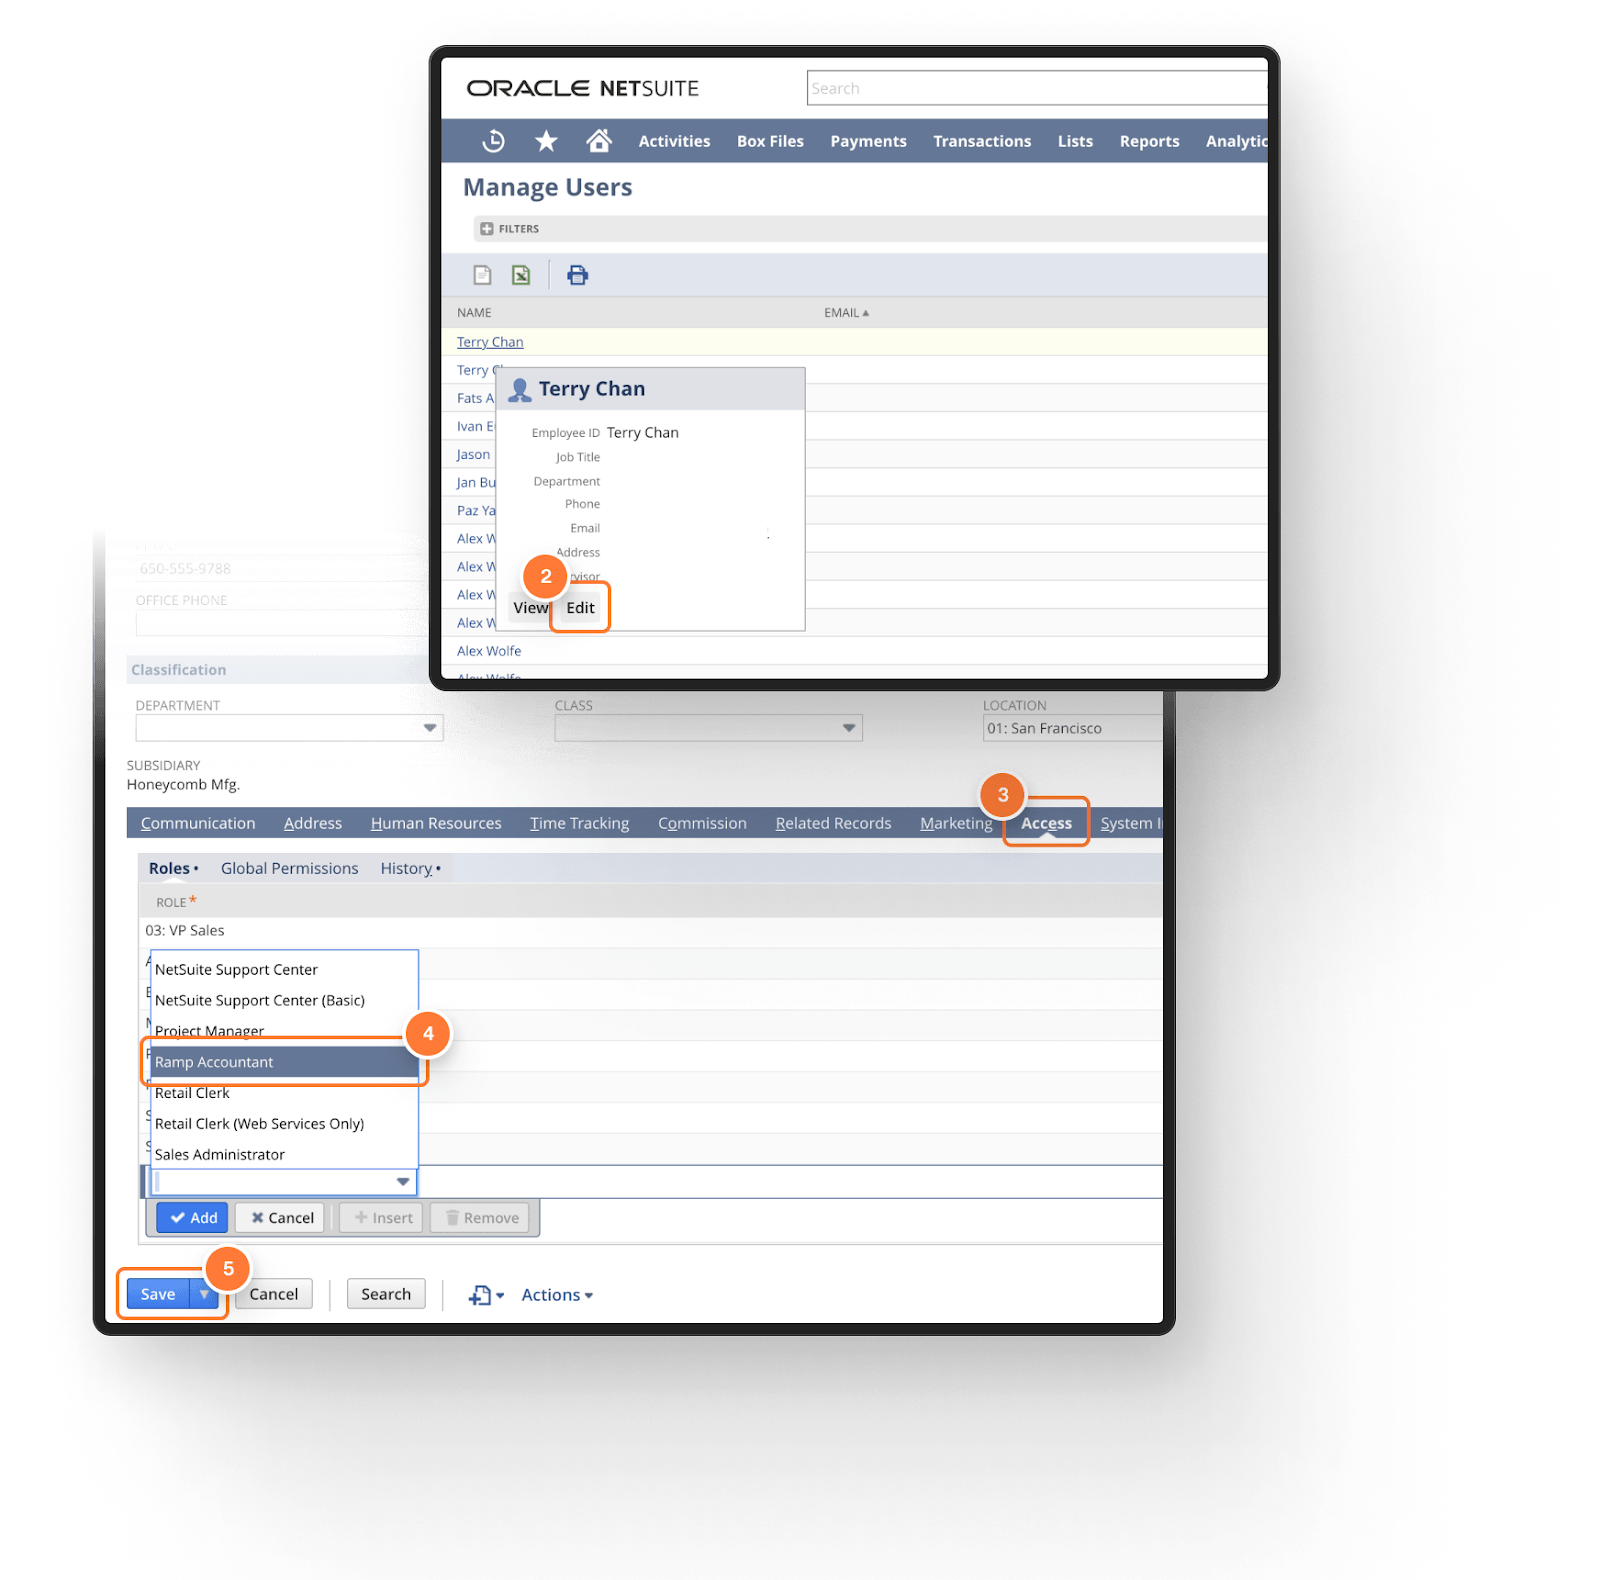
Hover over Setup -> Users/Roles and click Manage Users.
-
Find the row corresponding to your Administrator user, and click your name.
-
Click Edit, then scroll down and click the Access tab of the table in the bottom half of the page.
-
Add a row for the Ramp Accountant role to your user, and click Save.
-
Verify that the Ramp Accountant role appears in your Role list. If the role is missing when you authorize Ramp, sign out of NetSuite and sign back in, then try again.
-
Click Continue in Ramp to continue to the next step.
Step 6
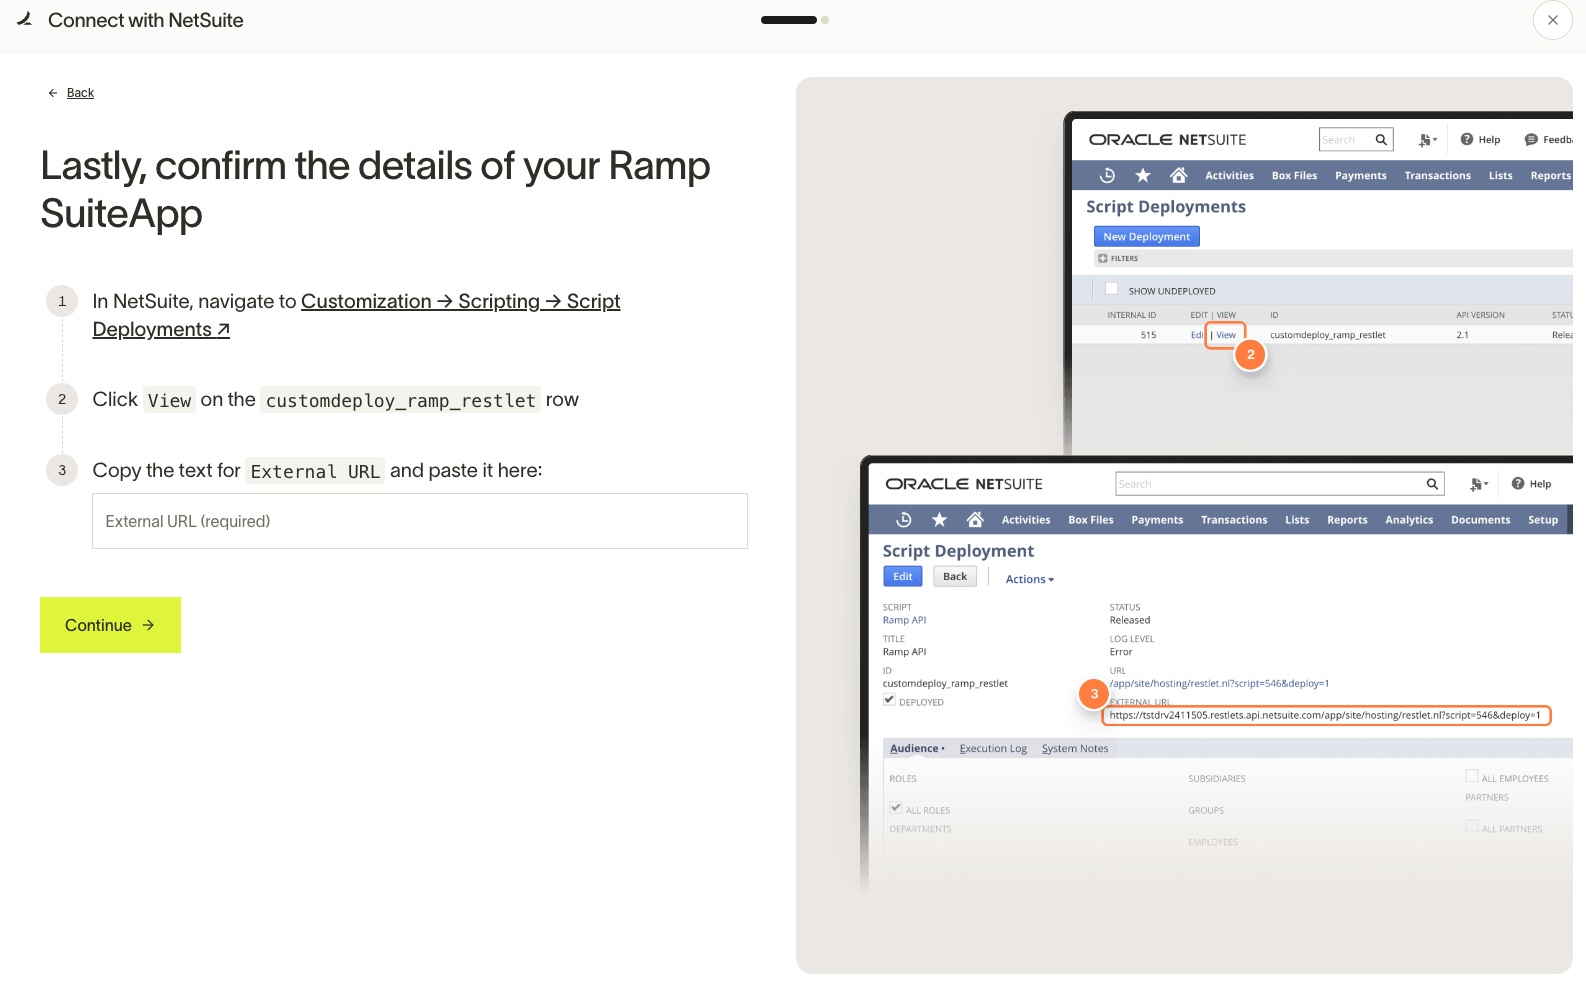
- Use the hyperlink in ramp or hover over Customization ->Scripting and click Script Deployments in your NetSuite.
- Use the filter named “Script” and search for Ramp API. Click View on the row with customdeploy_ramp_restlet.

- Copy the entirety of the text underneath the External URL and paste it into the field on Ramp’s setup page.
- Click Continue when this is complete.
Step 7
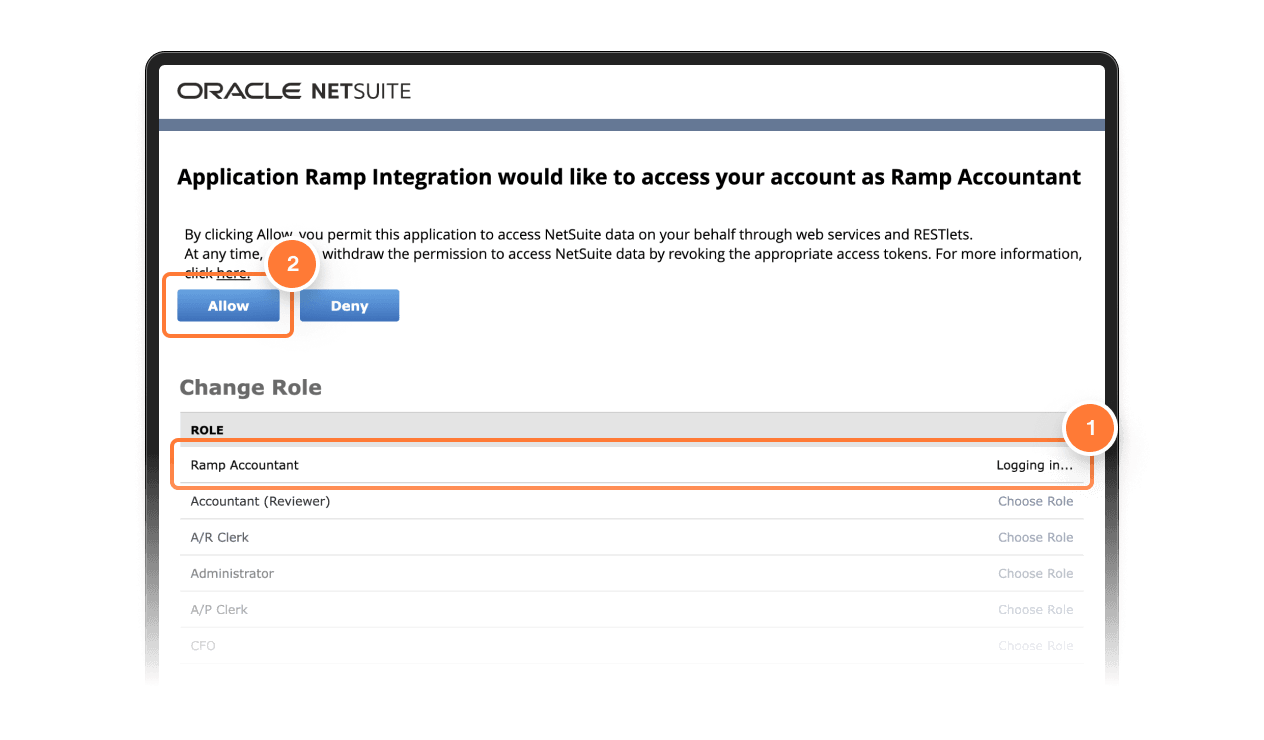
- Confirm Ramp access to NetSuite by clicking on the Approve access in NetSuite button. This opens up a screen to select the Ramp Accountant role using “Choose Role”, then click “Allow” at the top of the screen.
Step 8
- Once redirected back to Ramp, you will configure your multi-entity settings. If you receive a white screen, please contact your Account Manager or Customer Success Manager for assistance.
Extra setup: custom segments
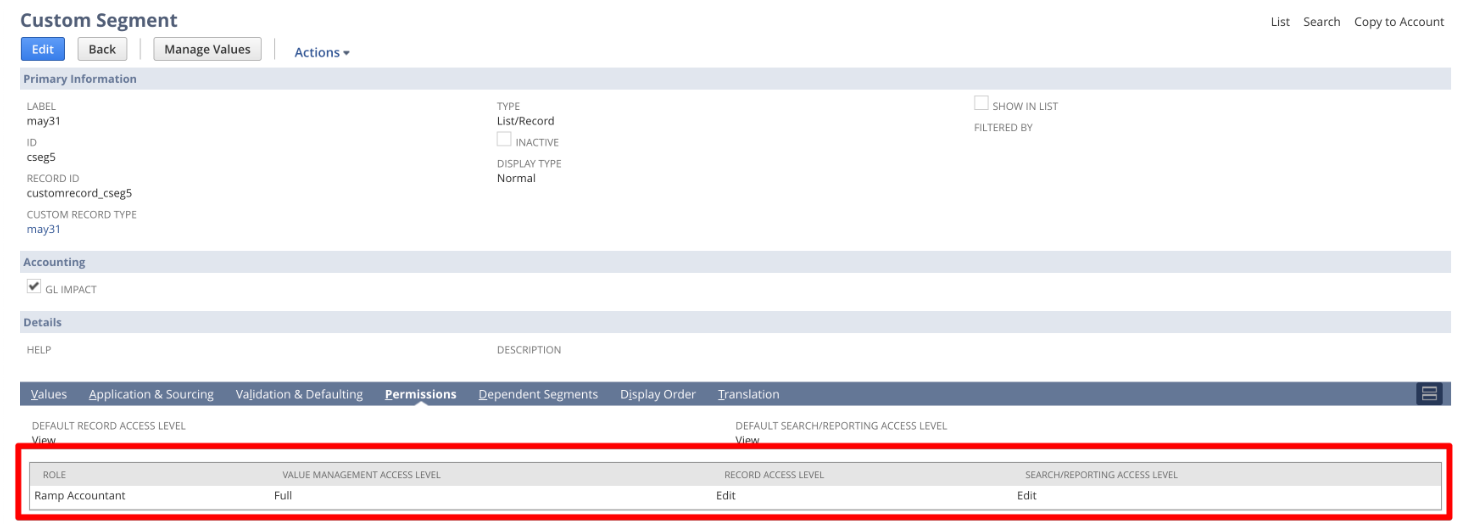
For each custom segment you want to view and code in Ramp, the segment must be viewable on the Credit Card, Bill, Bill Payment, or Purchase Order forms, and the following permissions set for the Ramp Accountant Role:
- Value Management Access: Full
- Record Access: Edit
- Search/Reporting Access: Edit.
To view custom segments, on NetSuite, go to Customization -> Lists, Records, & Fields -> Custom Segments. Then click edit next to the segment you'd like to view on Ramp and add the permissions in the Permissions tab laid out above (picture below).