Sage Intacct overview
Overview
Available on Ramp Plus. See Ramp Plus overview for plan details.
We have a direct integration with Sage Intacct that allows you to seamlessly integrate and push information from Ramp to Sage to keep an up-to-date and accurate account of spend. We also want you to have full control over what happens, so we don’t change any settings on your Sage instance or create accounts or vendors without your permission.
If you use multiple subsidiaries, we infer the appropriate subsidiary to sync to based on the location you set for the transaction. When we sync over transactions, we sync them as a credit card transaction. For reimbursements, we send them as bills and settle them with bill payments.
We’ve also built some additional features to make the integration more robust:
- Custom fields and UDD: We will pull in custom fields from your Sage Intacct configuration and any UDDs so you can code everything you need within Ramp.
- Receipt Attachment: The receipt within Ramp syncs as an attachment to your Sage instance. If an employee uploads a receipt after its transaction has been synced, we will automatically send it without you having to manually add it to your instance.
- Default vendor for reimbursements: When we sync reimbursements, we typically set the employee reimbursed as the vendor (and create one if there isn’t a user already). However, you can set a default vendor (e.g., Ramp Reimbursement Vendor) if you don’t want all your employees to be vendors on Intacct.
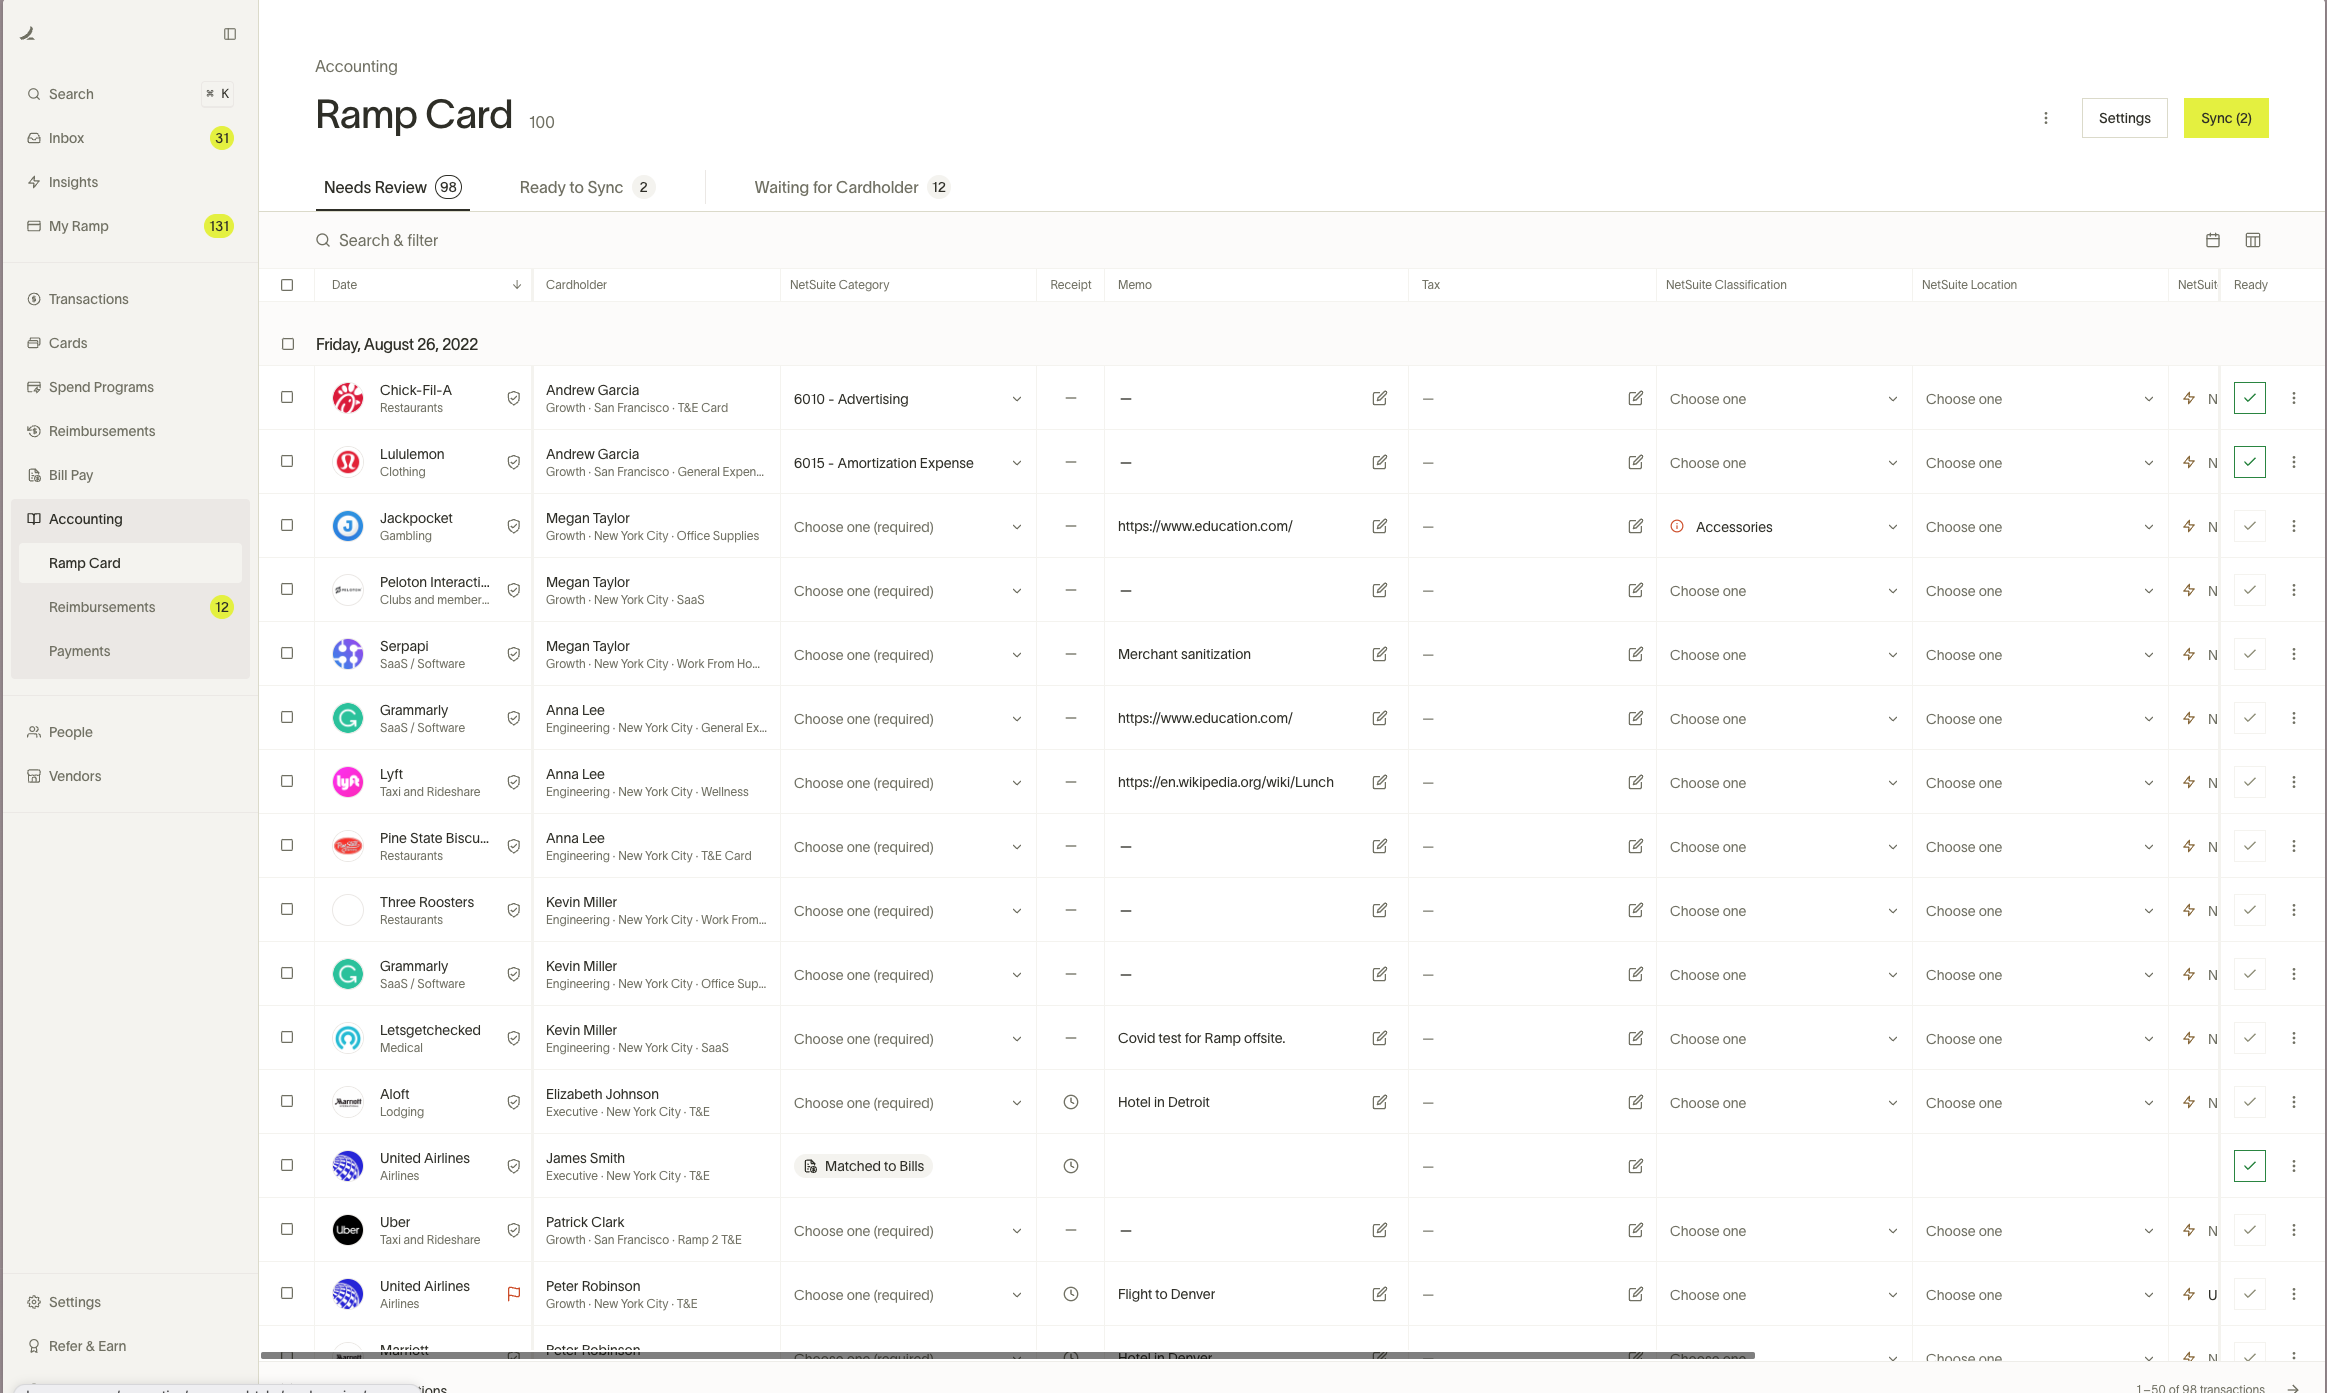
What it looks like
Below is what the Accounting screen will look like once you connect Sage Intacct. The dimensions shown depend on your configuration.
Set up
Please follow the instructions here to set up Sage Intacct.
Note: If you have a multi-currency account, you must create a credit card at each entity level(not at the top level).
Transactions
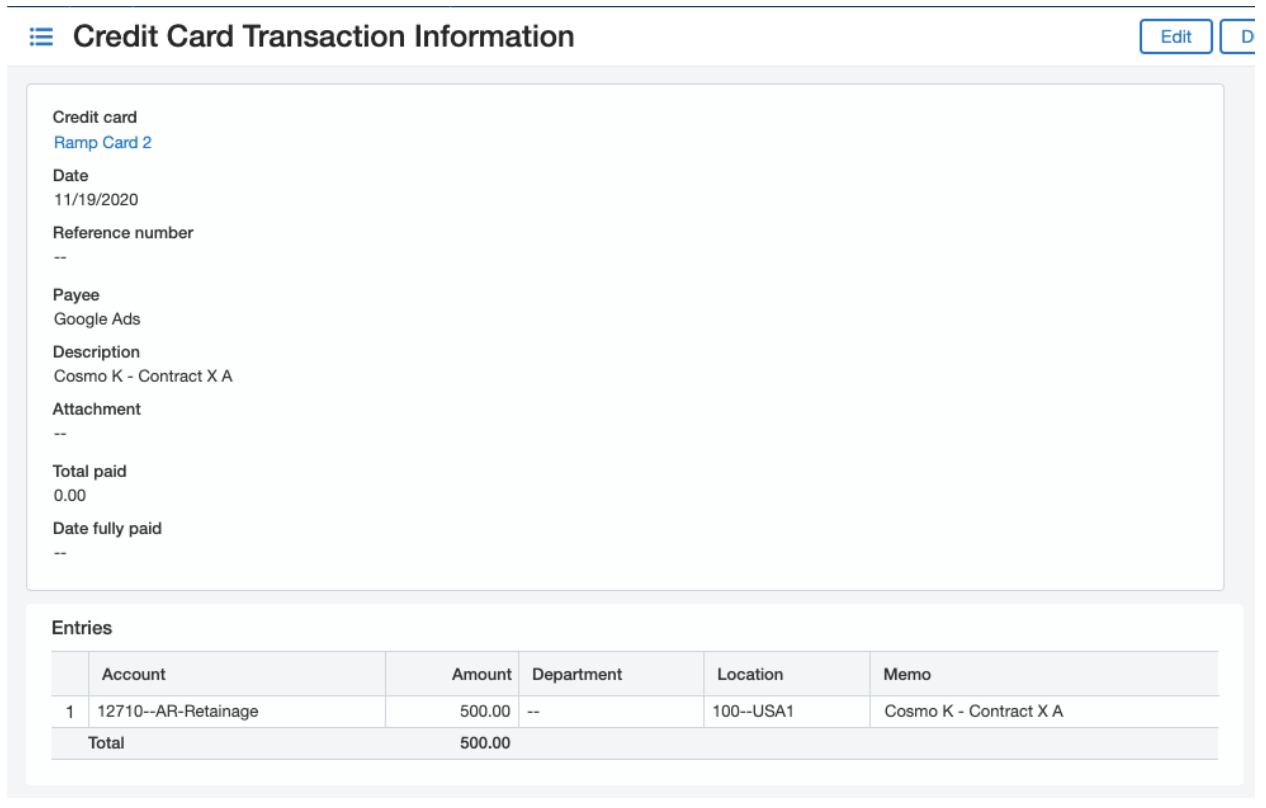
Ramp card transactions show up as card transactions on Sage. To see them, go to:
Cash management > credit card transactions.
Note: the receipt syncs under the Attachment line (no receipt for this transaction), and the memo will be “<cardholder first name last name> - memo."
Reconciliation / charge payoff
Once the Credit Card has been used, it must be paid to clear the expense. This requires creating a Charge Payoff, which results in an AP Bill. The bill must then be paid to clear the Bank and reduce all liability accounts. There are quite a few postings involved here, and it is wise to understand at what point different accounts are hit, what will hit the Cash and Accrual books, and when.
The amount for the credit card account will only appear on the Cash Book after the Bill is paid. If this is posted but not paid, it appears on the Accrual Book. Once this is paid, users will see the money reflected on the Cash Book
Please see below for an illustration of expected behavior through the process
- Credit card used and charge recorded
Accrual Book - Debit Expense A/C, Credit 'Credit Card Accrual'
Cash Book - No impact - Charge Payoff (move from credit card to AP)
Accrual Book - Debit Credit Card Accrual, Credit Accounts Payable
Cash Book - No impact - Pay Credit Card Vendor AP Bill
Accrual Book - Debit Accounts Payable, Credit Cash
Cash Book - Debit Expense, Credit Cash
Reimbursements
Reimbursements are created as bills on Sage, and a bill payment is created if it is paid through ACH via Ramp. The bill syncs over to the default AP Account (which currently cannot be changed on Ramp's side) on Sage.
- It will be marked as unpaid if you select I won't pay this with Ramp. When the payment has cleared, you then come back to Ramp and mark it as paid.
- If paid through ACH on Ramp, we also sync a Bill Payment that credits the cash account selected in Reimbursement settings.
For Bills, click the drop down menu at the top > Accounts Payable > Bills. The vendor is set as the reimbursed employee: “<employee first name last name email>” so you can quickly identify the Ramp reimbursements.
Once you click “view” next to one of the bills, you can see the information that was coded within Ramp (example below).
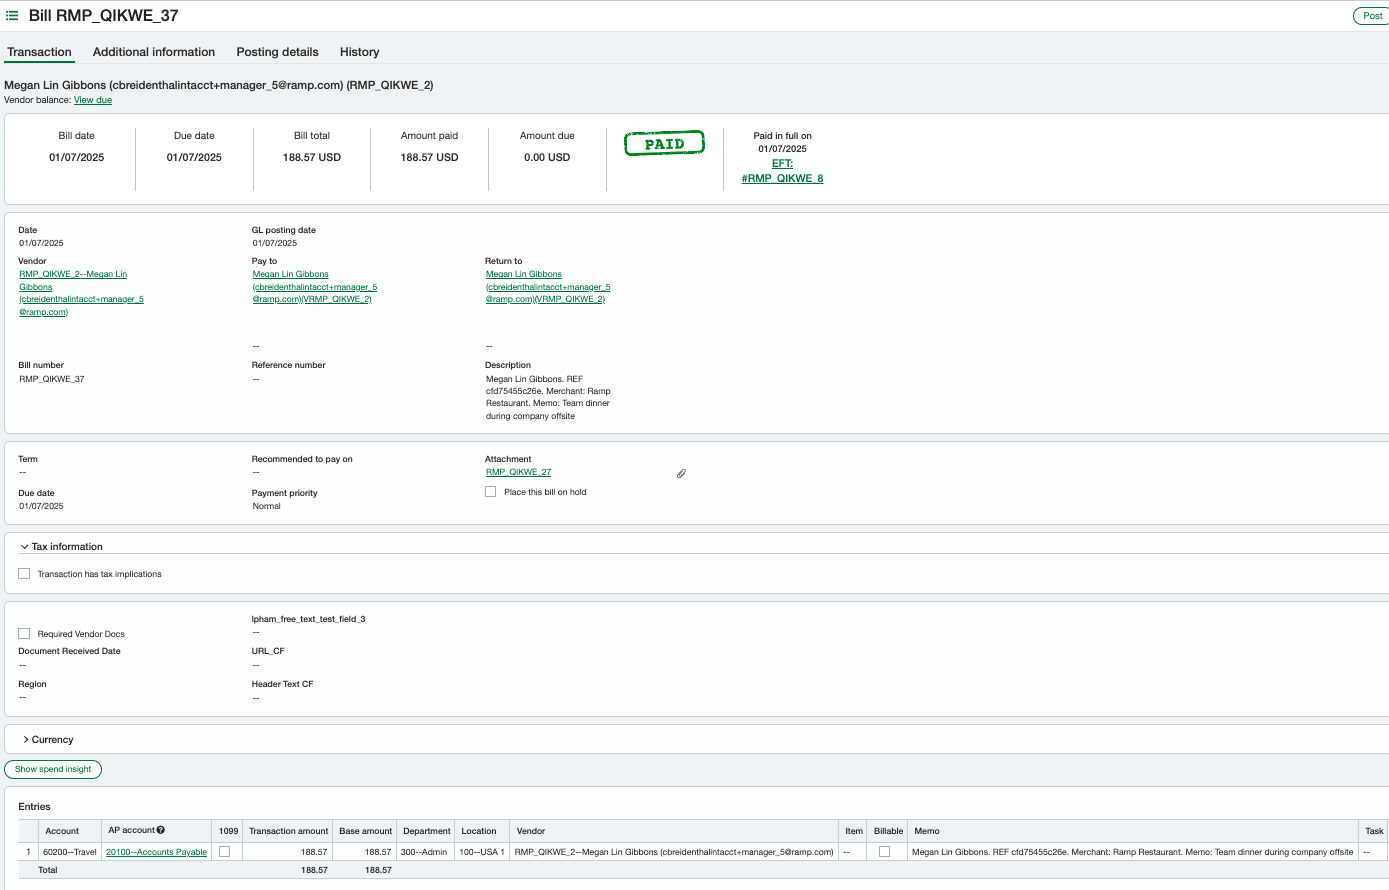
For bill payments, go to the default cash account selected in Ramp.
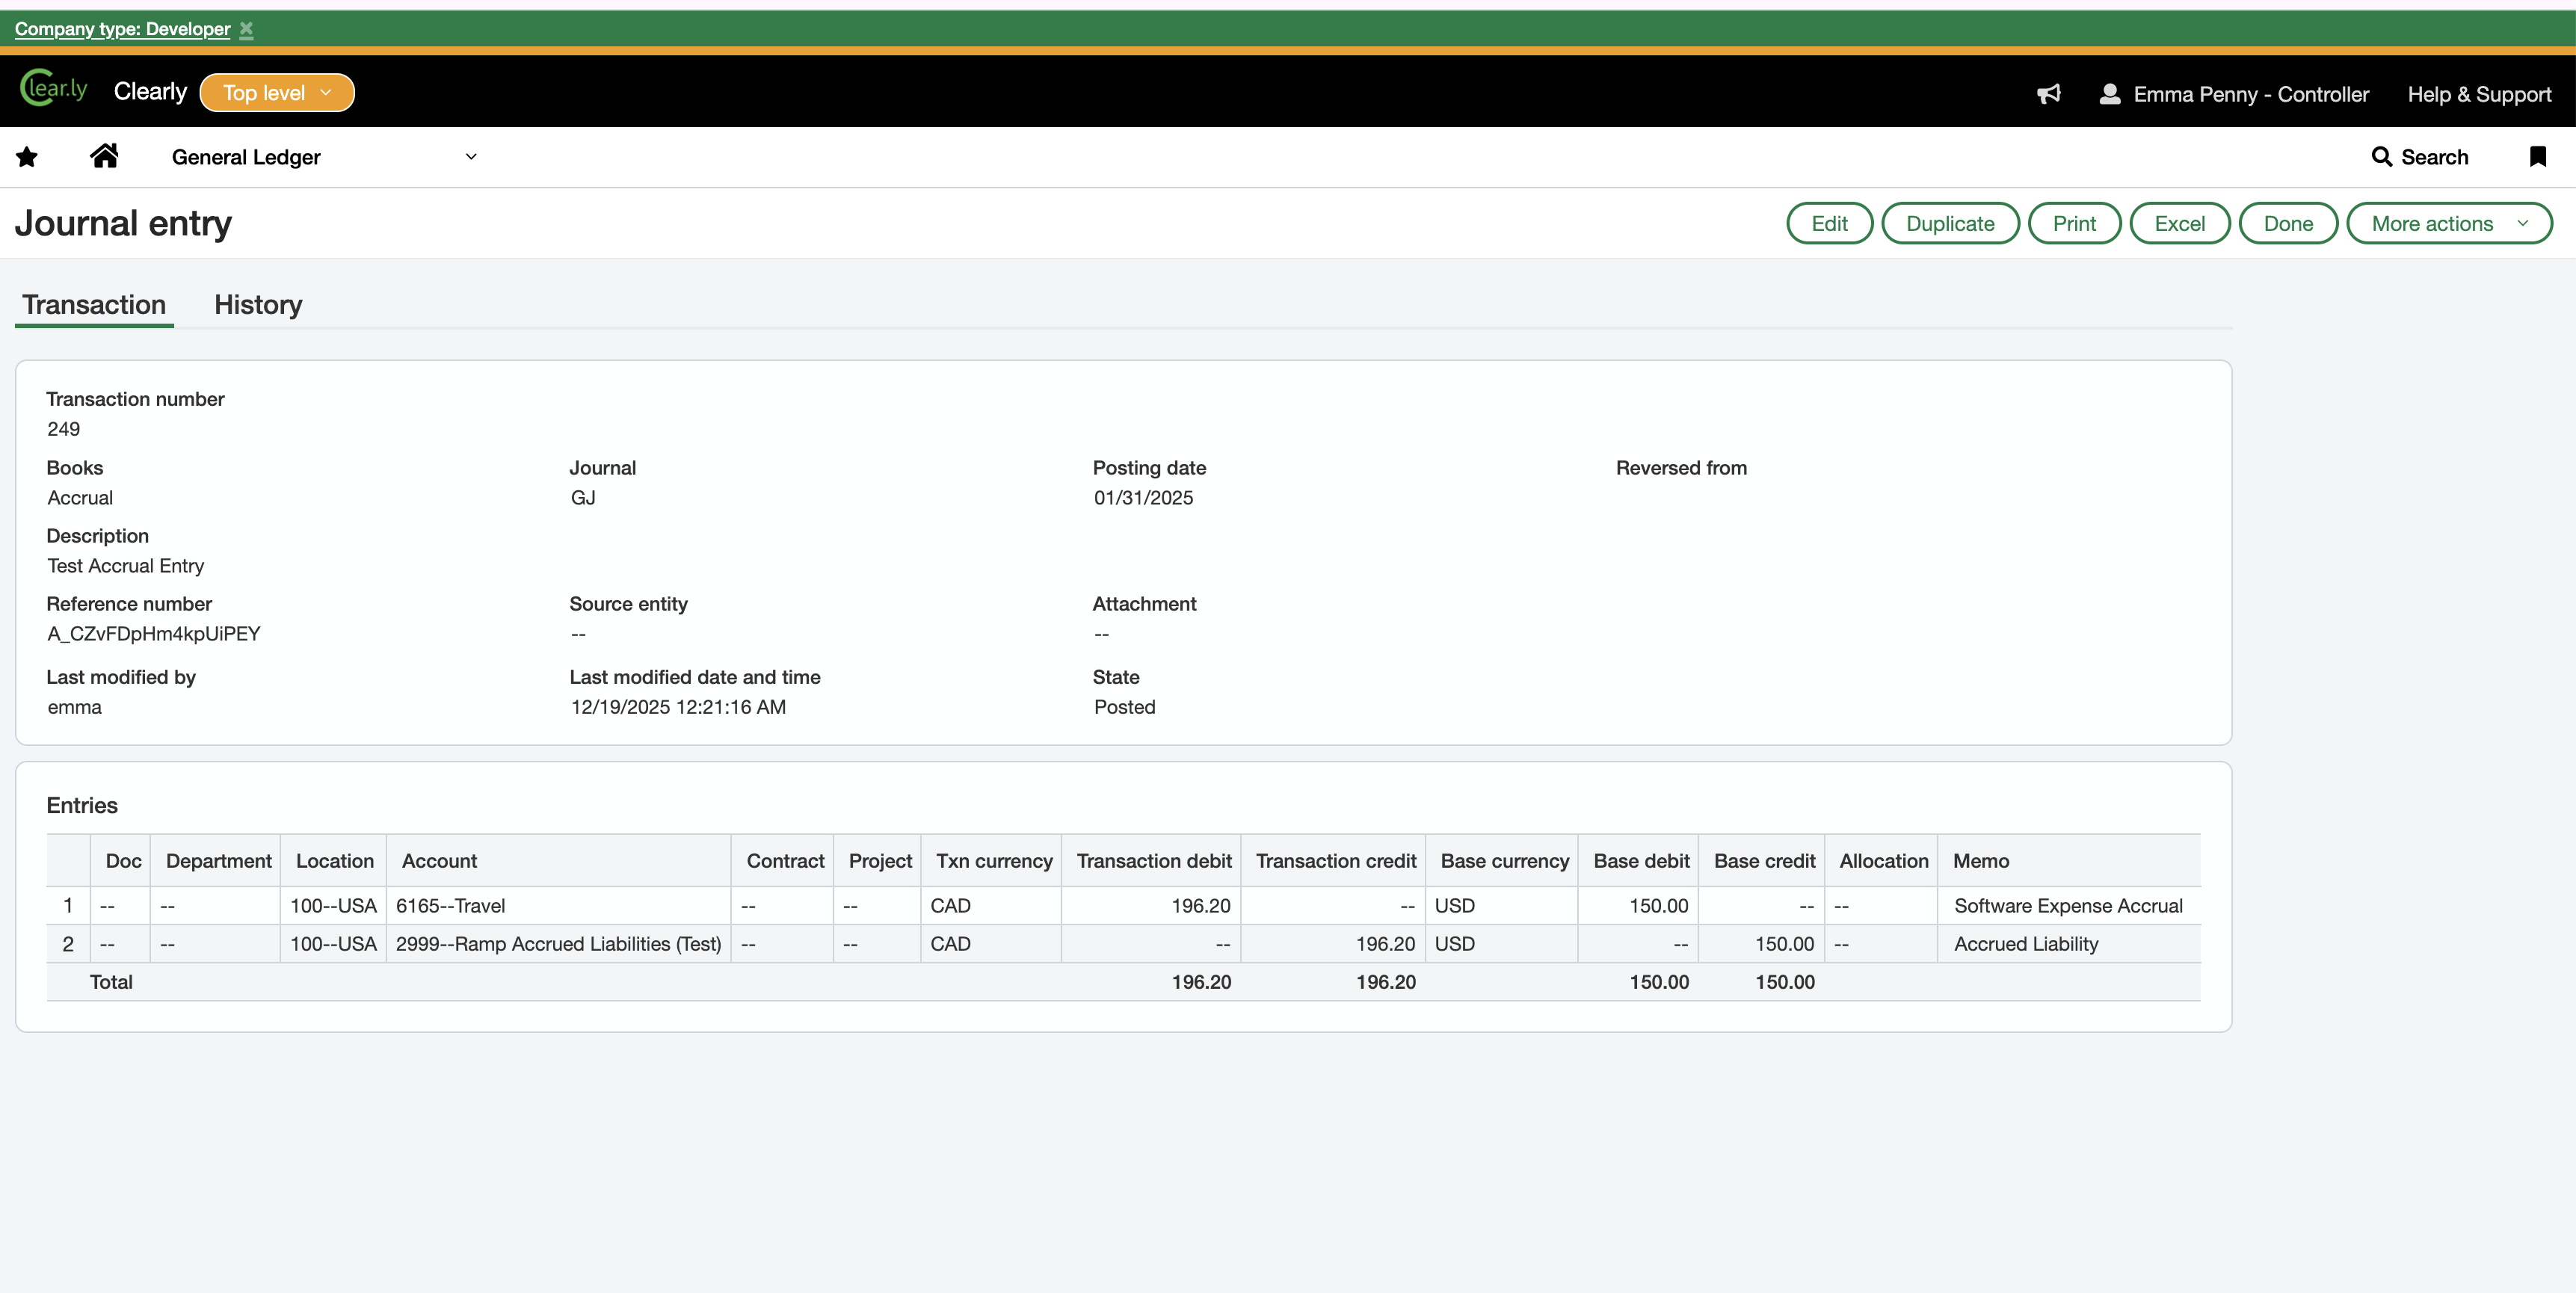
Accruals
Ramp supports syncing card transactions as accruals. Any accruals will be posted to Sage Intacct as a journal entry. For more information on this feature please review How to Use Ramp's Accruals Feature.
Accounting Logic:
- Create an accrual journal entry for all unsynced expenses dated in the chosen period.
- Post a reversing journal entry on the date you select (often the 1st of the next month).
- Let you choose detail level : one line per transaction or one line per GL group.
- Allow entity-level liability account settings.
- Prevent double counting : after you post an accrual, Ramp moves the accounting date of those transactions to the reversal date when you later sync them.
Bill Pay
Bill Pay is now available for Sage customers. For instructions on how to set up Bill Pay, please reference this article.
Accounting period handling
Ramp supports editable accounting periods on bills and respects Sage Intacct posting period rules. If a bill's accounting date falls within a closed accounting period, Ramp automatically updates it to the first day of the next open period before syncing; see Sync error: Accounting period closed for troubleshooting.
Custom fields and UDD’s
We will pull in any custom fields or UDDs you have within Sage so you can code everything you need within Ramp and take advantage of our automation.
Custom fields or UDDs can be single selectable values from either a custom list or a list of custom records, or they can be free-form text fields. We will pull any options for you to code, which can be used in automation, such as pre-coding cards and rules in Ramp.
Note: The word “restricted” is a reserved word for Sage so we cannot pull any field with that name.
Repayments
Ramp can sync employee repayments to Sage Intacct, including both bank account and debit card repayments. Bank account repayments sync as journal entries (GL Batch), while debit card repayments sync as Credit Card Transactions (refund type). For full details on setup, sync behavior, and troubleshooting, see Sync repayments to your accounting software.
Statement payments
Ramp does not sync statement payments (credit card balance payoffs) or cashback redemptions to Sage Intacct. You must record these manually.
For statement payments, use the Charge Payoff process described above to clear the credit card liability. For details on the accounting entries Sage Intacct creates at each step, see the Reconciliation / charge payoff section.
For cashback redemptions, record a journal entry in Sage Intacct that credits the cashback or rebate income account and debits the credit card liability account.
This limitation applies only to statement payments and cashback. Ramp does support syncing employee repayments to Sage Intacct.
Ramp Checking Account transfers
We sync Ramp Checking Account wallet transfers as journal entries in Sage Intacct.
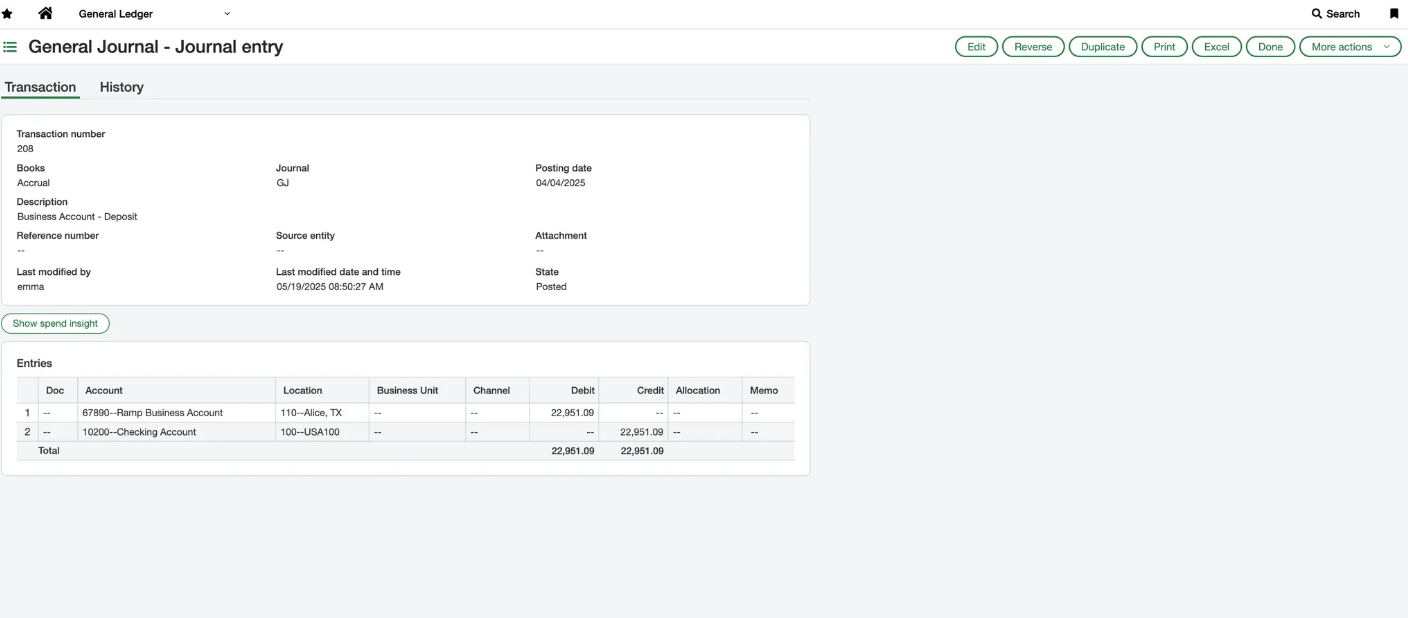
Accounting logic
- Deposits:
- Debit Ramp Checking Account
- Credit opposing account
- Withdraws:
- Debit opposing account
- Credit Ramp Checking Account
Managed investment account
Ramp syncs Managed Investment Account transfers and activities to Sage Intacct as journal entries. For details on supported activity types, account mappings, and expected journal entries, see Ramp Investment Account (Managed) Accounting.
Ramp Checking Account bank feeds
Please follow the setup instructions in this Help Center article.