Ramp Procurement Quick Start Guide
Get up and running in 15 minutes.
Note: This is a quick start overview of the full procurement workflow on Ramp. For detailed configuration instructions — intake forms, conditional questions, approval policies, and purchase order customization — see Getting started with Procurement.
Overview
Ramp Procurement lets you capture every purchase request in one place, automatically loop in the right approvers, and manage purchase orders — all on one platform. This guide walks you through the end-to-end procurement workflow so you can get set up quickly.
Here's how the process works at a high level:
- An employee submits a purchase request through a Spend Program.
- The request goes through your approval workflow.
- Once approved, Ramp creates a purchase order (PO).
- The vendor sends an invoice.
- You match the invoice to the PO in Bill Pay.
- You approve and pay the bill.
How it works
Use the table below as a quick reference for where key actions live in Ramp:
| To do this | Go here |
|---|---|
| Submit a procurement request that creates a PO after approval | Request and choose a Program |
| Create a new Spend Program | Manage spend → Programs → Create program |
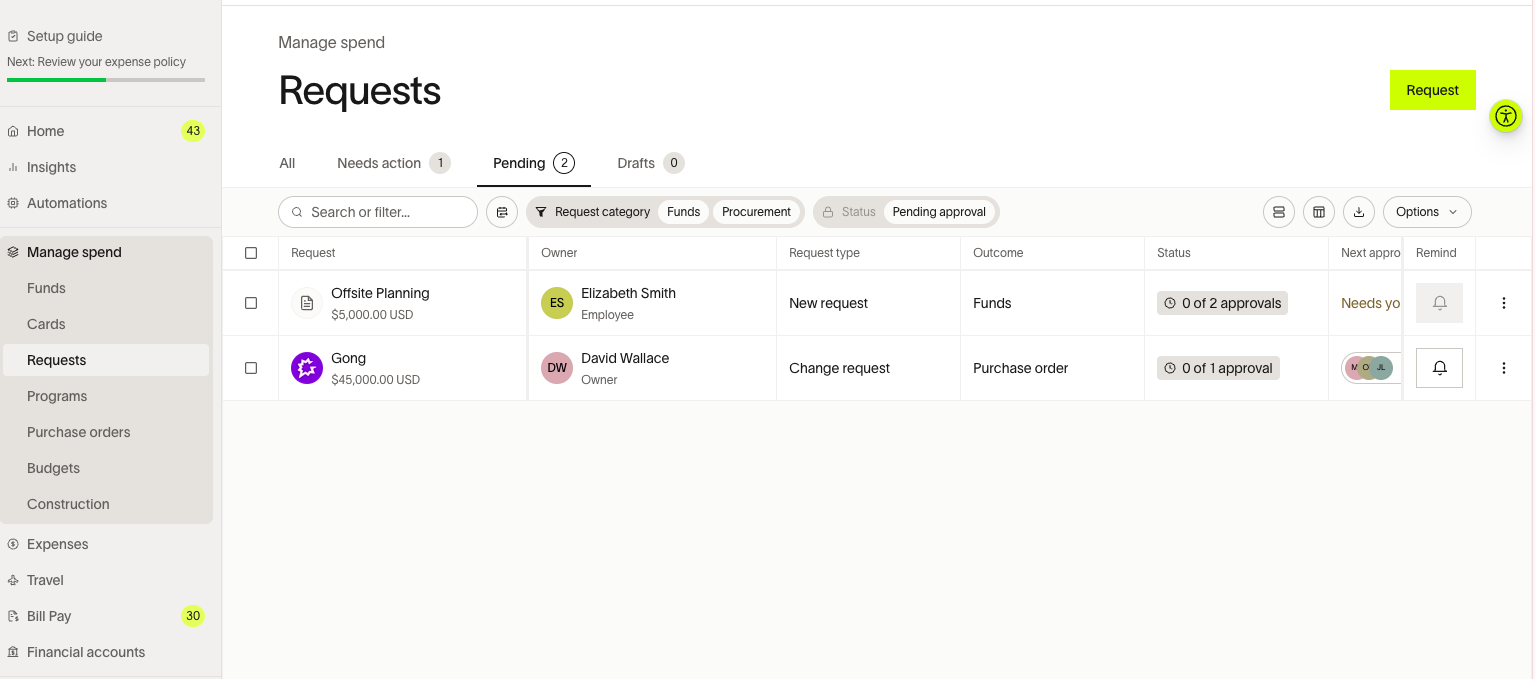
| See pending requests | Manage spend → Requests |
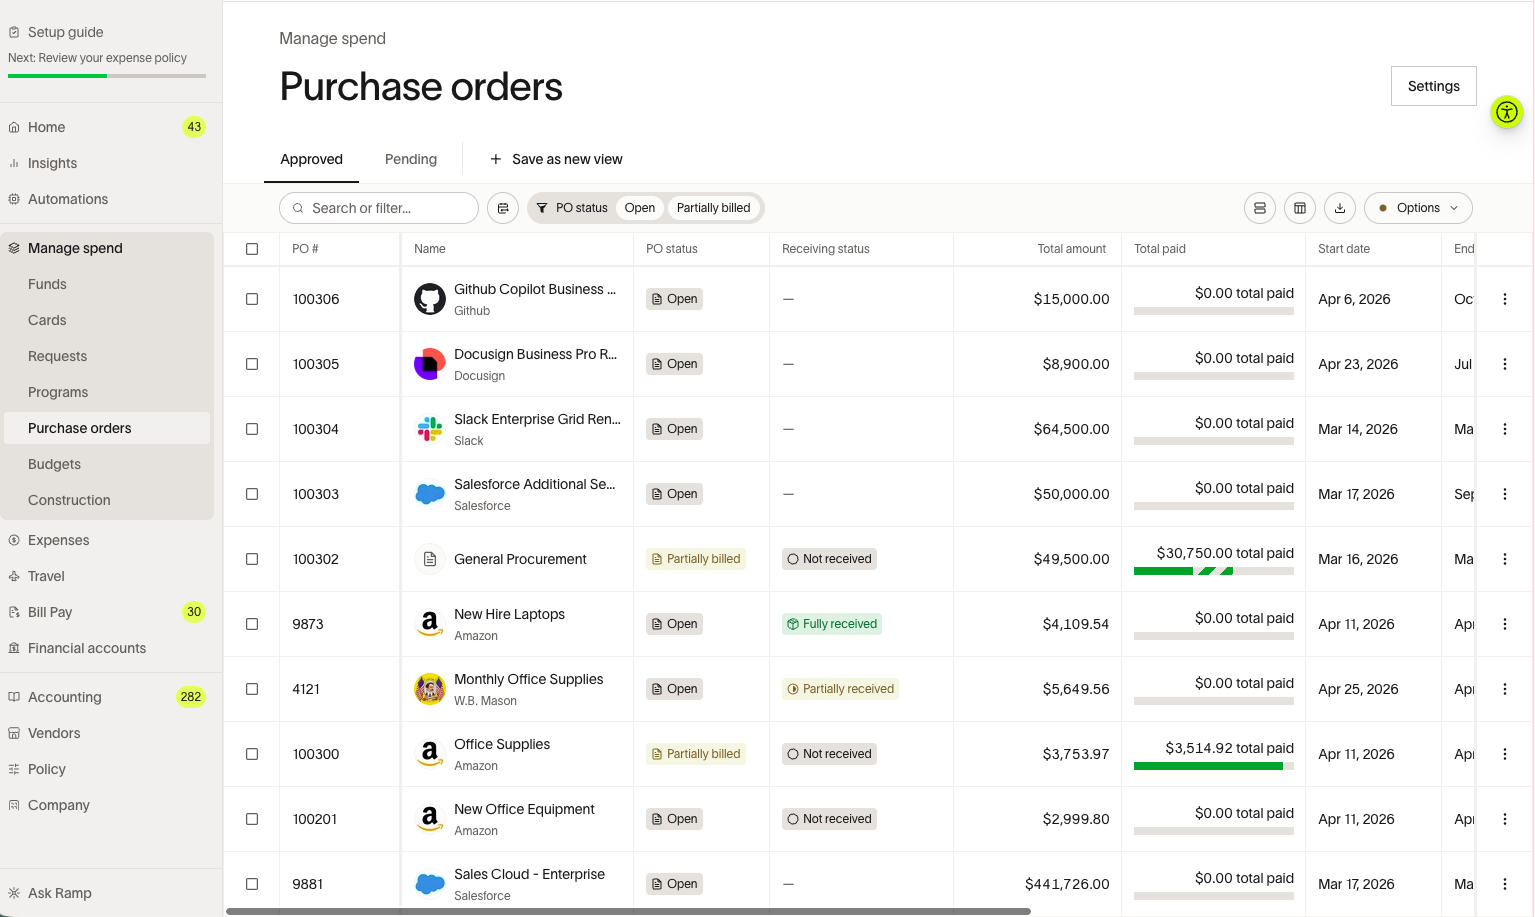
| See approved purchase orders | Manage spend → Purchase orders |
| Set up vendor onboarding | Vendors → Settings → Vendor requests |
| Create custom forms | Spend Programs → Programs → Manage automations → Manage workflow forms |
| Set up Bill Pay approvals | Bill Pay → Bills → Settings → Approvals |
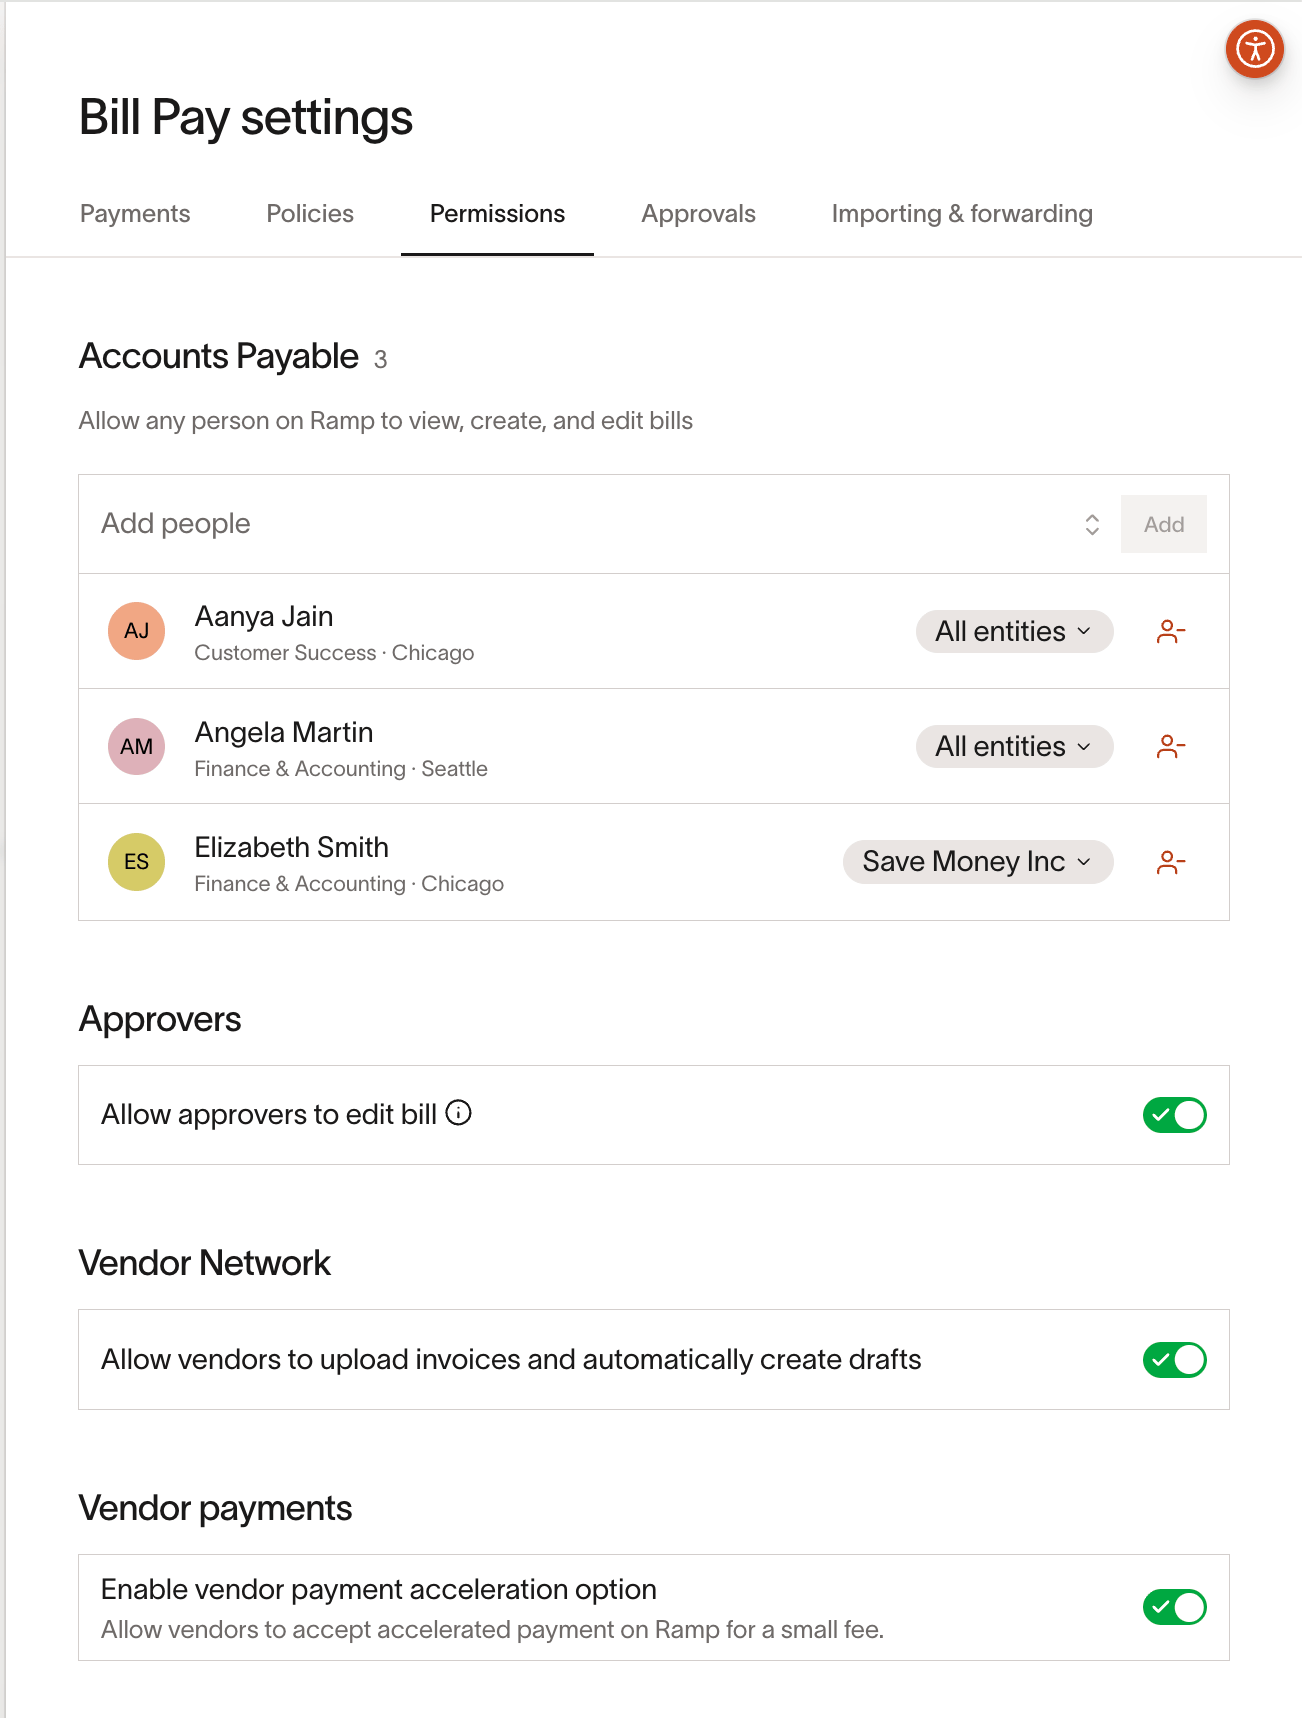
| Assign Accounts Payable roles | Bill Pay → Settings (3 dots) → Permissions |
Step 1: Create your first Spend Program
A Spend Program is a request form and approval workflow bundled together. When employees want to buy something, they pick the right program and fill out the form. Different programs can have different questions and different approvers.
- Go to Manage spend in the left sidebar.
- Click Programs.
- Click Create program (top right).
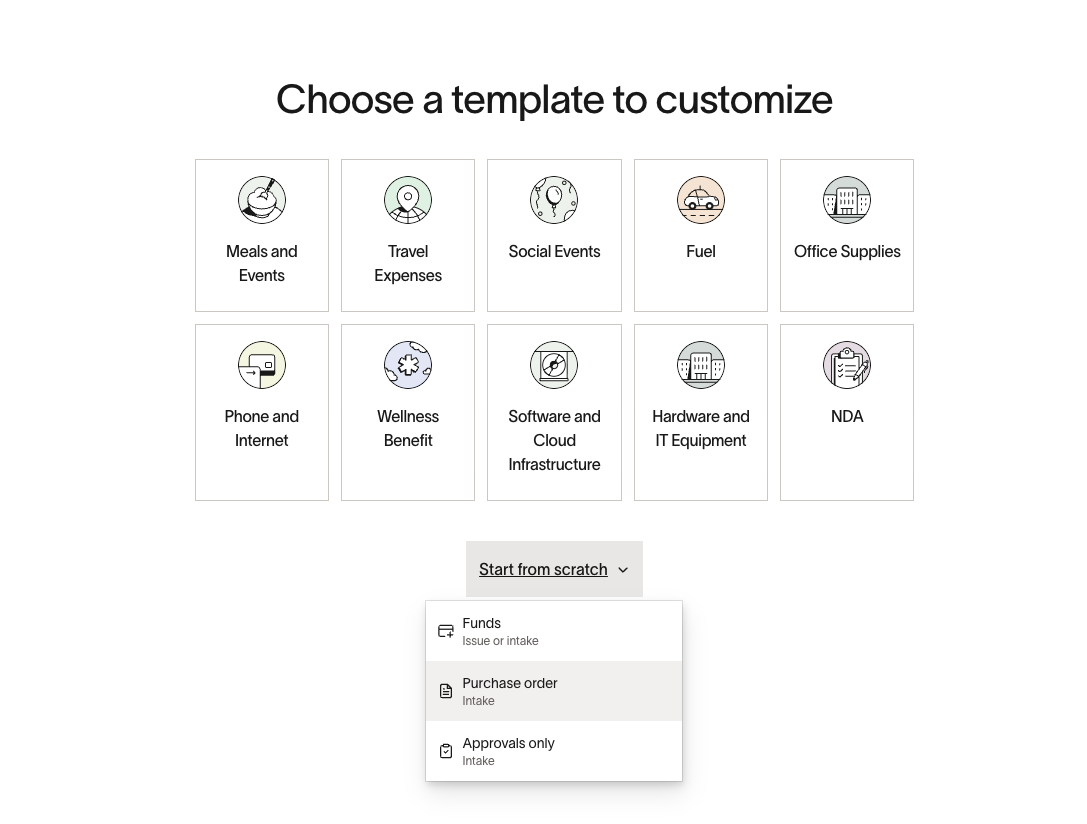
- Select Start from scratch (Purchase order or Approvals only) or select a template .
- Name your program (e.g., "Software purchase request").
- Add your intake questions.
- Set up your approval workflow.
- Click Publish .
Your employees can now submit requests through this program. For detailed configuration options — conditional questions, PO field mapping, line item coding, and custom approval policies — see Getting started with Procurement.
Step 2: Review and approve requests
When an employee submits a request, it appears in your Procurement requests tab and goes through your approval workflow. Once fully approved, Ramp automatically creates a purchase order.
To submit a new procurement request, use Request and choose a Program. The Purchase orders page is for reviewing POs after they are created, not for starting a new request.
- Go to Manage spend in the left sidebar.
- Click the Requests tab.
- Click any request to review it.
- Approve, reject, or request changes.
You'll also receive email notifications when requests need your approval. For more on submitting and managing requests, see How to submit procurement requests.
Step 3: Manage purchase orders
A purchase order (PO) is the official record of what you approved. It includes the vendor, amount, and line items. When invoices come in, you match them to the PO to confirm you're paying for what was approved.
- Go to Manage spend in the left sidebar.
- Click the Purchase Orders tab.
- Click any PO to see details, download it, or send it to your vendor.
You can sync purchase orders to your accounting system. For setup instructions, see Syncing Ramp purchase orders into accounting.
Step 4: Set up Bill Pay
When a vendor sends an invoice, you upload it to Bill Pay. Ramp's OCR reads the invoice and can auto-match it to the right PO. You review, approve, and pay — all in one place.
- Go to Bill Pay in the left sidebar.
- Click the 3 dots (top right), then Settings .
- Set up your payment accounts under Payments .
- Add Accounts Payable under Permissions . For details on this role, see Accounts Payable on Ramp .
- Set up approval workflows by going to Approvals .
For detailed setup instructions, see Bill Pay setup. To configure approval workflows, see Bill Pay approvals.
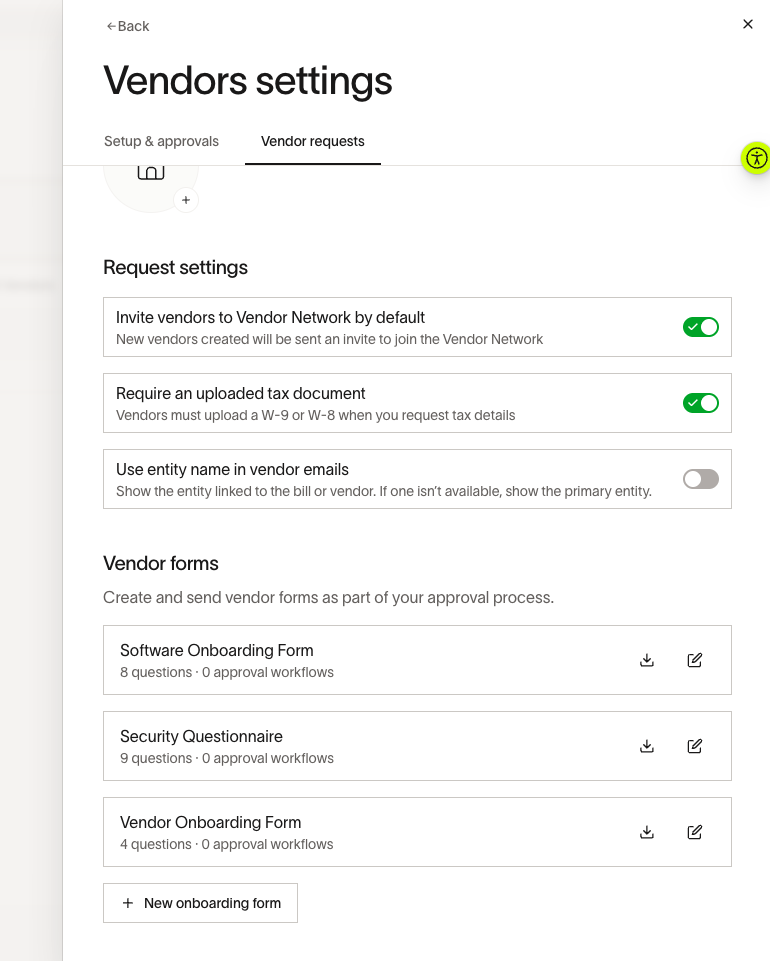
Step 5 (optional): set up vendor onboarding
When employees request spend with a new vendor, you can automatically send that vendor a form to collect payment details, W-9, and other information — before you approve the request.
- Go to Vendors → Settings .
- Under Vendor requests → Vendor forms , create a custom form or use the defaults.
- To import existing vendors, under Setup & approvals use Import vendors with CSV to upload a CSV or enable syncing from your ERP.
- In your Spend Program's approval workflow, add a Vendor onboarding step.
For more on vendor management, see Vendor management on Ramp. To import vendors from your ERP, see Import ERP vendors into Ramp. To learn about the onboarding workflow, see Vendor onboarding in Procurement.
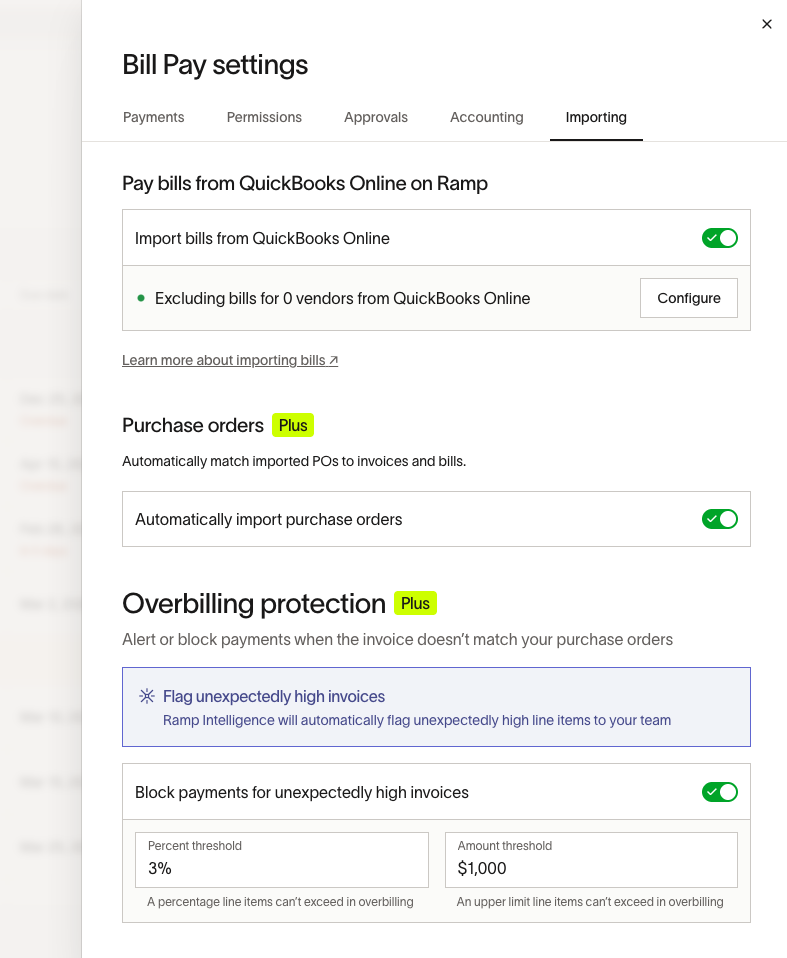
Step 6 (optional): set up PO matching
PO matching helps you verify that invoices align with what was approved. There are two types:
- 2-way match: The invoice matches the PO (amount and vendor). This works well for software and services.
- 3-way match: The invoice matches the PO and you've confirmed goods were received. Use this for physical goods.
If you use NetSuite, Sage Intacct, or QuickBooks, you can import POs from your ERP and match invoices to them in Ramp.
- Go to Bill Pay → Settings (3 dots) → Importing tab.
- Toggle on Automatically import purchase orders .
- For 3-way match, enable it in your Spend Program's procurement controls.
For detailed instructions, see Importing and matching POs. For 3-way matching setup, see 3-way match with Ramp Procurement. For overbilling controls, see Overbilling protection.
Role-based functionality
The procurement workflow involves several roles. Here's what each role can do:
For Admins
Admins create and manage Spend Programs, set up approval workflows, configure Bill Pay settings, and assign Accounts Payable roles. Admins can also skip approvals and issue a PO directly, as long as they aren't on the approval chain.
For Employees
Employees submit purchase requests through the Spend Programs you've published. They select a program, fill out the intake form, and track their request status in the Manage spend tab. After a request is approved, employees can submit change orders if something needs to change. For details, see Change orders.
For Accounts Payable
Accounts Payable roles upload and manage invoices in Bill Pay, match invoices to purchase orders, and process payments. To assign Accounts Payable roles, go to Bill Pay → Settings (3 dots) → Permissions. For more on this role, see Accounts Payable on Ramp.
For a full overview of roles and permissions, see User roles overview.
Use cases and examples
One program for all purchases
If your procurement needs are straightforward, create a single "General purchase request" program. Use conditional questions to tailor the form based on spend type — for example, only show software-specific questions when the requester selects "Software" as the category.
Separate programs by spend type
For more control, create separate programs for different categories — for example, "Software," "Hardware," and "Professional services." Each program can have its own intake questions, approval chain, and payment method. This is the most common approach for teams that want category-specific approvals (e.g., routing all software requests through IT).
Programs by department
If different departments have different approval requirements, create department-specific programs. Use the visibility settings to restrict each program to the relevant team — for example, only Engineering employees see the "Engineering purchases" program.
Best practices and tips
- Decide on your program structure early. Consider whether you need one program for all purchases or separate programs for different spend types. Separate programs let you tailor questions and approvals, while a single program with conditional questions is simpler to manage.
- Use conditional questions to keep intake forms short. Instead of asking every question to every employee, show questions based on previous answers — for example, only ask about data security requirements if the vendor handles sensitive information.
- Set up vendor onboarding before going live. Collecting W-9s and payment details automatically saves your team time and ensures compliance from the start.
- Enable PO matching if you receive invoices. 2-way matching works for most services and software. Enable 3-way matching for physical goods where you need delivery confirmation.
- Configure Bill Pay approvals separately. Purchase request approvals and invoice payment approvals are two different workflows. Make sure both are configured so invoices don't get stuck waiting for approval.
- Start simple and iterate. You can always add more programs, questions, and approval steps later. Launch with the minimum setup that covers your most common purchase types.
Frequently asked questions
What's the difference between a purchase order and a virtual card?
A purchase order requires the vendor to send invoices, which go through a separate set of approvals in Bill Pay. This works well for larger purchases or spend that your AP/finance team needs to review. A virtual card issues a card for the approved amount — once approved, the requester can use it immediately. This is typically better for smaller purchases where you trust the requester and don't need invoice-level review. For more details on configuring payment methods, see Getting started with Procurement.
Can employees edit a request after submitting it?
Before approval, requests can be edited by the request owner, approvers, Accounts Payable and Admin roles. After approval, employees can submit change orders. You can set up a separate approval policy for change orders. See Change orders for details.
Can I import vendors from my existing system?
Yes. You can import vendors via CSV or sync them from your ERP if you have an active integration. Go to Vendors → Settings → Import vendors with CSV to get started. See Import ERP vendors into Ramp for instructions.
Do purchase orders sync to my accounting system?
Yes, they can. Ramp supports PO syncing with NetSuite, Sage Intacct, and QuickBooks. See Syncing Ramp purchase orders into accounting for setup instructions.
Where can I get help with complex setups?
For implementations involving legal reviews, contract management (DocuSign, Ironclad), or multi-entity configurations, reach out to your Ramp CSM or contact Ramp Support.