Workday integration: Set up HRIS
Overview
Available on Ramp Plus. See Ramp Plus overview for plan details.
For an overview of our HRIS integration, please reference this article. For set up instructions regarding Workday, continue below.
To set up the integration between Ramp and Workday, navigate to:
- Navigate to the Company tab
- Click on Integrations
- Select User Management
- Choose Workday
Note: Before linking Workday, please ensure the correct permissions are enabled. Since Workday permissions are configured at the field level, we'll need access to several fields to get everything set up. Below you will find steps to grant the necessary permissions.\
Workday configuration
Step one: Create an integration system user (ISU)
You'll need to create an Integration System User in Workday:
-
In your Workday portal, sign in to the Workday tenant
-
In the Search field, type Create Integration System User
-
Select the Create Integration System User task

-
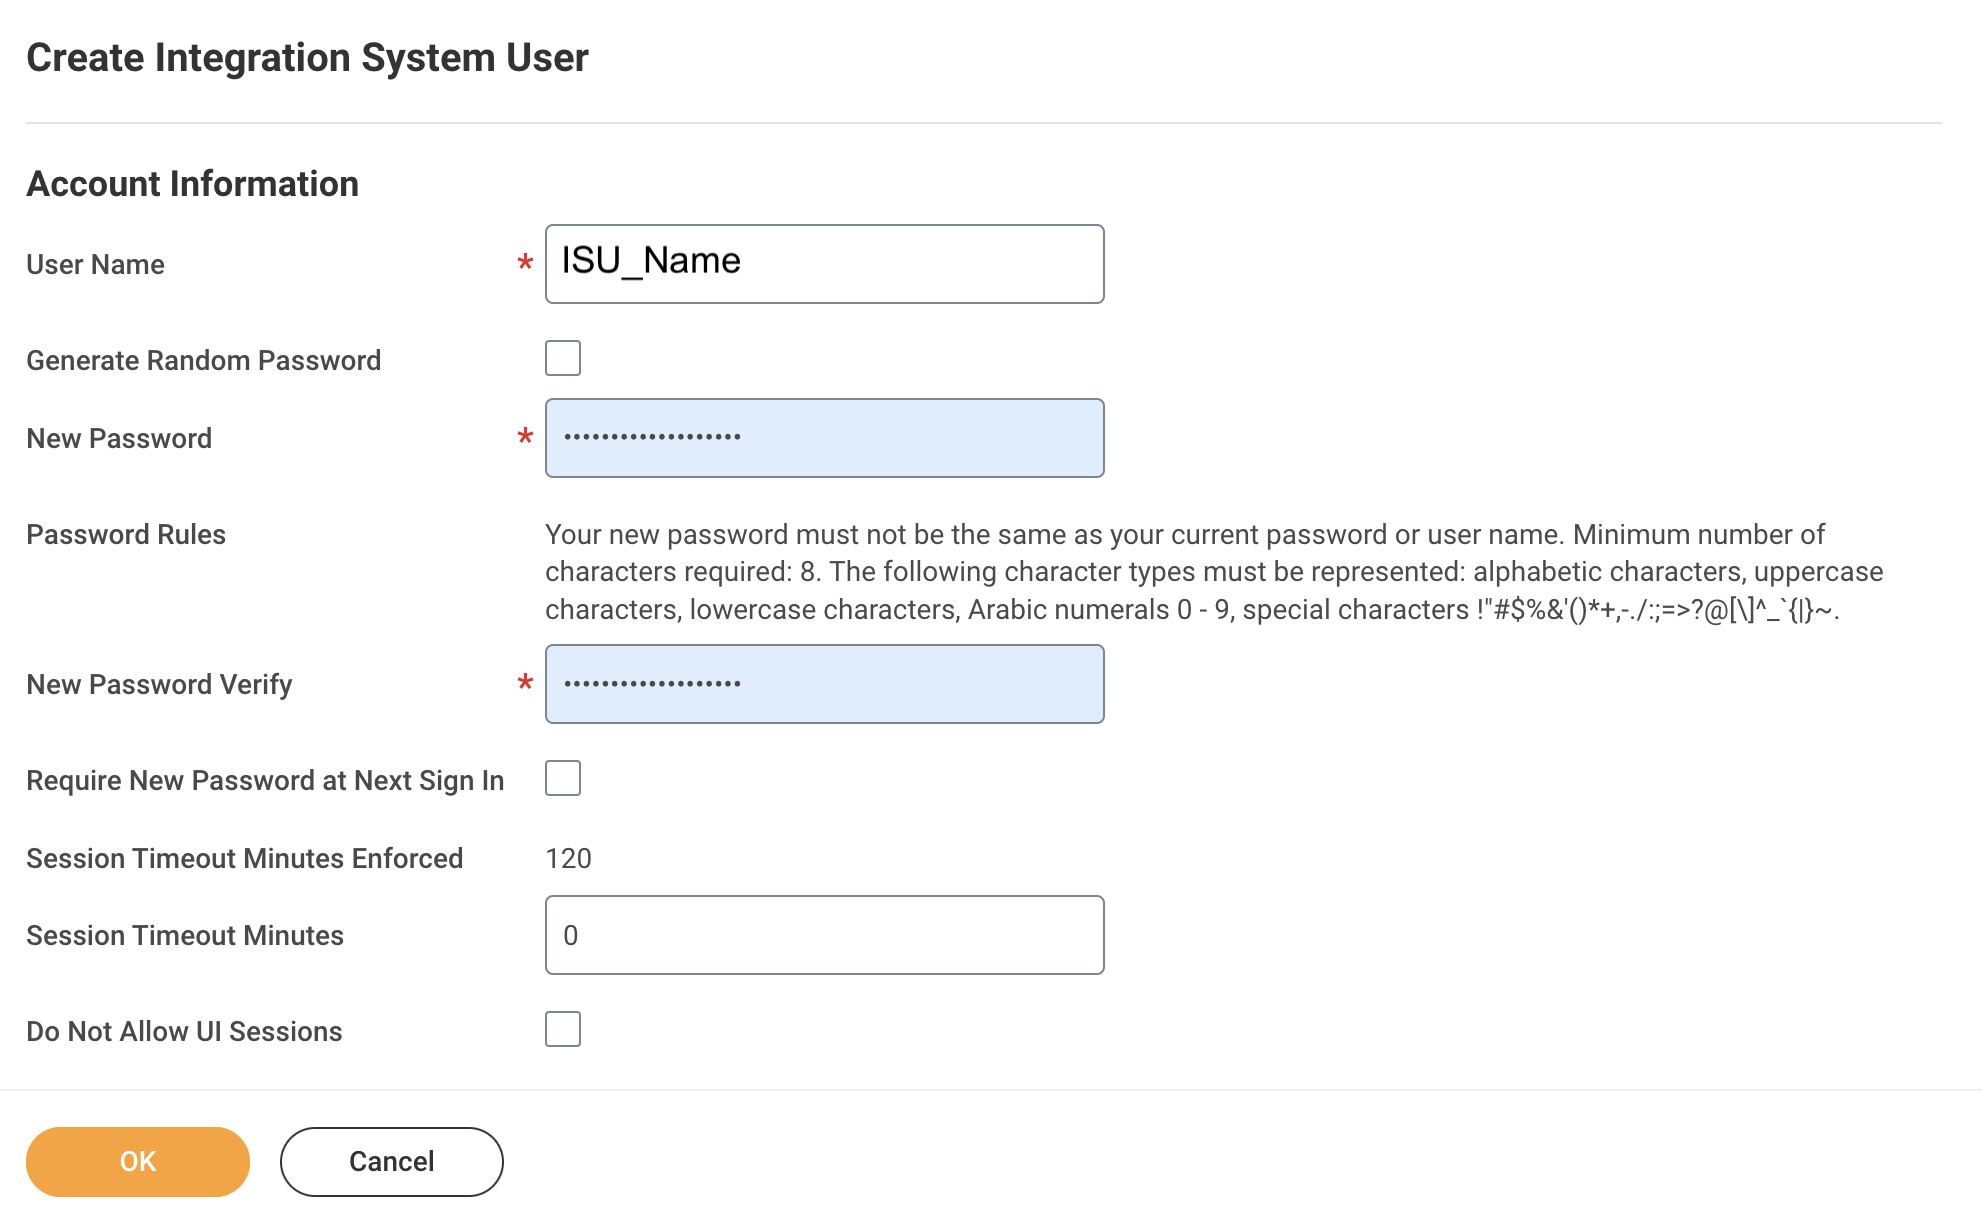
On the Create Integration System User page, in the Account Information section, enter a user name, and enter and confirm a password.
-
Click OK Note:
- Ensure Require New Password at Next Sign **In is NOT checked.
- You'll want to add this user to the System Users list to ensure the password doesn't expire.
Step two: Create a security group and assign an integration system user
Now, add the Integration System User to a Security Group:
-
In the Search field, type Create Security Group.

-
Select the Create Security Group task.
-
Click OK.
-
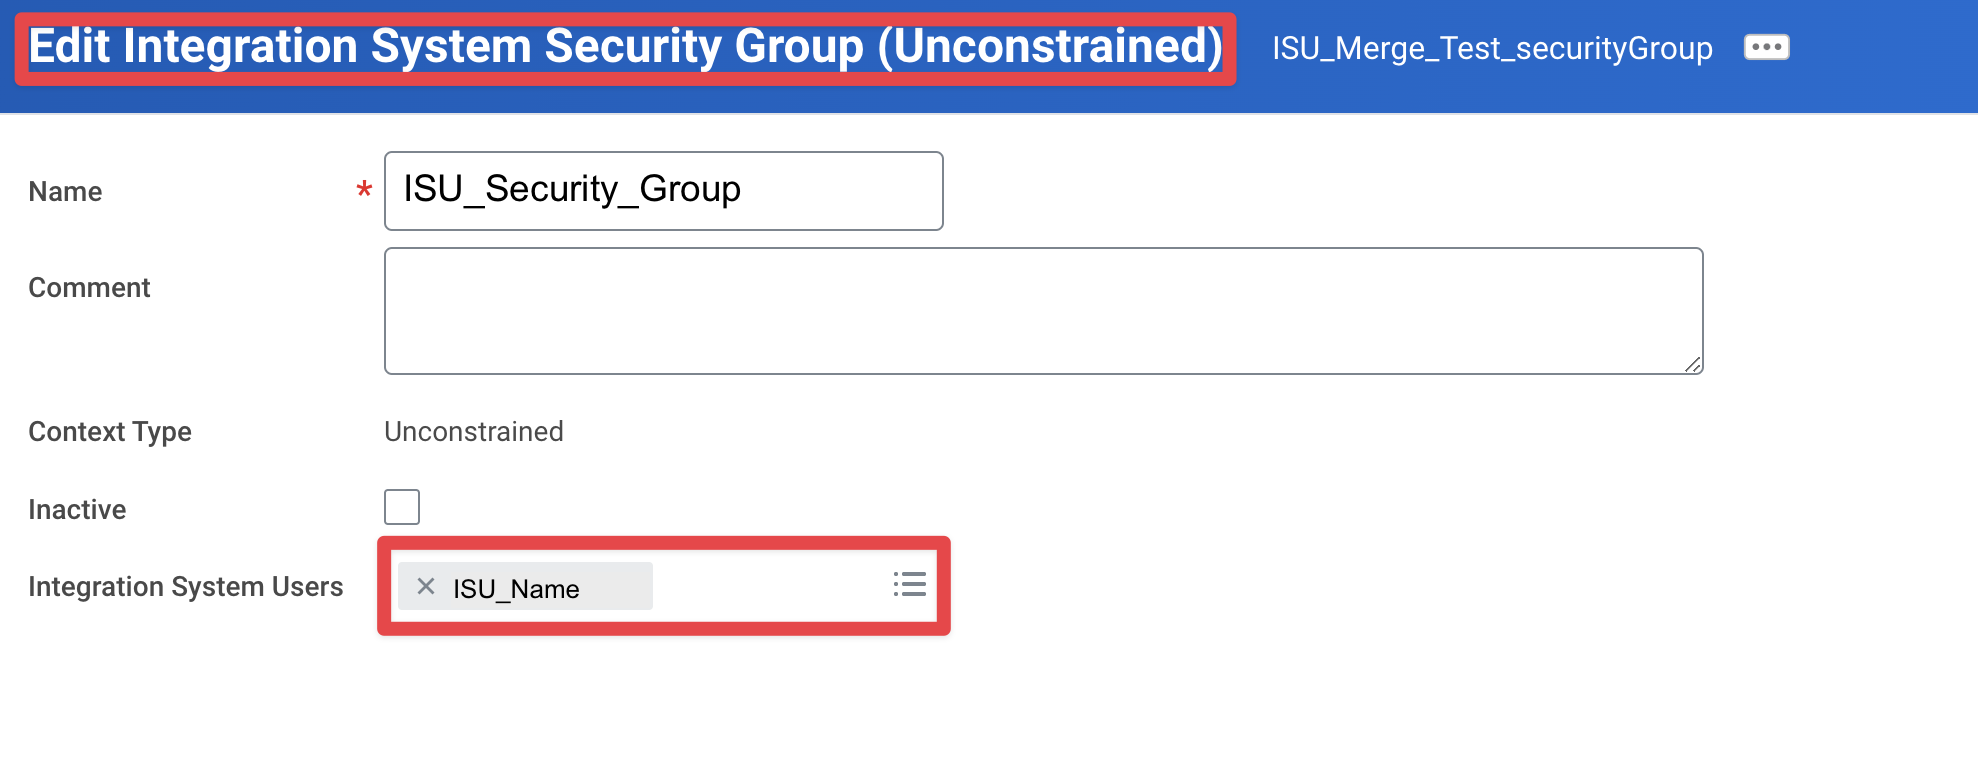
On the Create Security Group page, from the Type of Tenanted Security Group pull-down menu, select Integration System Security Group (Unconstrained).
-
In the Name field, enter a name.
-
Click OK.
-
On the Edit Integration System Security Group (Unconstrained) page, in the Integration System Users field, enter the exact name you entered when creating the ISU in the first section.
Step Three: Configure domain security policy permissions
-
In the Search field, type Maintain Permissions for Security Group.

-
Ensure the Operation is Maintain and the Source Security Groupis the same as the security group assigned in Step 2.

-
Add the corresponding Domain Security Policywith GET operation. Required Domains: Worker Data: Public Worker Reports(minimum required) Person Data: Work Contact Information Worker Data: Current Staffing Information Worker Data: Organization Information Worker Data: Workers Worker Data: All Positions
Step Four: Activate security policy changes
-
In the search bar, type "Activate Pending Security Policy Changes" to view a summary of the security policy changes that need approval.

-
Add any relevant comments on the window that pops up
-
Confirm the changes to accept them.

Step Five: Validate authentication policy is sufficient
Check the Manage Authentication Policies section to ensure the ISU you created is added to a policy that can access the necessary domains. It shouldnotbe restricted to only the "SAML" Allowed Authentication Types – if this is the case, you can create a new Authentication Policy with a "User Name Password" Allowed Authentication Type.
-
Editing Authentication Policies

-
Create an Authentication Rule, and add the Security Group to the Rule.

-
Make sure the Allowed Authentication Types is set to a specific User Name Password or set to Any.

Step Six: Activate all pending authentication policy changes
-
In the search bar type, Activate All Pending Authentication Policy Changes.

-
Proceed to the next screen, and confirm the changes. This will save the Authentication Policy that was just created.

Step Seven: Obtain the web services endpoint for Workday tenant
We'll need access to your specific Workday web services endpoint:
-
Search in Workday for Public Web Services.

-
Open Public Web Services Report.
-
Hover over Human Resources and click the three dots to access the menu.
-
Click Web Services > View WSDL.
-
Navigate to the bottom of the page that opens and you'll find the host.
-
Copy everything until you see /service. This should look something like https://wd5-services1.myworkday.com/ccx.

Step Eight: Enter credentials into Ramp
Return to Ramp and enter your Workday credentials into the popup window for the integration setup.
-
Workday URL: Enter the Web Services Endpoint you found from Step 5.

-
User ID: Enter theIntegration System User name for the user created in Step One.
-
Password: Enter the Integration System User password for the user created in Step One.
-
Workday Tenant Name: Enter your Workday Tenant name. Example: If you sign in at "https://wd5-services1.workday.com/acme", enter "acme".