Internal Invoice: Send an invoice on Vendor Network
Overview
Vendors can send an invoice to a connected Ramp Bill Pay customer directly from their Vendor Portal account over Vendor Network. Sending an invoice on Ramp eliminates the extra steps of sending an invoice externally, and importing it from outside Ramp. The sent invoice automatically generates a new draft bill with a ‘Vendor Network’ label for the customer to review and process, and vendors can track progress in their Vendor Portal account.
Note: Some customers may choose todisable vendor-initiated invoicing. In such cases, you will not be able to send them an invoice via Ramp, even if they are connected to your Vendor Profile.
How it works
Invoices can be created in your Vendor Portal in two ways:
- Import a pdf invoice generated by an external invoicing solution
- Create a new invoice on Vendor Portal
You can then select from your existing customer list and send your invoice via the Ramp Vendor Network directly to your customer on Ramp. Once an invoice has been sent, it cannot be canceled or deleted, your customer will need to reject it.
*Note:*Customers can disable invoicing from vendors over the Vendor Network. You won't be able to select customers who have disabled invoicing on their end.
What does my customer see?
Once your invoice is sent, your customer will see a new draft bill with a ‘Vendor Network’ label, that they will be able to process normally as they would any draft bill. Any customer who has the permissions to edit and process draft bills on Ramp will be able to process your invoice.
If a customer deletes the draft bill or archives the bill after it was approved, your invoice will show a ‘Rejected’ status in Vendor Portal. They can add an optional rejection reason that you're able to see, otherwise please contact your customer to understand why it was rejected.
Importing a .pdf invoice
Step 1
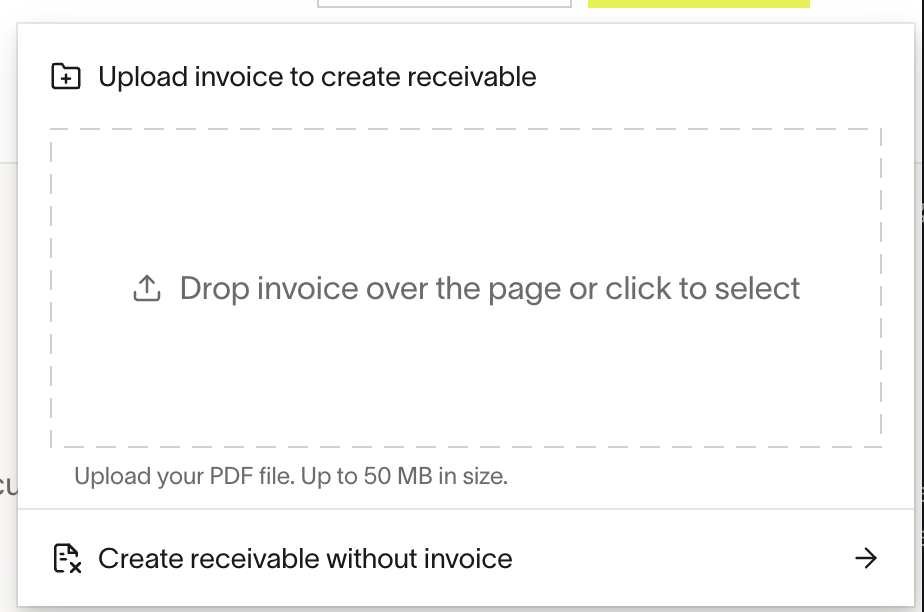
To send an invoice on Vendor Portal click ‘New invoice’ on the top right corner of the ‘Receivables’ table.
Step 2
To import an existing .pdf invoice, drag and drop a .pdf file into the prompt, or click the dotted line to select and upload a .pdf file.
Step 3
Once the import is complete, click on the new draft invoice in the ‘Draft’ section of your ‘Receivables’ table.
In the ‘Create invoice’ flow, select the linked Bill Pay customer that you would like to send your invoice to.
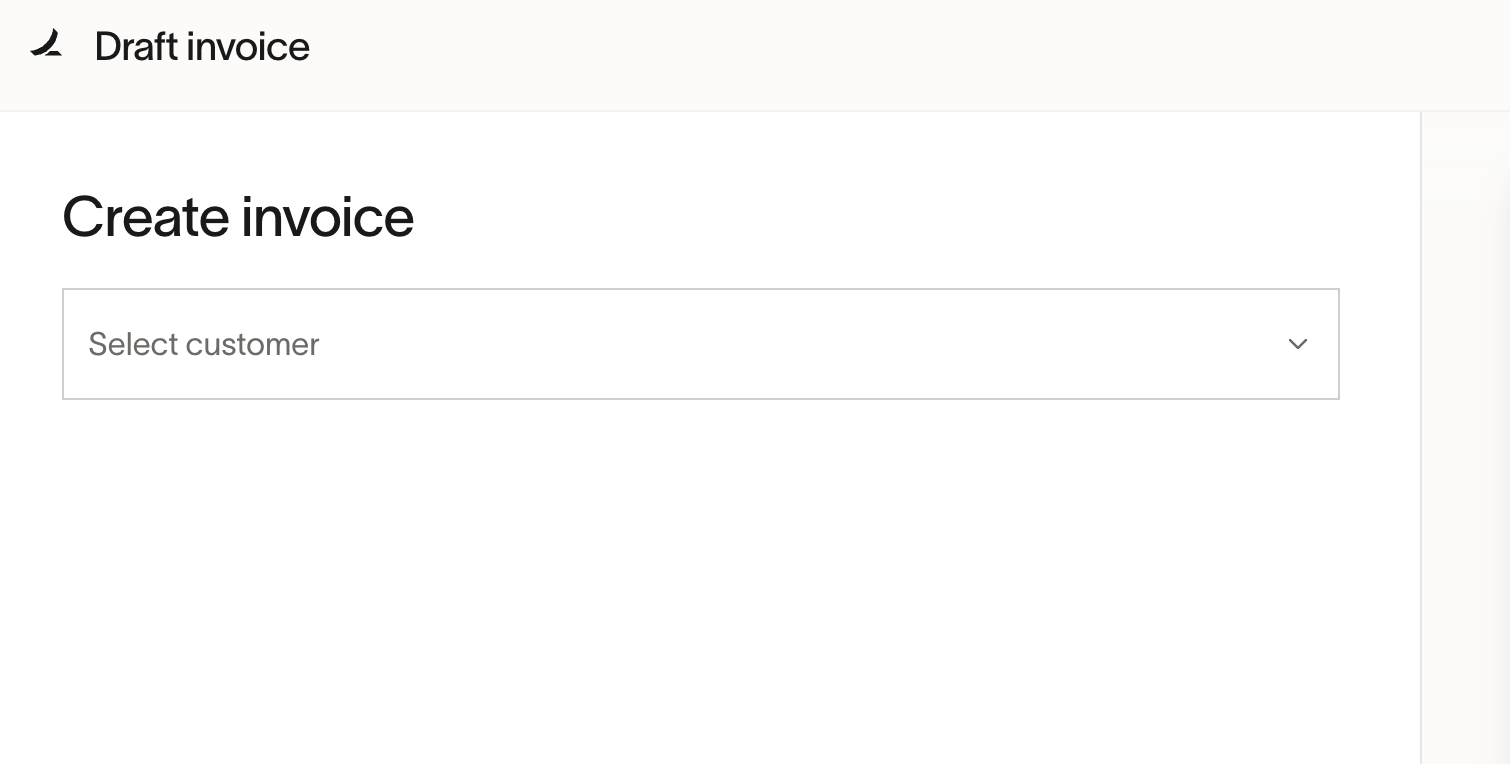
- Note - if you do not see your customer in the ‘Select customer’ drop down, it means they have not connected to your Vendor Profile account on the Vendor Network. To fix this, please ask your customer to find your vendor profile in the Vendor section on Ramp, and click ‘Connect’ on the right side of your vendor profile details.
Step 4
Review the imported ‘Invoice details’ and ‘Line items’ on the left side of the screen to ensure they are accurate.
Then select a payment destination under ‘Payment details’ from your stored payment accounts. This is the account that your customer’s payment will be delivered to.
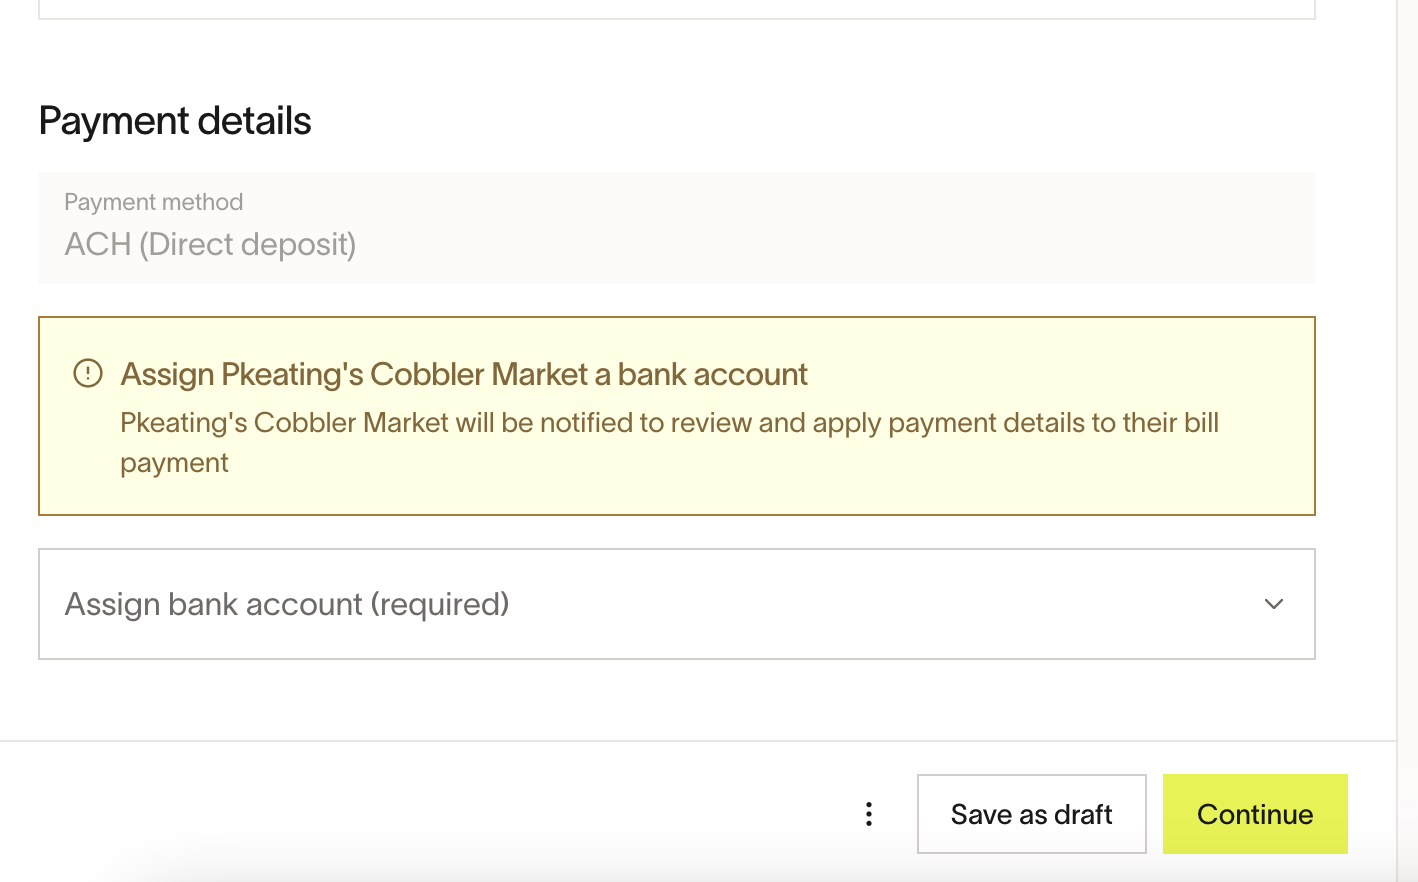
From here, you can save your bill as a draft, or if you’re ready to send, click ‘Continue’. Then click ‘Create and send’. Your invoice will then be delivered to your customer.
Step 5
Once sent, your invoice will show up under ‘Open’ invoices on your ‘Receivables’ table. You will be able to track processing and payment status by clicking on your invoice.
To create a new invoice
Step 1
To send an invoice on Vendor Portal click ‘New invoice’ on the top right corner of the ‘Receivables’ table, and click ‘Create receivable without invoice’
Step 2
In the ‘Create invoice’ flow, select your linked Bill Pay customer that you would like to send your invoice to.
Step 3
Enter your invoice number, invoice date, and due date in the ‘Invoice details’ section, and then add line items for your invoice. You can choose to add a simple % tax calculation, enter a static $ tax amount, or leave this field blank.
Step 4
Enter your invoice number, invoice date, and due date in the ‘Invoice details’ section, and then add line items for your invoice.
Then select a payment destination under ‘Payment details’ from your stored payment accounts. This is the account that your customer’s payment will be delivered to.

From here, you can save your bill as a draft, or if you’re ready to send, click ‘Continue’. Then click ‘Create and send’. Your invoice will then be delivered to your customer.
Step 5
Once sent, your invoice will show up under ‘Open’ invoices on your ‘Receivables’ table. You will be able to track processing and payment status by clicking on your invoice.
Invoice status
Invoices can have the following status on Vendor Portal:
- Draft - this invoice is still being edited, and has not yet been sent to a customer
- Invoice Sent - this invoice has been sent to your customer as a draft bill
- Invoice Received - your customer has saved your invoice as a new bill to be processed
- Once it's in this state, you can comment on the invoice to communicate with the customer
- Rejected - your invoice has been deleted or rejected by your customer, they may have optionally sent you a reason why the invoice was rejected
- Note - a common reason for rejection is that the invoice is a duplicate. Please ensure you're sending your invoice to your customer only once via a single method.
Deleting or canceling an invoice
Delete a draft invoice
If your invoice is still in Draft status and has not been sent, you can delete it. To delete a draft:
- From the Receivables table, find the draft invoice, open the row menu (three dots), and select Delete draft .
- Alternatively, open the draft invoice and select Delete from the menu in the footer.
You will be asked to confirm the deletion. This action cannot be undone — the draft is permanently removed from your Receivables table.
Cancel a sent invoice
Once an invoice has been sent, it cannot be canceled, voided, or deleted by the vendor. If you need a sent invoice removed, contact your customer and ask them to reject it. The customer can reject the invoice by deleting the corresponding draft bill or archiving the bill in Ramp. Once rejected, the invoice shows a Rejected status in your Receivables table, and the customer may include an optional reason for the rejection.
Frequently asked questions
I am a Ramp Bill Pay user, how do I invite a vendor to Ramp’s Vendor Portal?
For more information, please refer to ourHow to invite a vendor to Ramp’s Vendor Portalarticle.
I am a vendor and I cannot find my customer in the ‘Select customer’ drop down in the ‘Create invoice’ flow.
This means that a Ramp Bill Pay customer is not linked to your Vendor Portal account via the Vendor Network. To fix this, please ask your Bill Pay customer to find your vendor profile in the Vendor section of the Ramp app, and click ‘Connect’ on the right side of your vendor profile details.
I’m a vendor, and I’m importing a .pdf invoice and the data is not being imported correctly, what should I do?
You should correct the data populated on the left hand side of the ‘Create invoice’ flow as this is the data that will be in the draft bill for your Ramp Bill Pay customer. They will also be able to see the original .pdf invoice as well.
Why can I only select an ACH payment destination under ‘Payment details’?
For now, we only support ACH payment destinations in our invoicing tool, but we plan on supporting more payment options in the future.
Are foreign currencies available?
At this time, you can only create and send invoices in USD.
How do I cancel or delete a receivable?
Draft invoices can be deleted from the Receivables table or the draft editor — see the "Deleting or canceling an invoice" section above. Sent invoices cannot be canceled or deleted. Ask your customer to reject the invoice if it was sent in error.