LogicGate integration: Set up with Ramp Programs
Overview
The LogicGate integration lets you create a LogicGate record from a Ramp Program workflow and keep the request moving in Ramp once the right LogicGate end step is reached. Ramp automatically creates the LogicGate webhook when you connect the integration, so LogicGate status updates can sync back to Ramp.
Use this integration when your team wants LogicGate to handle part of a procurement, intake, or risk review workflow while Ramp continues to manage the overall approval path.
Compatibility
This integration requires an active LogicGate environment URL in the format https://your-subdomain.logicgate.com. You also need a LogicGate Client and LogicGate Secret from your LogicGate profile.
Note: LogicGate Secret is not the same as the access key value shown in LogicGate. If you no longer have the secret, reset the secret key in LogicGate before connecting Ramp.
Prerequisites
- Admin access in Ramp
- Access to your LogicGate environment URL
- Access to Person icon > Profile > Access Key in LogicGate so you can generate credentials
- At least one Ramp Program workflow where you want to add the LogicGate step
- A LogicGate workflow that includes fields you can map from Ramp
Integration steps
Step 1 - Connect LogicGate to Ramp
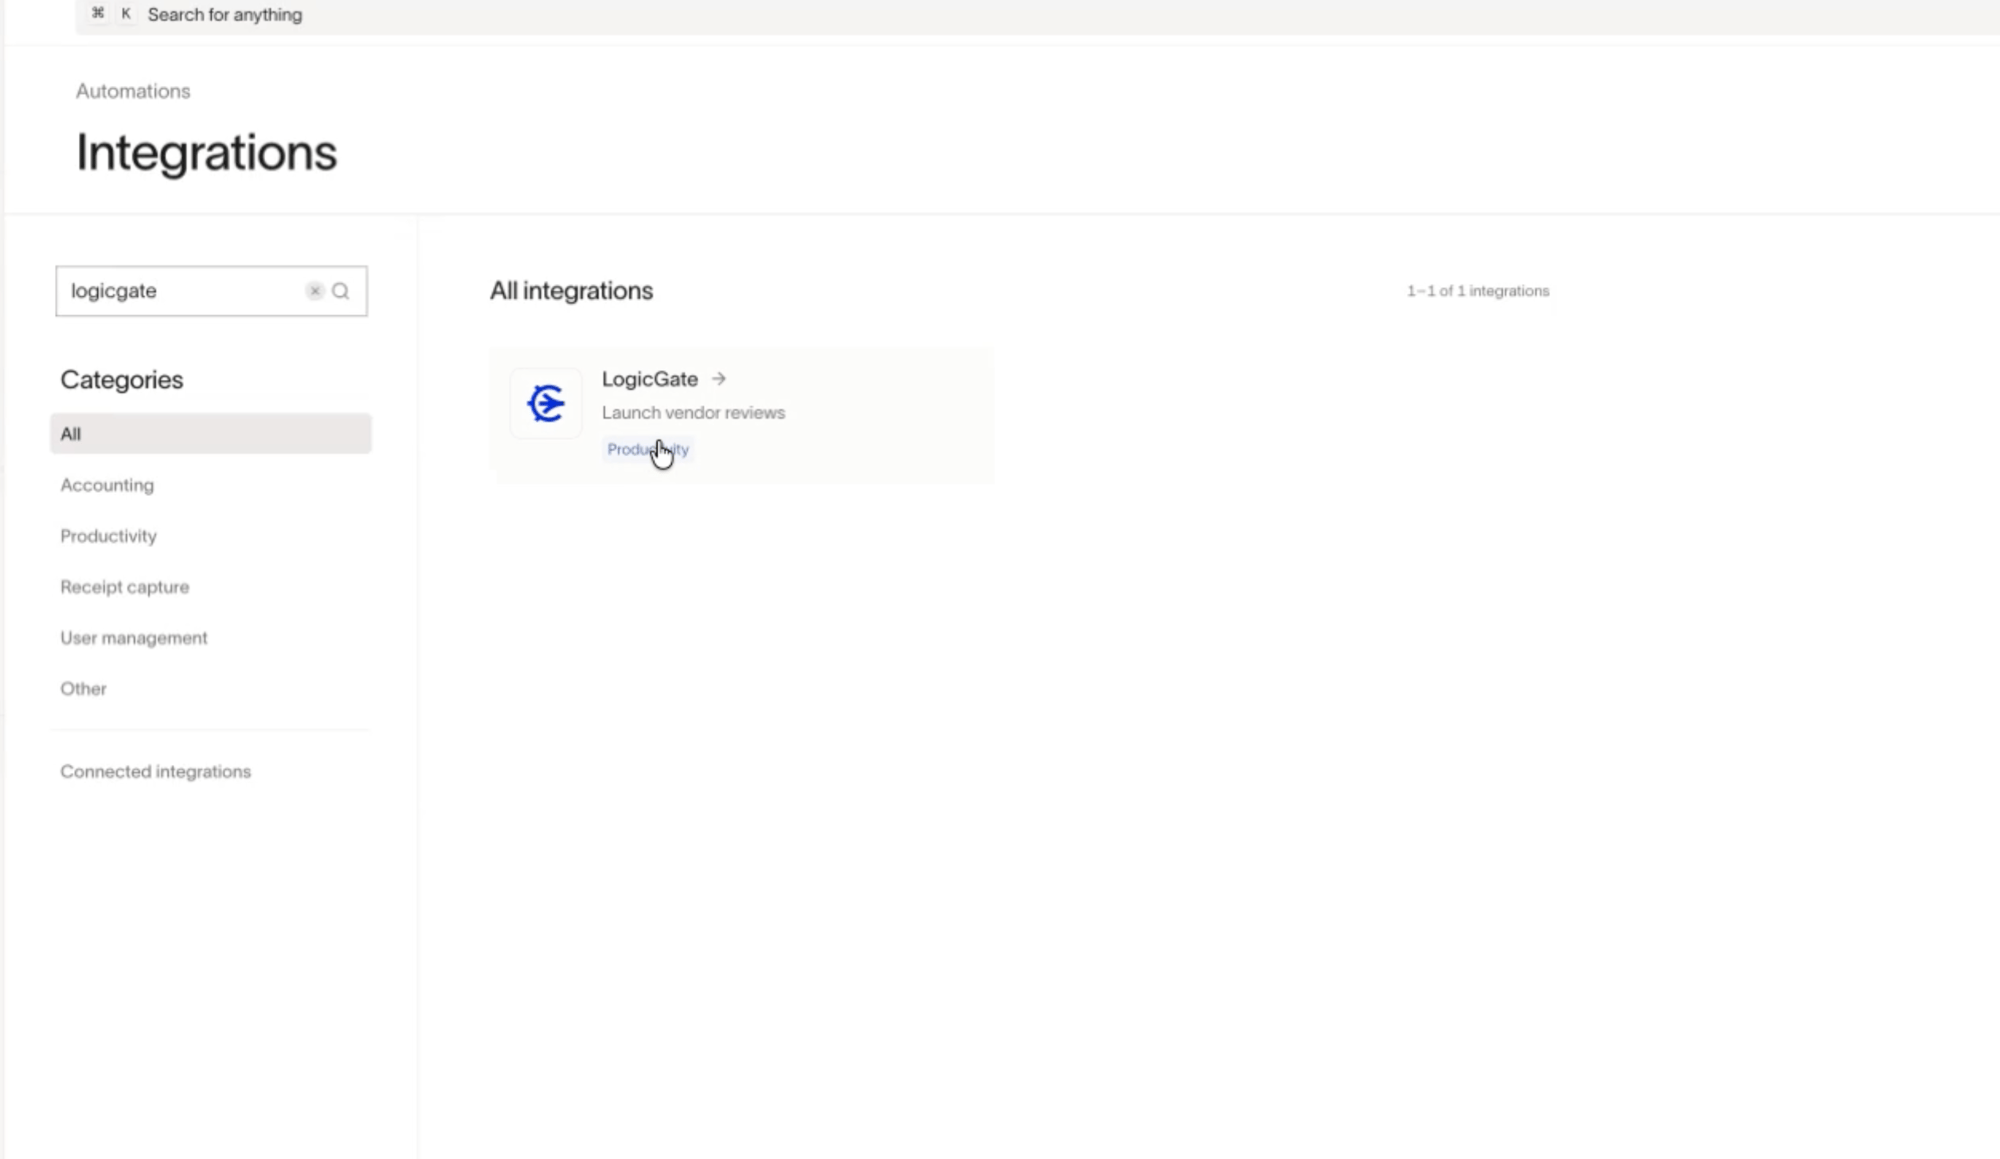
- Go to Automations > Integrations , then search for LogicGate . If LogicGate is already connected, go to Automations > Integrations > Connected integrations > LogicGate instead.
- Enter your LogicGate URL . Ramp expects your full LogicGate environment URL, such as
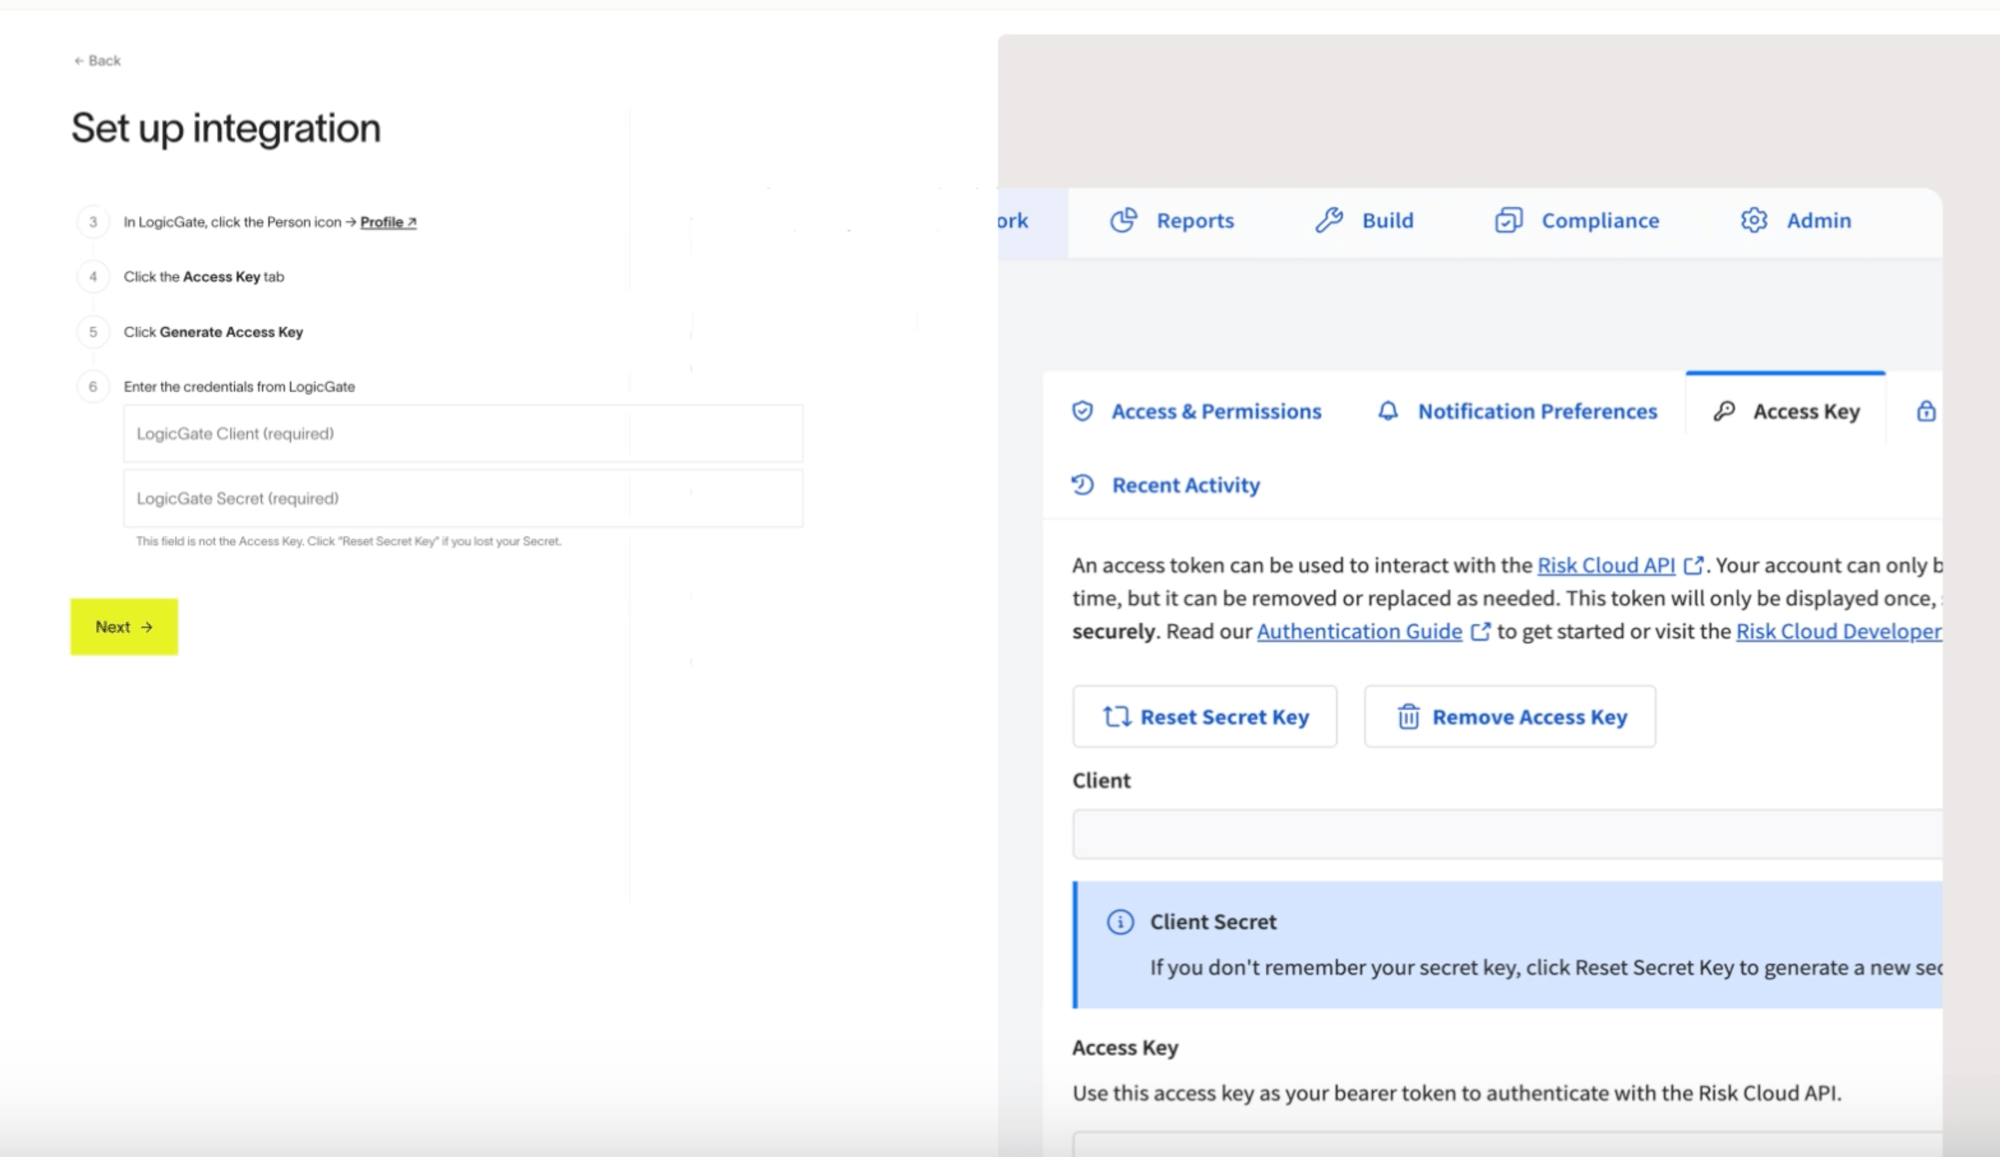
https://your-subdomain.logicgate.com. - In LogicGate, go to Person icon > Profile > Access Key , then select Generate Access Key .
- Copy the LogicGate Client and LogicGate Secret from LogicGate into Ramp.
- Finish the setup flow. After the connection succeeds, Ramp creates the LogicGate webhook automatically.
Step 2 - Add a LogicGate step to your program workflow
- Open the Ramp Program workflow where you want to use LogicGate.
- Add the LogicGate workflow step.
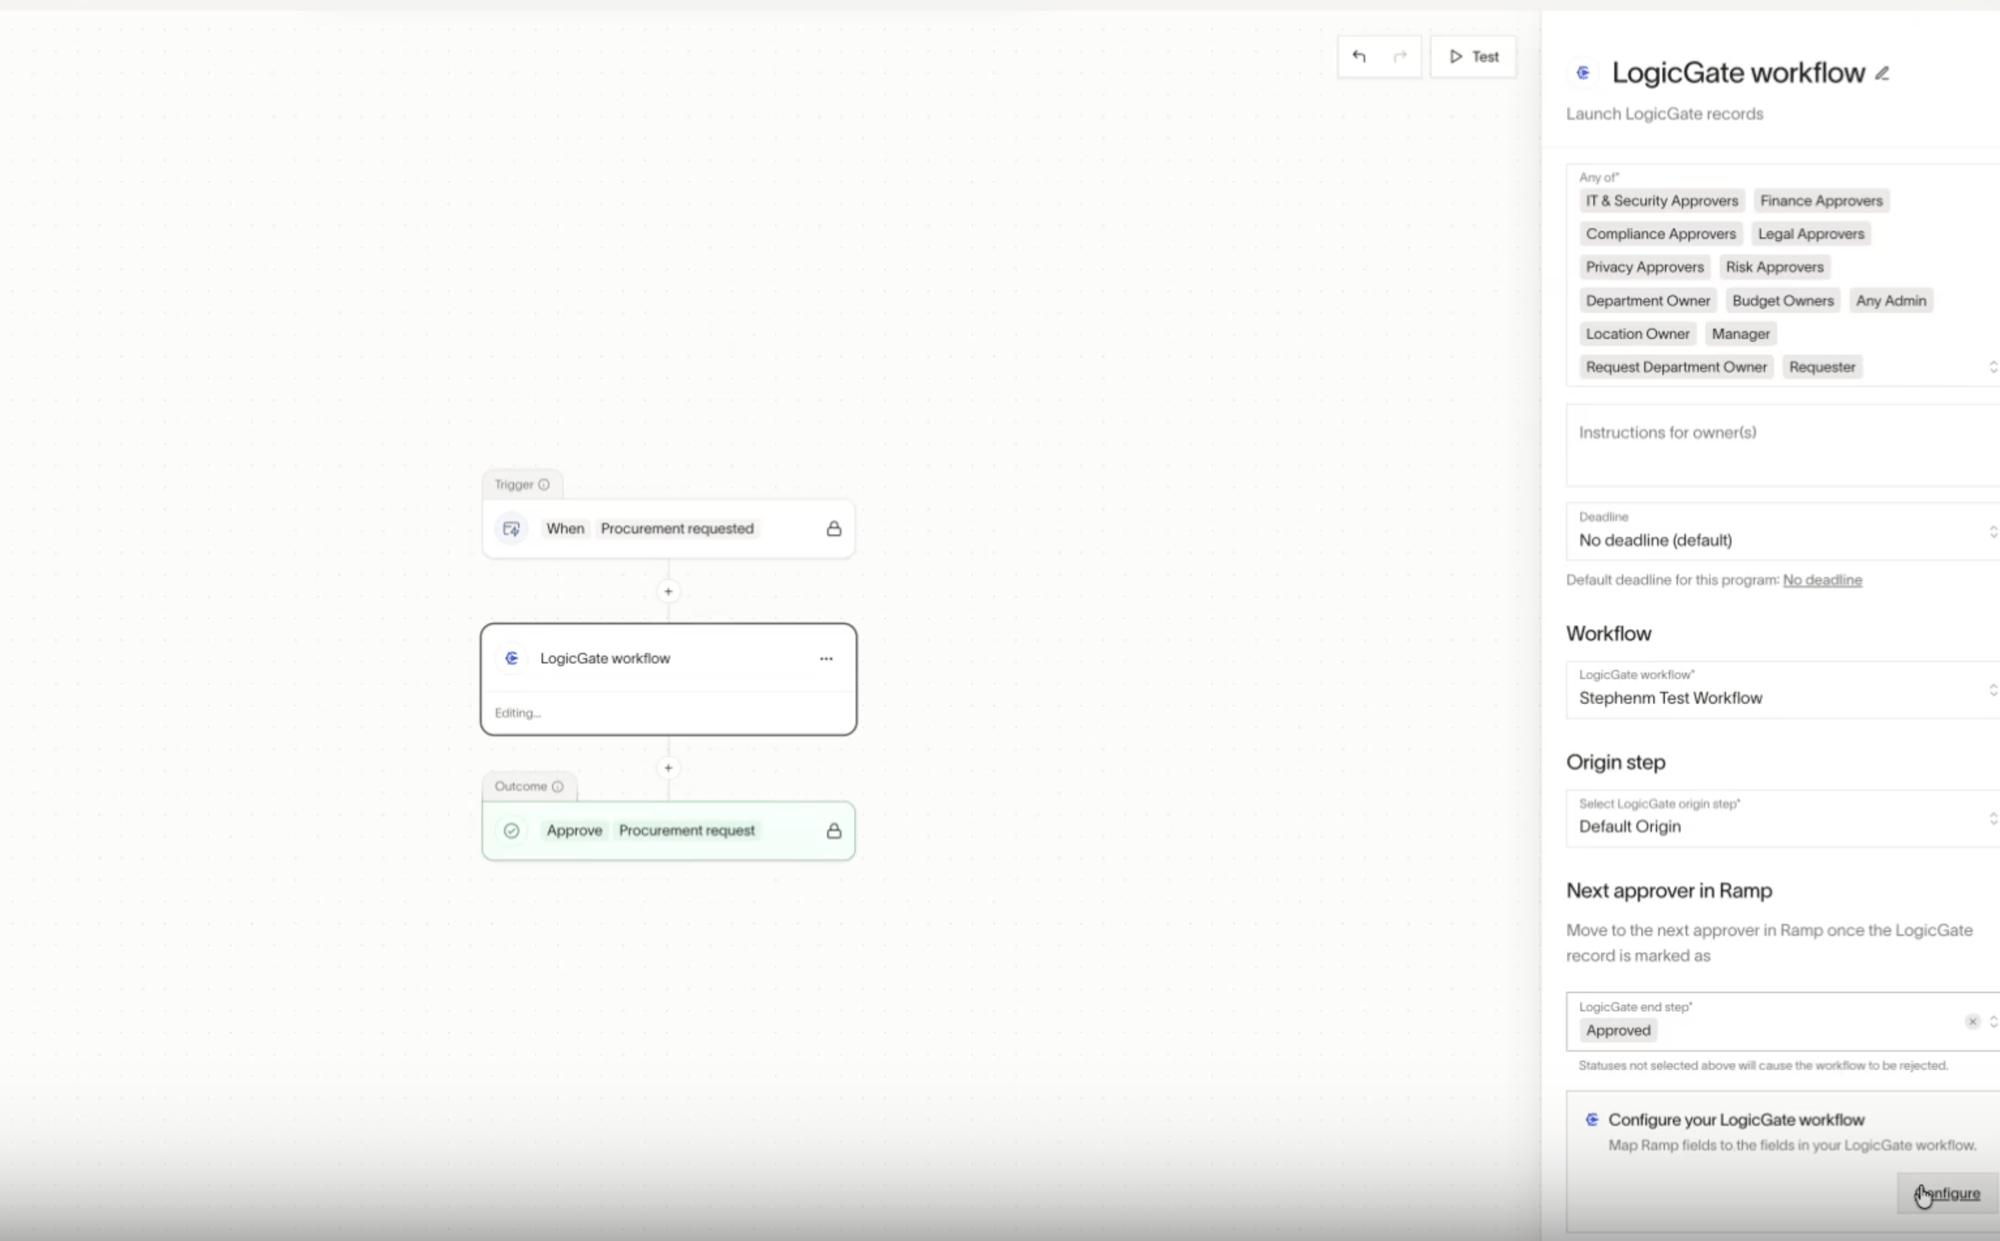
- Under Any of , assign the person who should start the LogicGate workflow. Make sure this person has access in LogicGate.
- Under LogicGate workflow , choose the LogicGate workflow Ramp should create records in.
- Under Select LogicGate origin step , choose the LogicGate starting step where the new record should be created.
- Under Next approver in Ramp , select the LogicGate end step or steps that should count as approved. When the LogicGate record reaches one of those steps, Ramp moves the request to the next approver in Ramp. LogicGate end steps you do not select are treated as rejected outcomes.
Step 3 - Configure field mappings
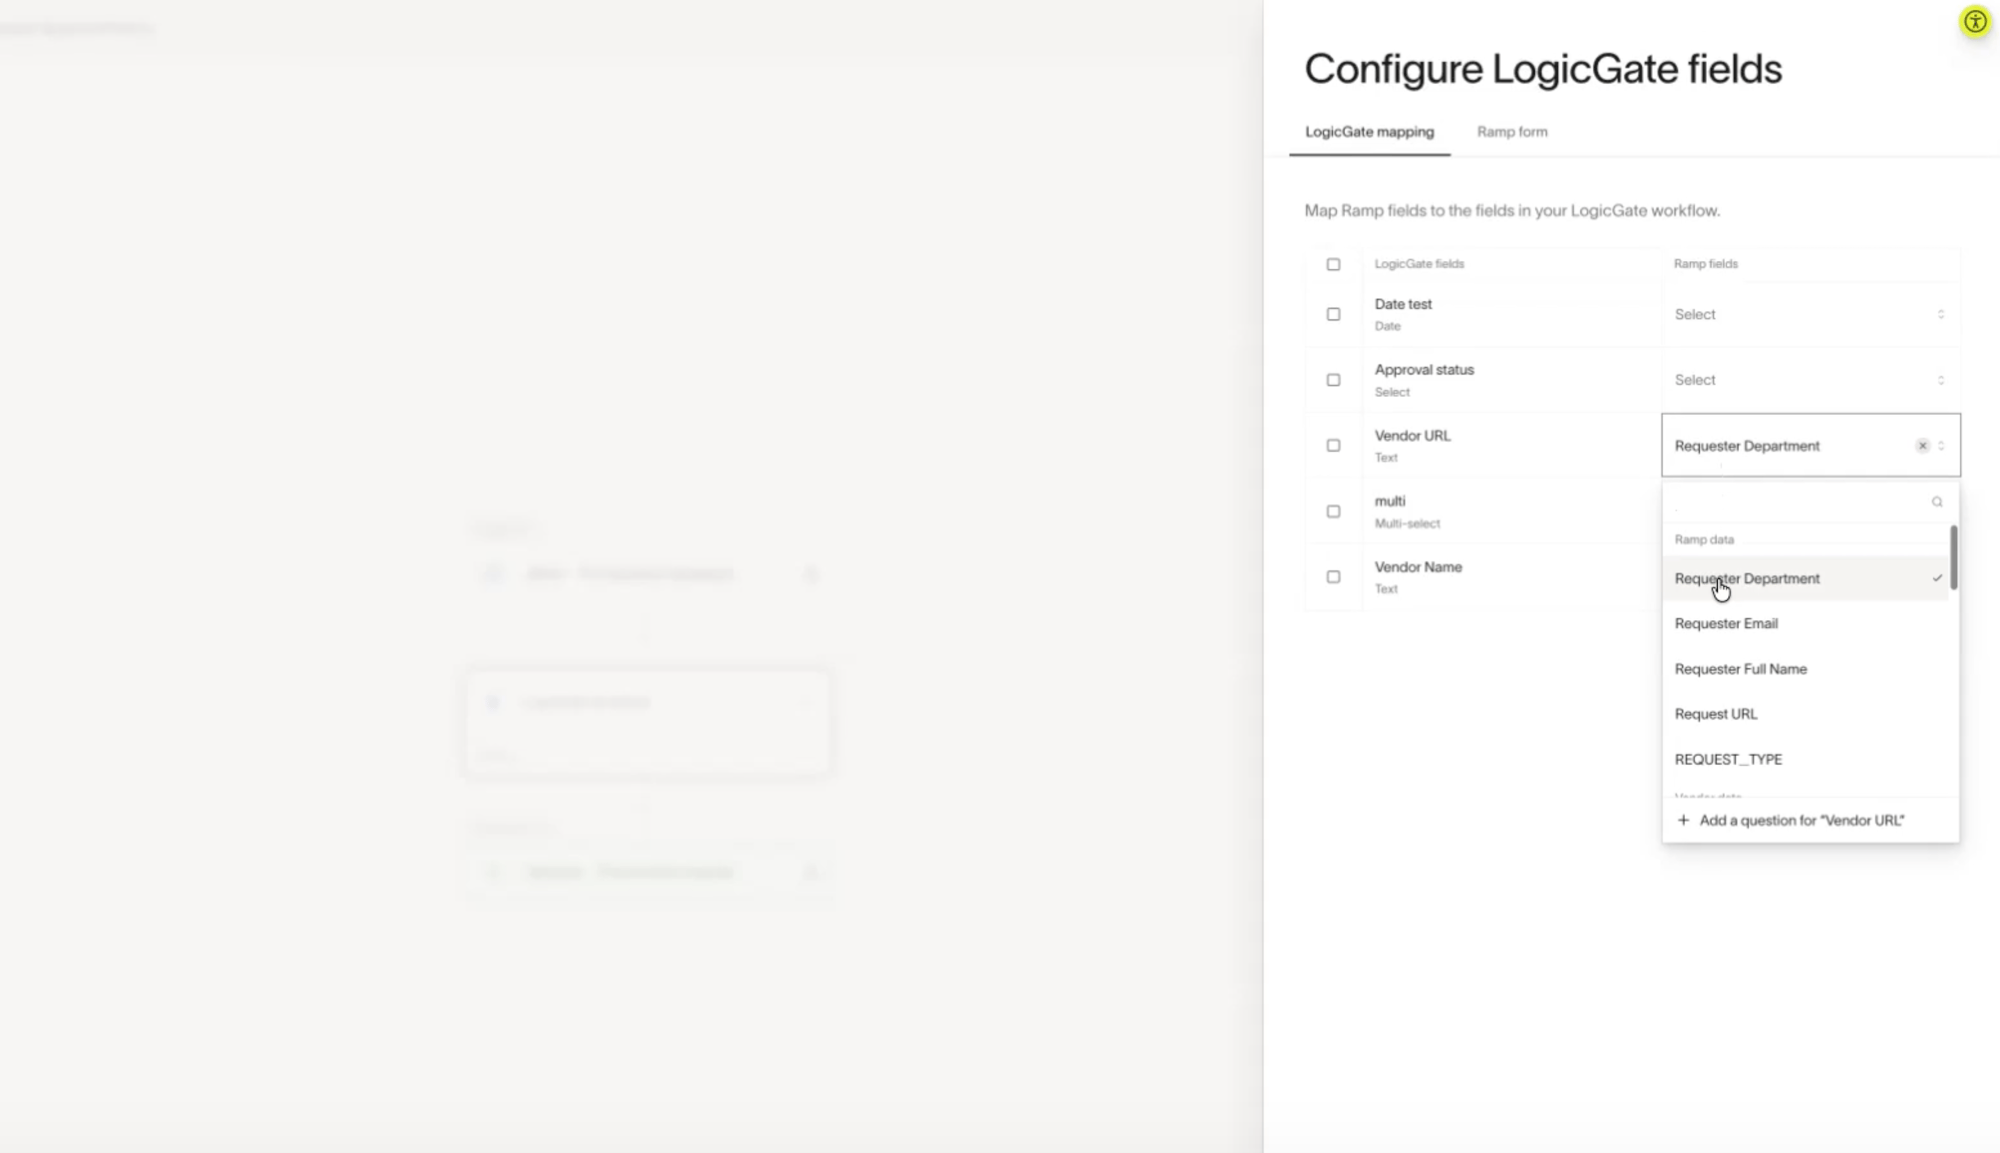
- Select Configure within Configure your LogicGate workflow .
- Map Ramp fields to the fields in your LogicGate workflow.
- Map every required LogicGate field before saving.
- If you want LogicGate reviews to match cleanly back to the Ramp vendor, include a mapping from Ramp vendor name to a LogicGate field.
- Make sure the selected LogicGate workflow has at least one field available to map. If it does not, choose a different LogicGate workflow.
Ramp requires at least one field mapping before you can save the LogicGate step.
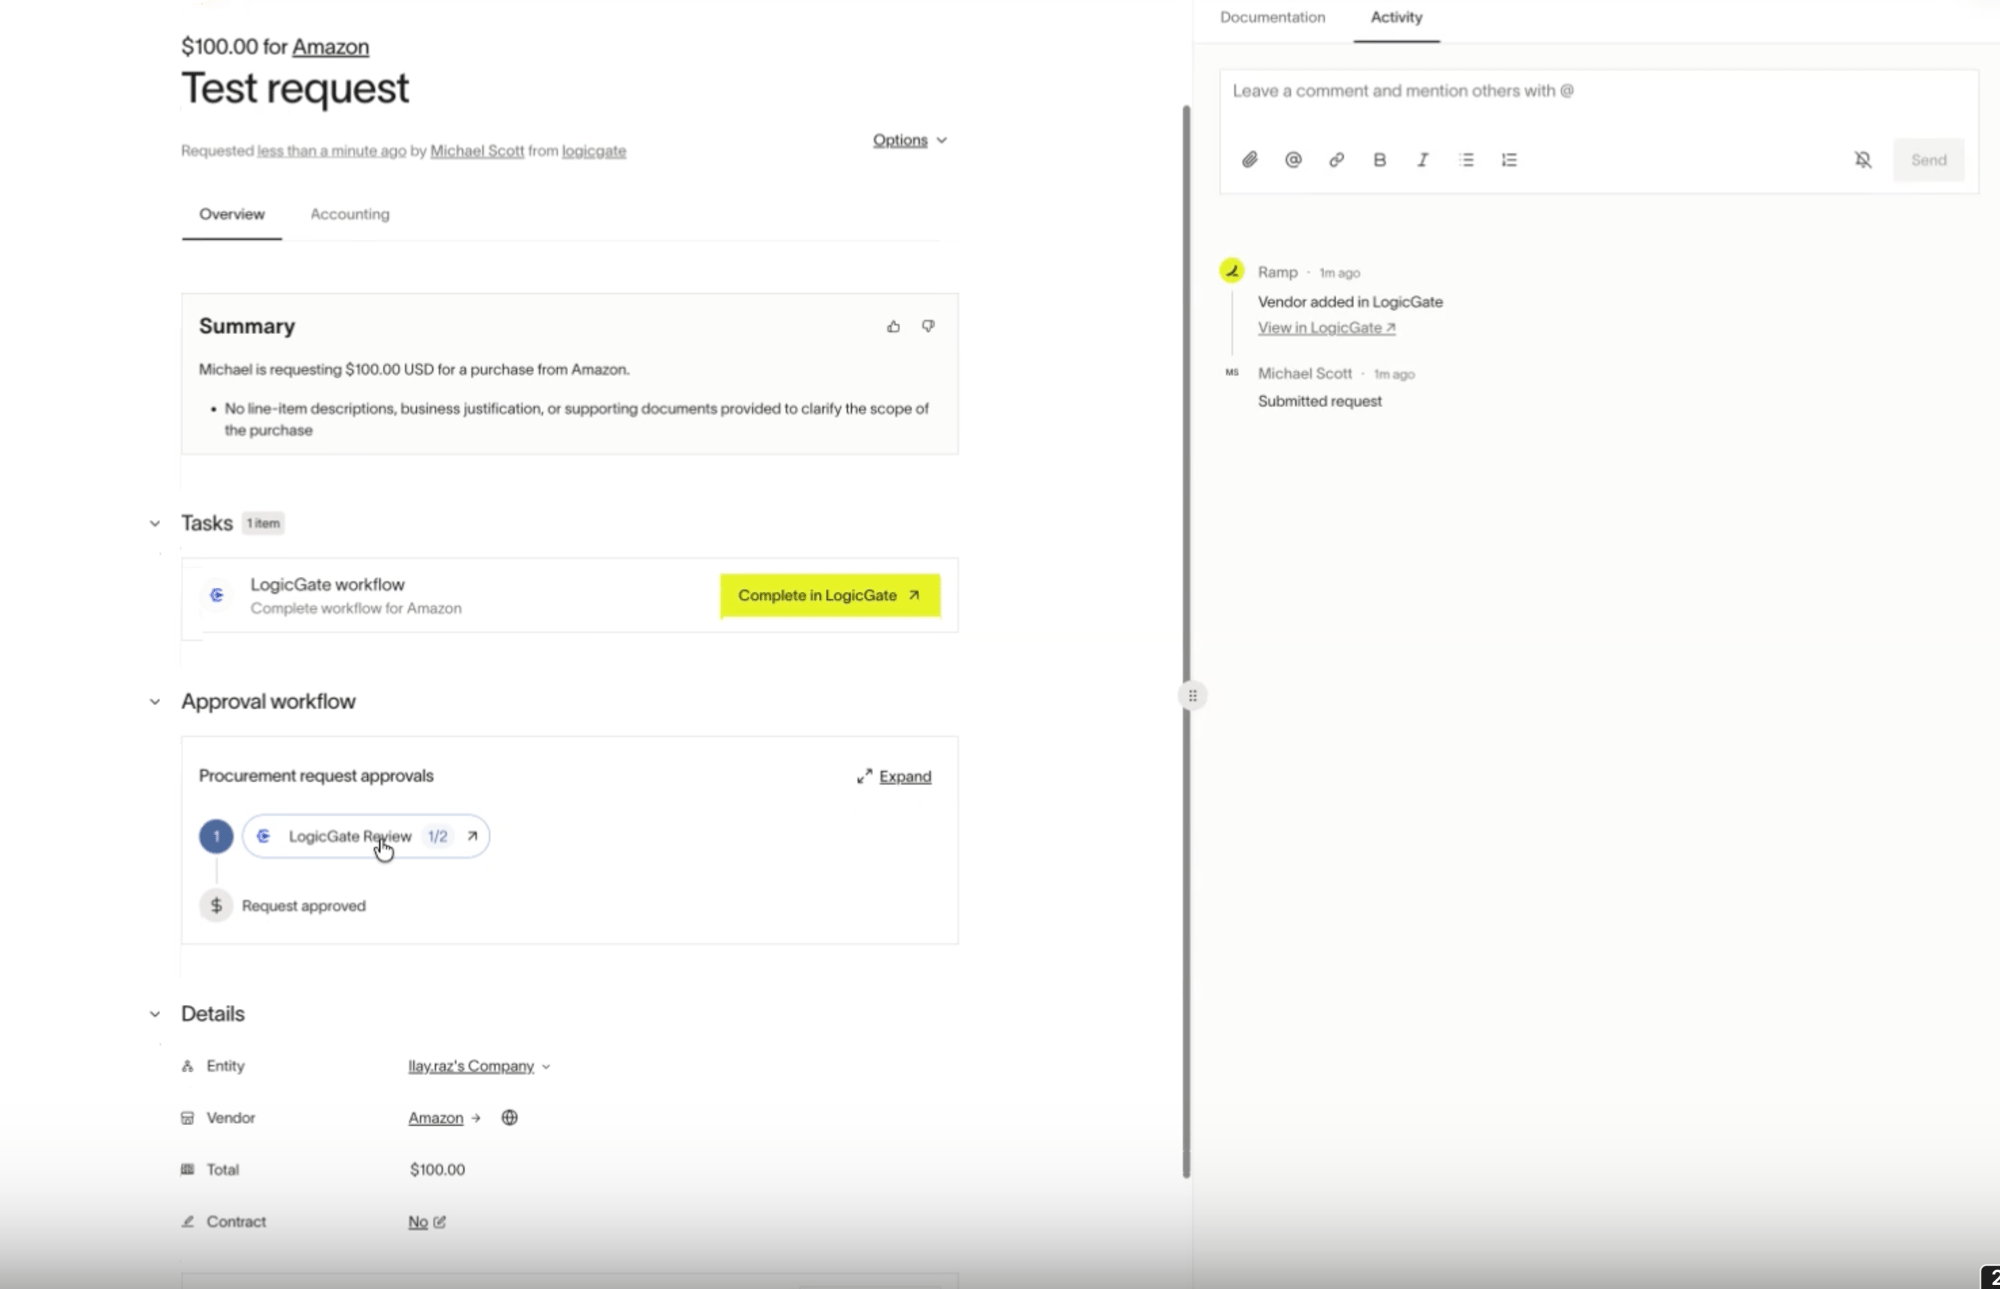
Step 4 - Submit and track the request
- When a Ramp request reaches the LogicGate step, Ramp creates a LogicGate record in the selected workflow and origin step using your field mappings.
- The Ramp request stays in progress while the LogicGate review is still open.
- When the LogicGate record reaches one of the selected end steps, Ramp updates the request and moves it to the next approver automatically.
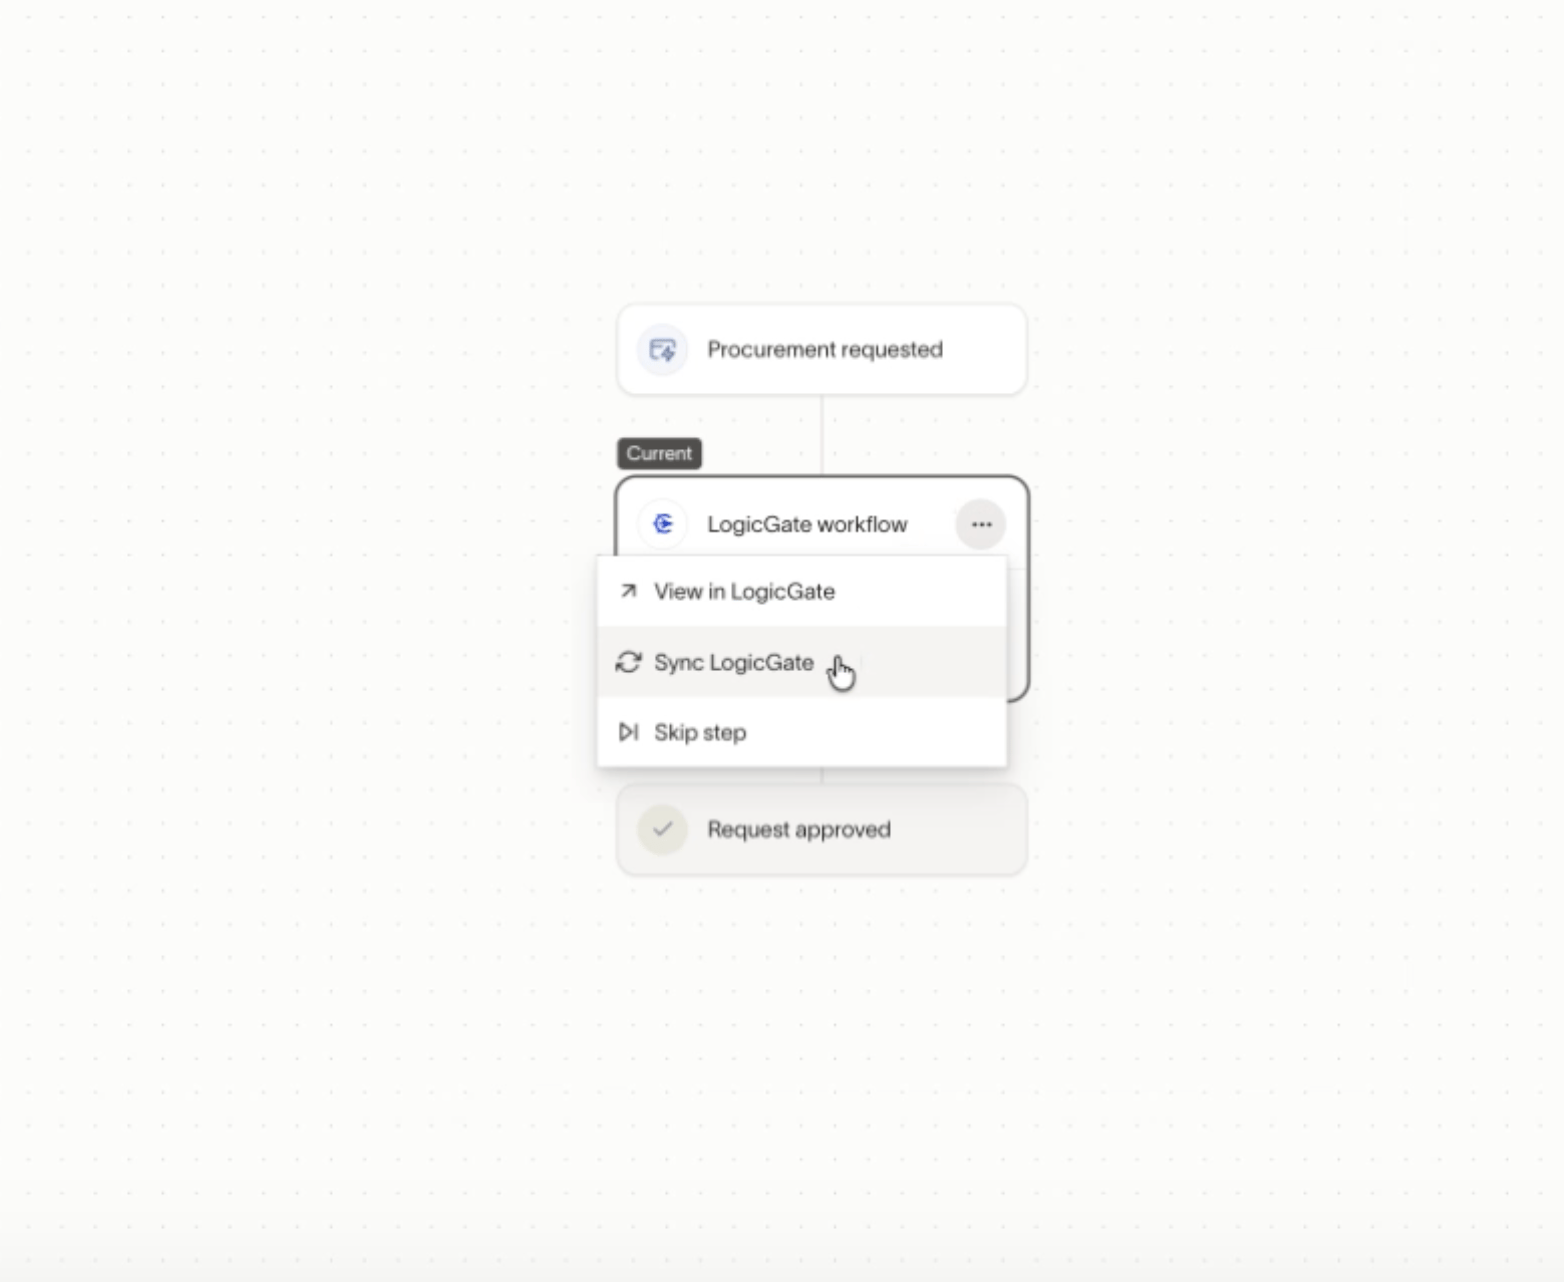
- If you need to refresh the status immediately while the LogicGate step is still in progress, use Sync LogicGate on the in-progress LogicGate node.
- If the LogicGate record reaches an end step that is not selected in Next approver in Ramp , Ramp treats that outcome as rejected.
Troubleshooting
I cannot connect LogicGate
Make sure you entered your full LogicGate environment URL in the format https://your-subdomain.logicgate.com. Then confirm you generated credentials from Person icon > Profile > Access Key in LogicGate and pasted the LogicGate Client and LogicGate Secret into Ramp. If you no longer have the secret, reset it in LogicGate and reconnect.
I cannot save the LogicGate step
Ramp requires at least one field mapping, and all required LogicGate fields must be mapped before the step can be saved. If your selected LogicGate workflow has no fields to map, choose a different LogicGate workflow.
My request did not move to the next Ramp approver
Check the Next approver in Ramp setting on the LogicGate step. Only the LogicGate end steps selected there count as approved outcomes that advance the Ramp request. Other end steps are treated as rejected outcomes.
LogicGate updates are not syncing back to Ramp
LogicGate updates normally sync back to Ramp automatically. If you need an immediate refresh, use Sync LogicGate on the in-progress LogicGate node. If updates still do not return, reconnect the LogicGate integration in Ramp so Ramp can create a fresh webhook connection.
Best practices
- Choose the LogicGate workflow first. If you switch to a different LogicGate workflow later, Ramp clears the LogicGate step selections and field mappings tied to the old workflow.
- Select approval steps carefully. Only choose LogicGate end steps that should send the request forward in Ramp.
- Use a LogicGate workflow with the right fields. Ramp can only map to fields that the selected LogicGate workflow exposes.
- Map vendor name if vendor matching matters. A Ramp vendor name to LogicGate field mapping is required for vendor matching behavior.
Additional resources
- For more on building workflow logic in Ramp, see Configuring Procurement Workflows .