Microsoft Dynamics Business Central integration: Connect a BSSI Multi-Entity Management extension
Overview
Available on Ramp Plus. See Ramp Plus overview for plan details.
This guide will walk you through the process of connecting Microsoft Dynamics Business Central 365 with a BSSI Multi-Entity Management extension to Ramp, enabling seamless integration for managing your financial data. Please follow these steps carefully to ensure a successful connection.
Note: The only Multi-Entity Management extension Ramp supports is the Binary Stream Software extension.
Prerequisites
- Customers must have an active Ramp account.
- Customers must have a BSSI Multi-Entity Management extension.
- Customers need to have their Azure Admin for Microsoft Dynamics Business Central assist with setup. The Azure Admin will have the information needed to complete the below setup process.
- Customers can use this link to identify their Azure Admin https://learn.microsoft.com/en-us/entra/identity/role-based-access-control/permissions-reference.
- Note: on-premises deployments are NOT supported
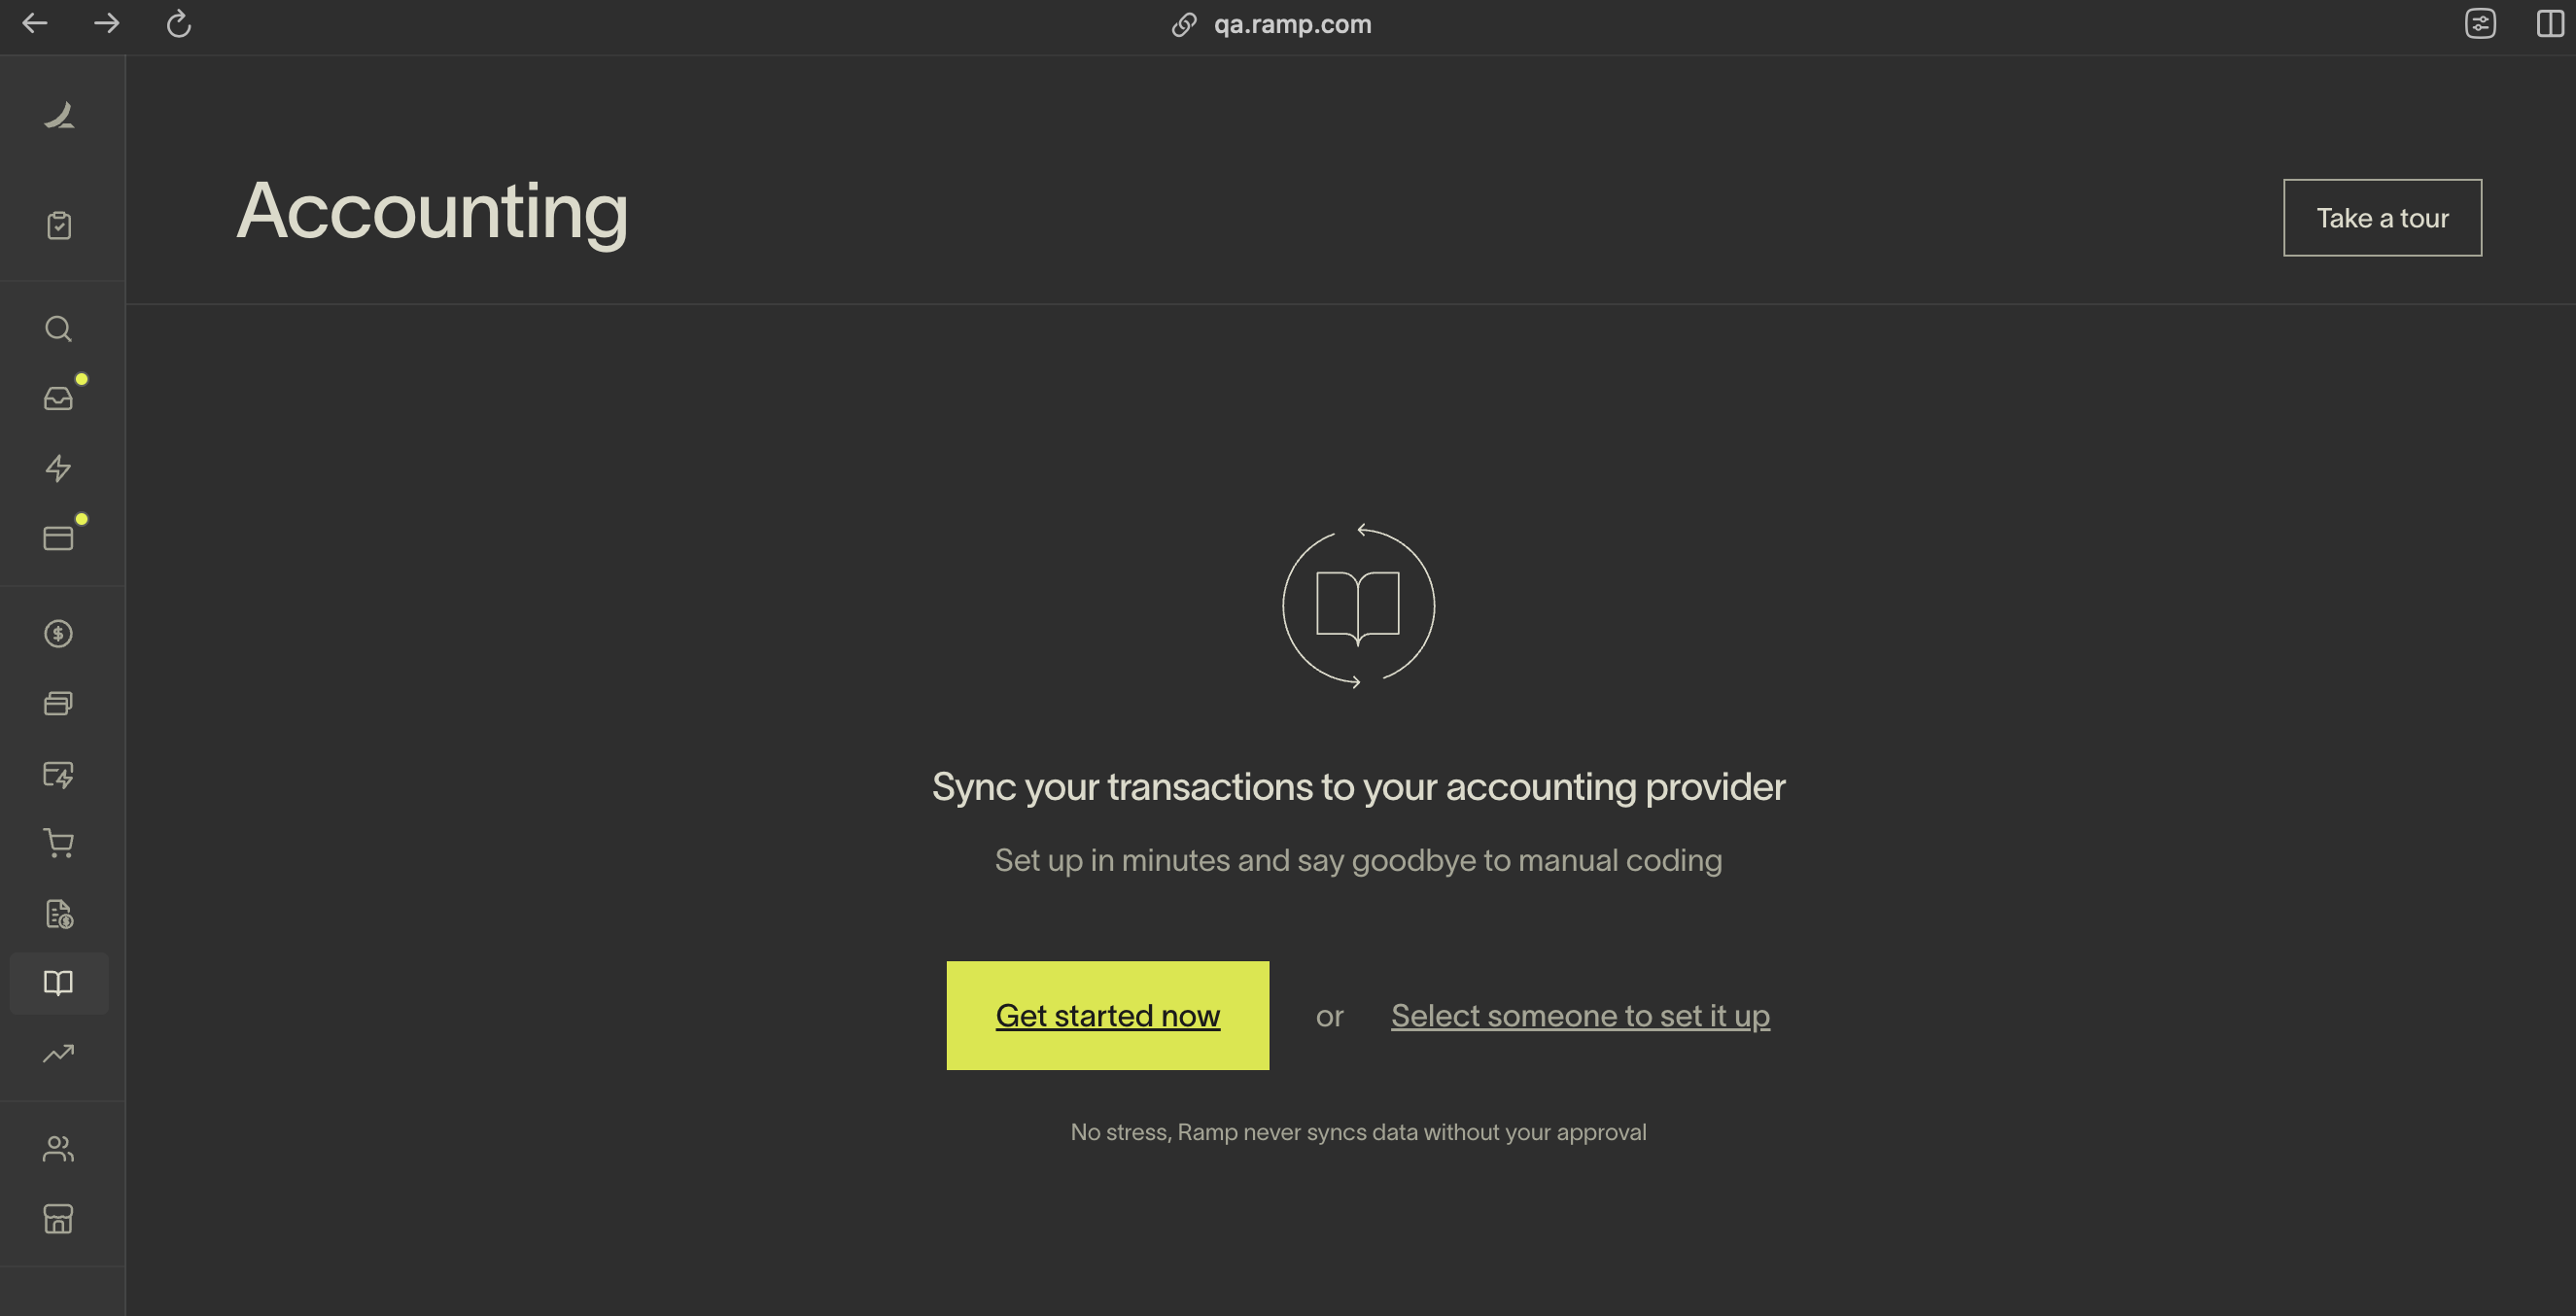
Step 1: Initiate connection from Ramp
- Sign in to your Ramp account.
- Navigate to the Accounting section on the left sidebar.
- Click on Get Started Now .
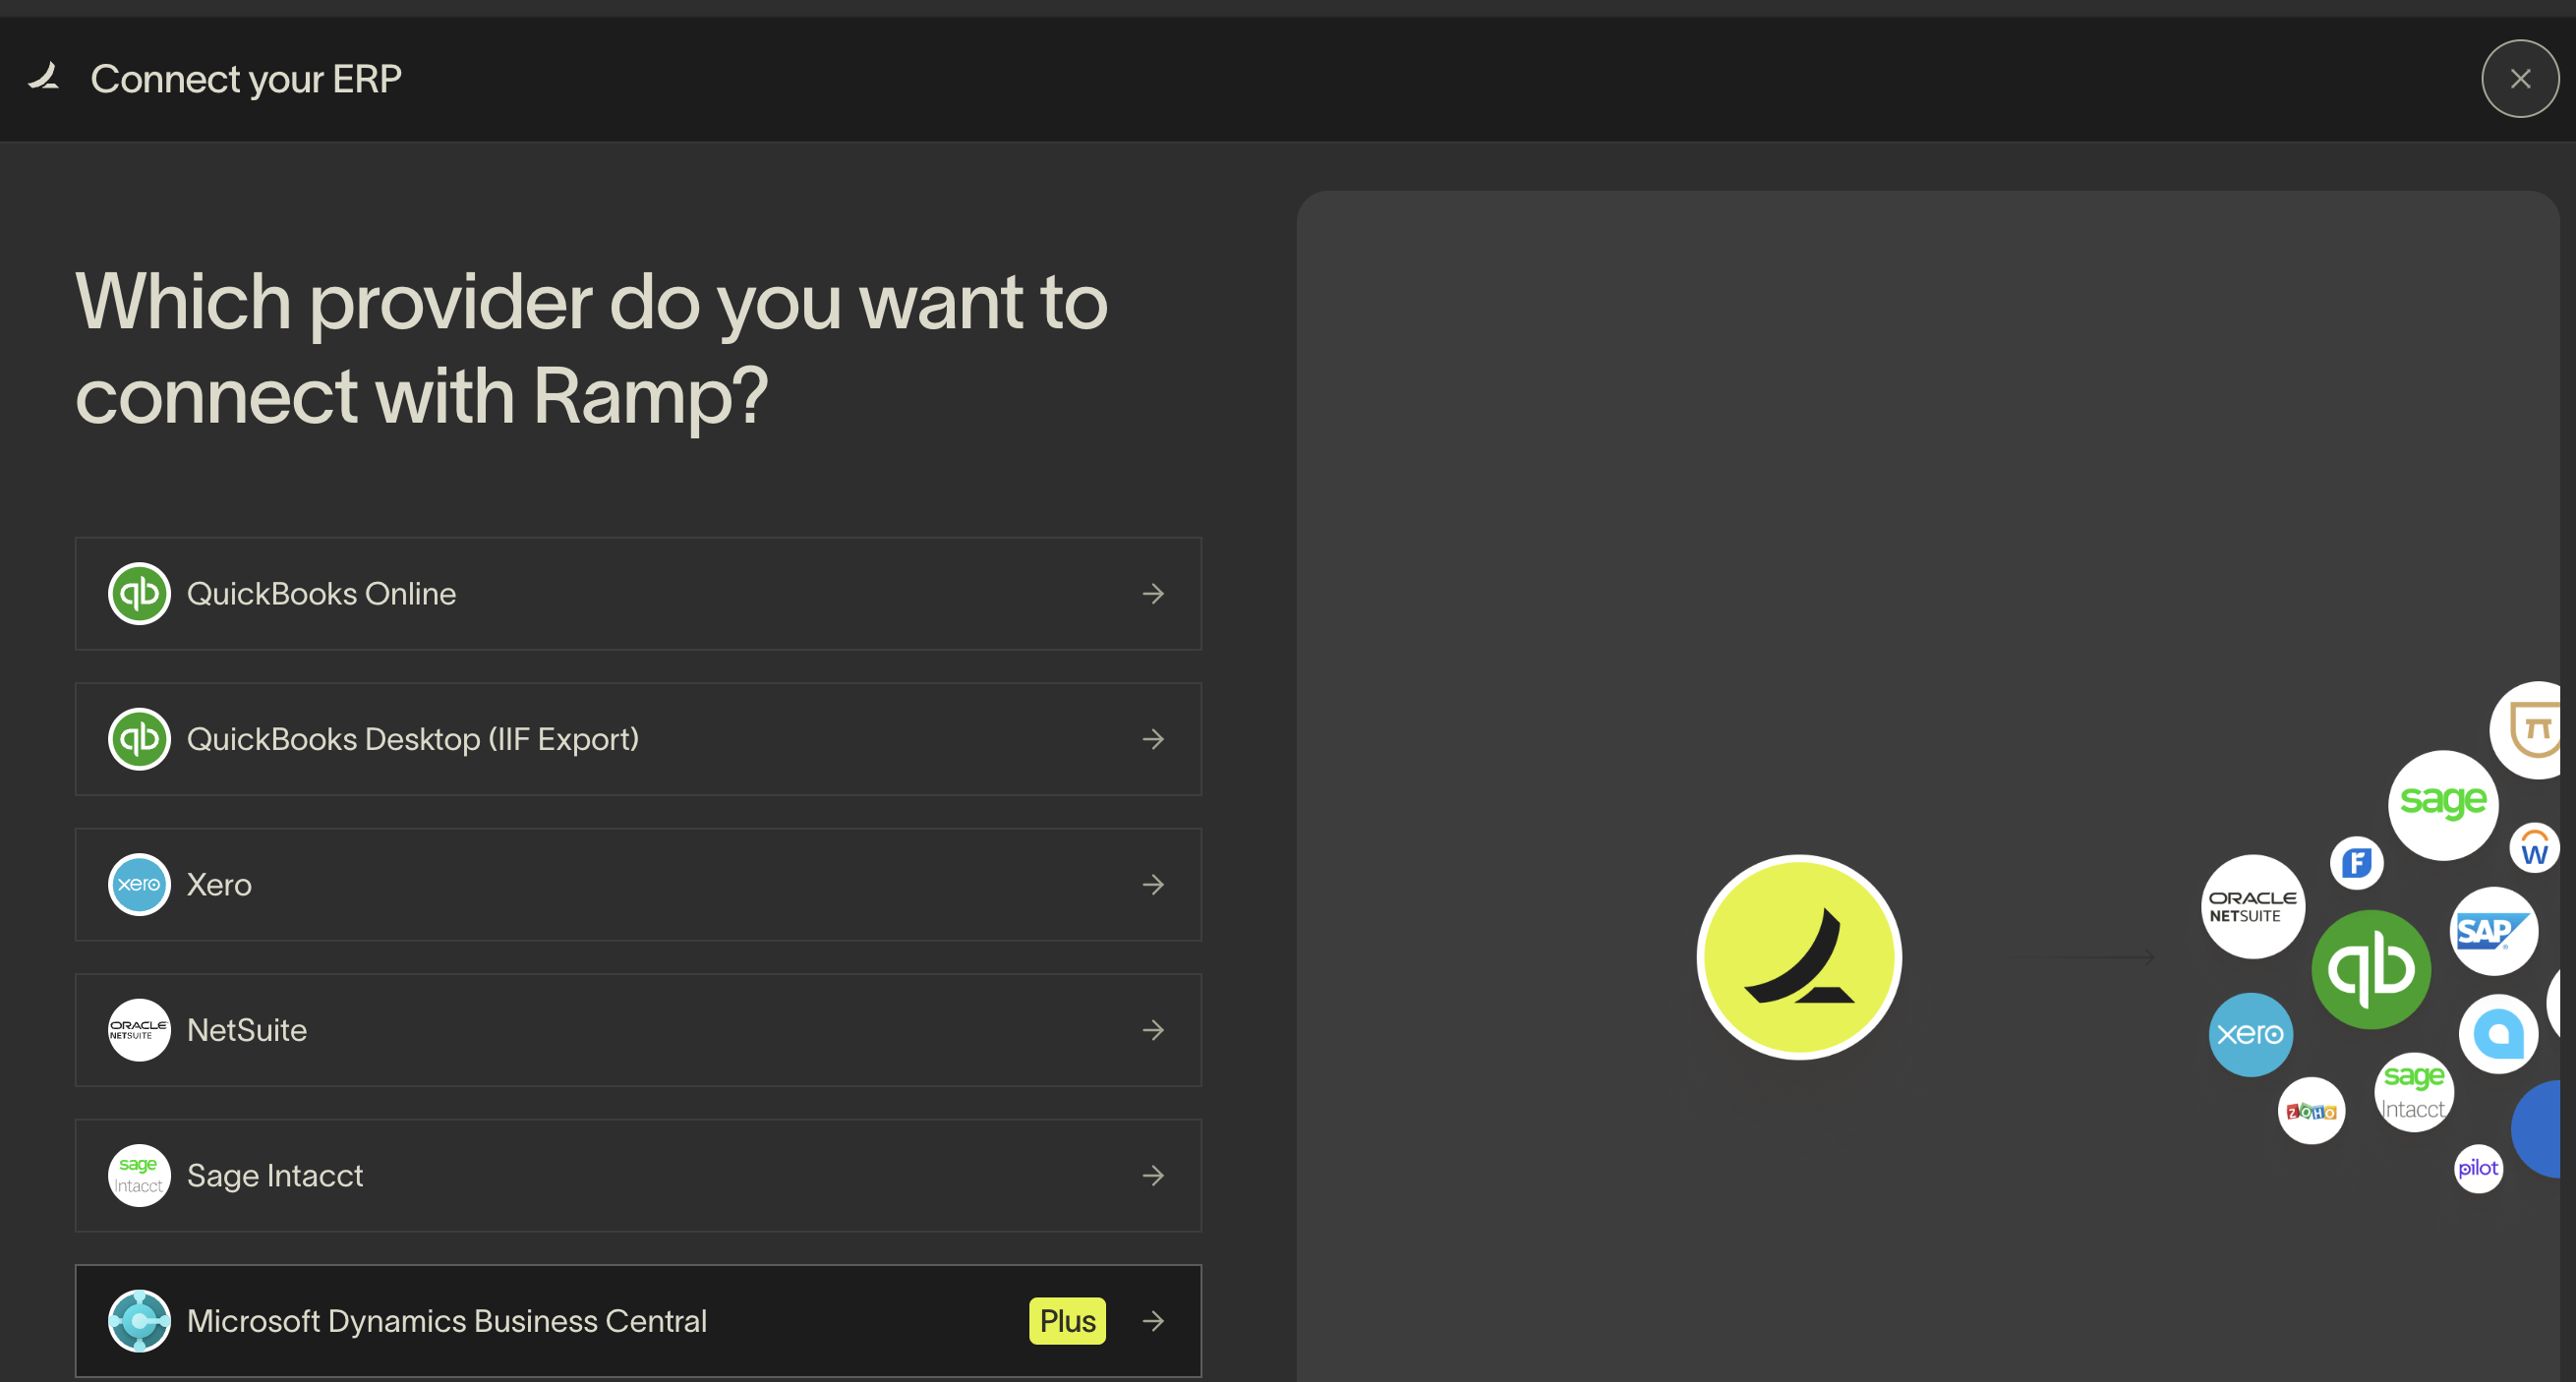
Step 2: Choose Microsoft Dynamics Business Central
- Select Microsoft Dynamics Business Central from the list of options.
- Sign in to your Microsoft Dynamics Business Central account as prompted.
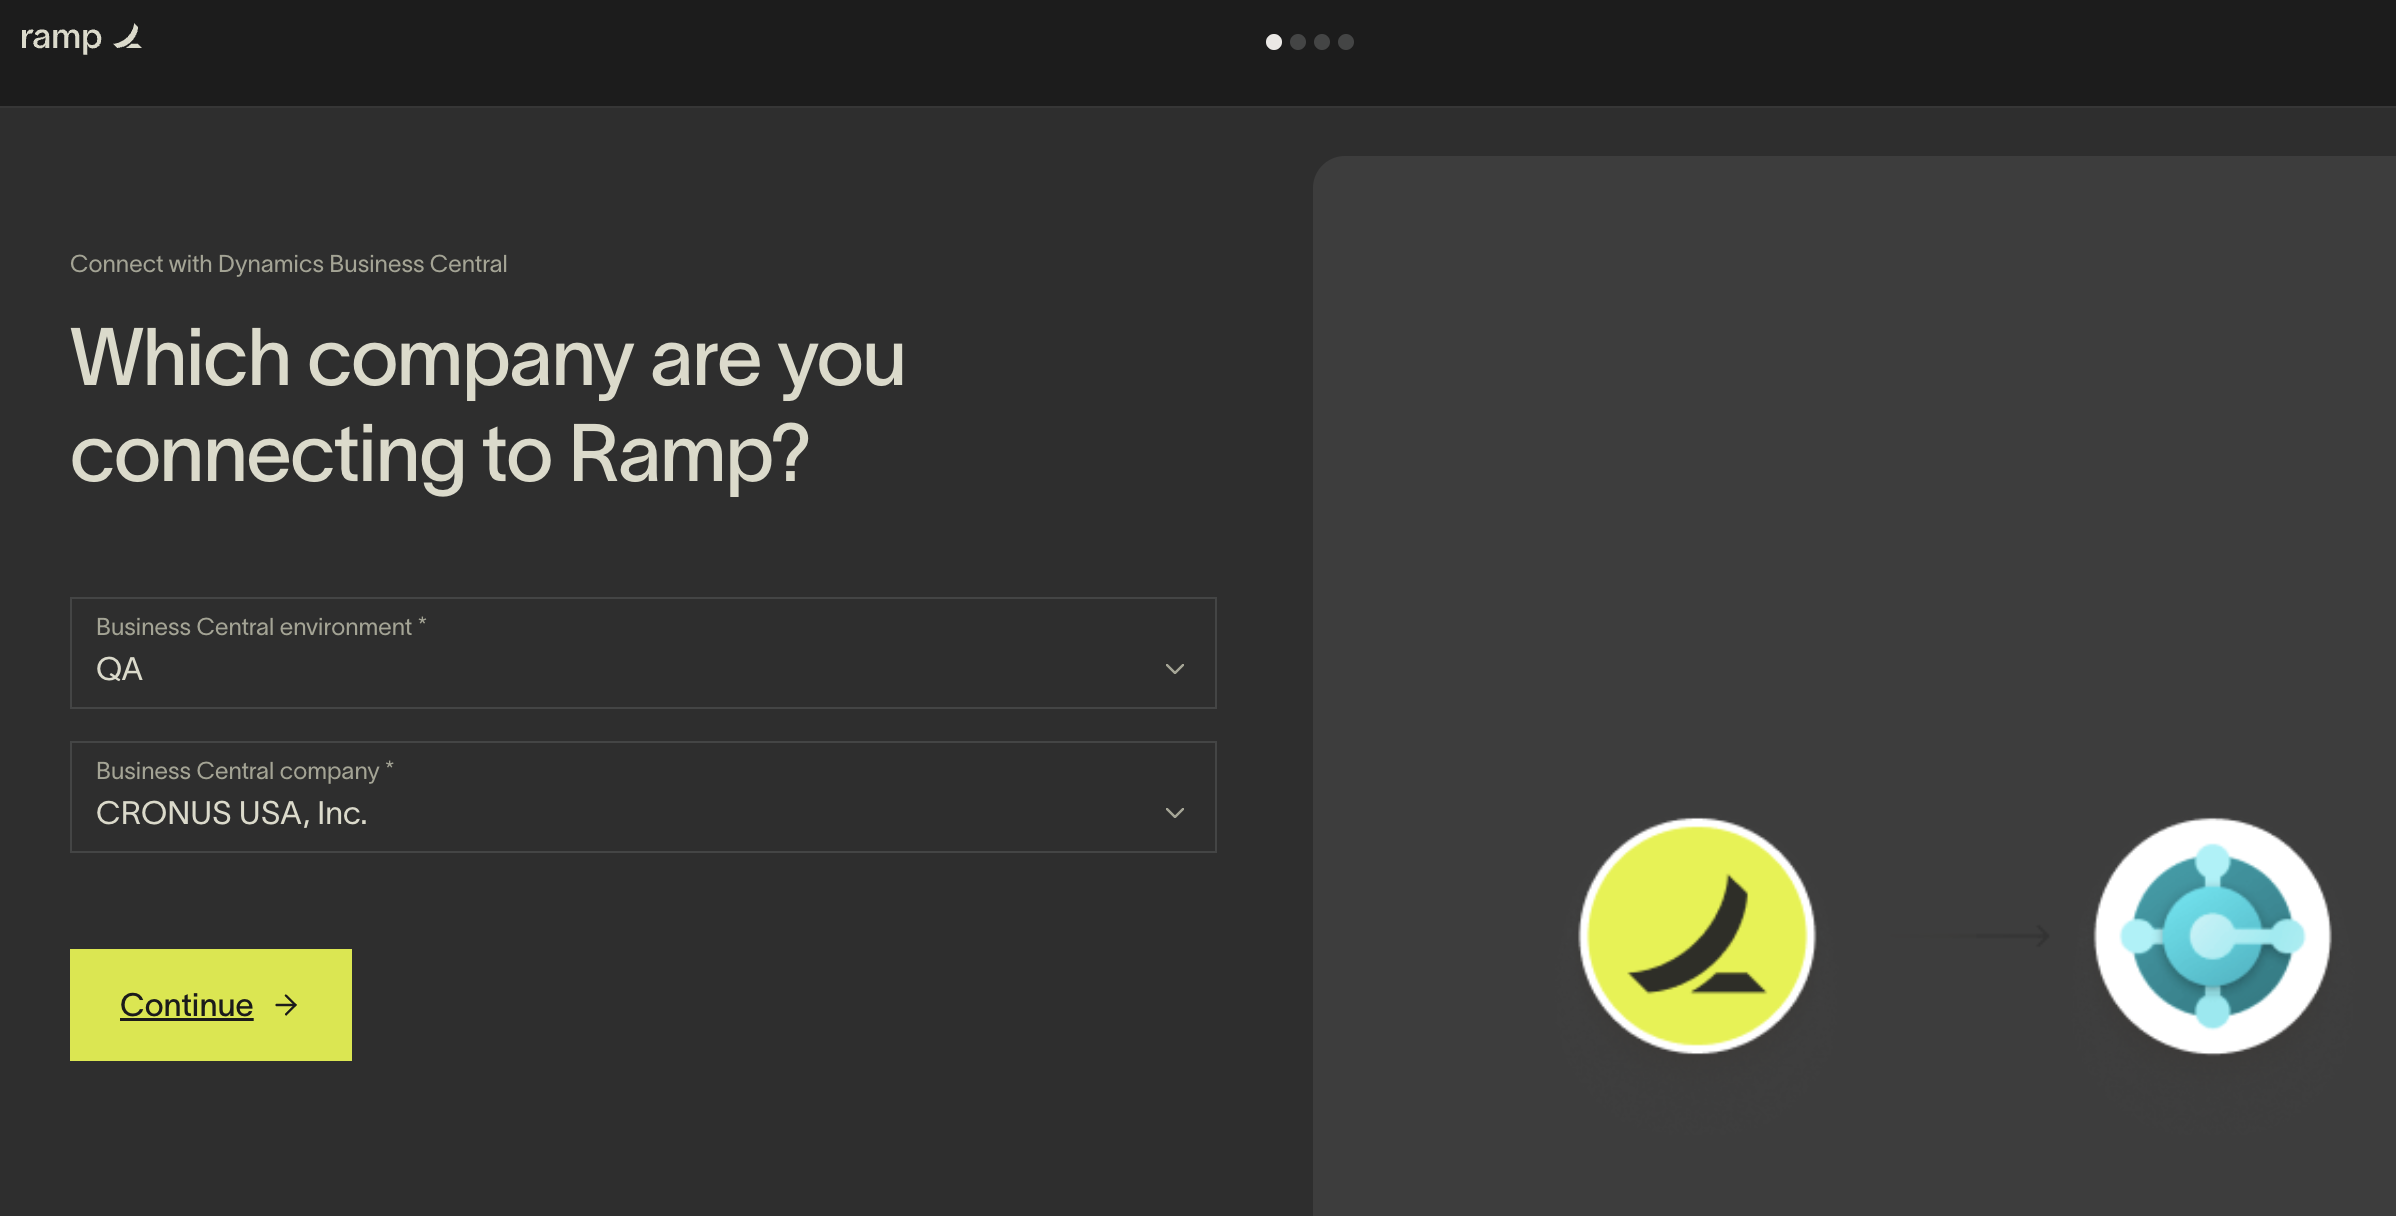
Step 3: Connect your company
- After signing in, you'll be redirected back to Ramp.
- You'll see a screen asking you to connect a company. Select your account environment (e.g., QA) and the company you wish to connect.
- Remember, Ramp currently supports connecting to one company at a time.
- Click Continue .
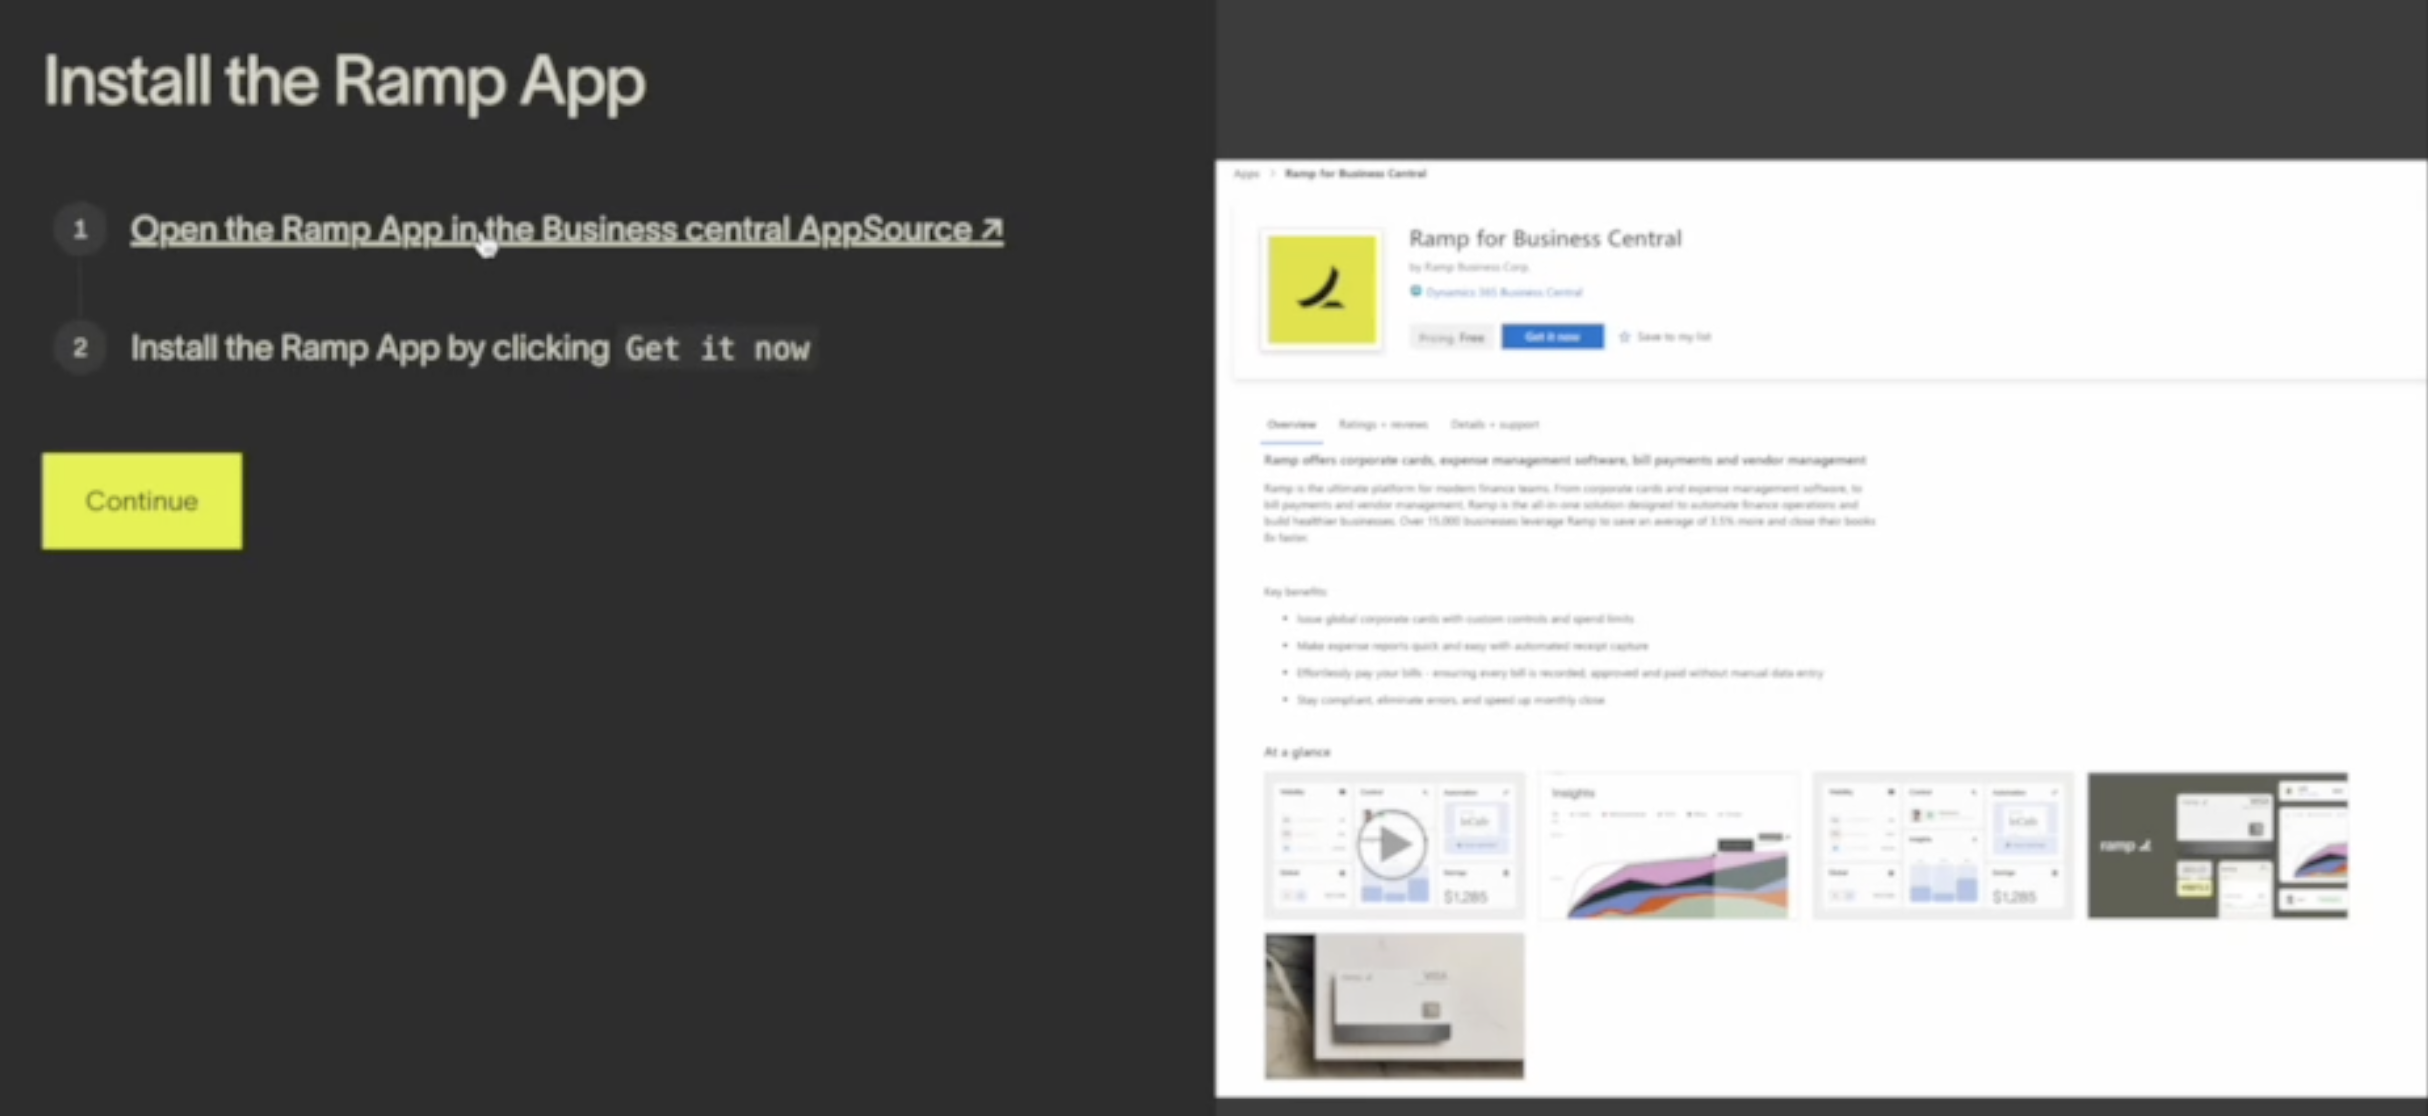
Step 4: Download and install the Ramp app
-
Click on the link provided to navigate to the AppSource app.
-
Select Get It Now and choose the specific environment you're using with Ramp.

-
Click Install . The installation might take a few minutes.

Step 5: Grant consent to the Ramp app
-
In Microsoft Dynamics Business Central, navigate toEntra Applications.
-
Find theRamp Connectorand, if you're an Azure admin, clickGrant Consent.
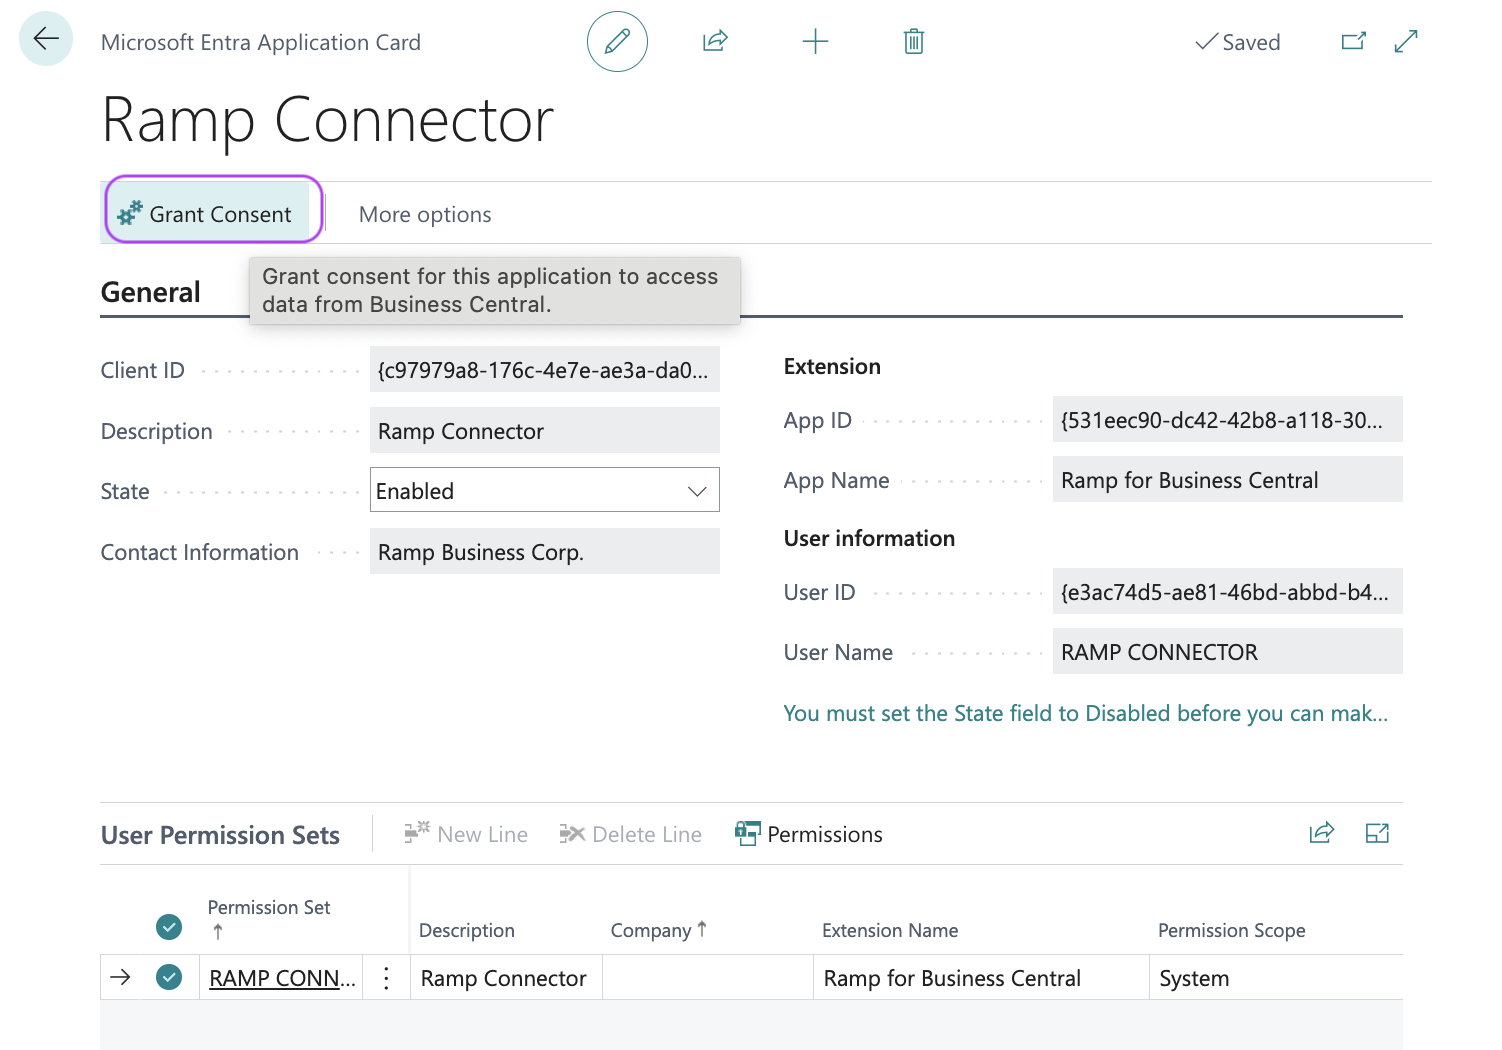
- Follow the prompts and clickAccept.
Step 6: Enable the Ramp connector permission set
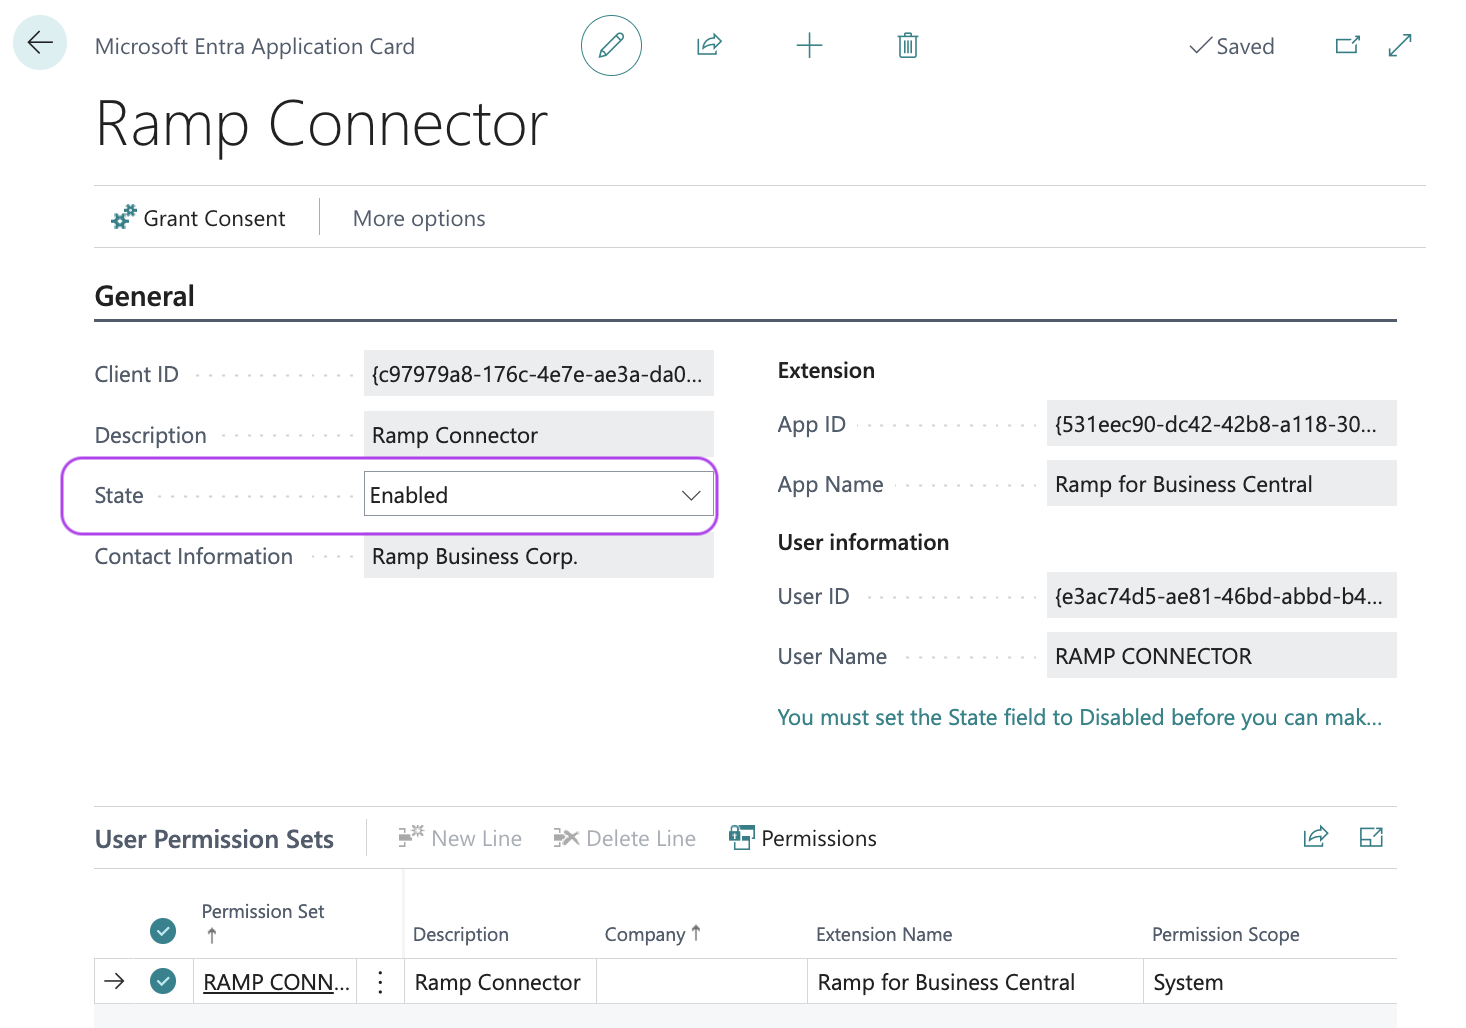
- Navigate toEntra Applicationsin Microsoft Dynamics Business Central.
2.Search for theRamp Connectorand change its state from disabled to enabled.
-
Confirm the creation of a user calledRamp Connectorby clickingYes.
-
Click openUser Permission Sets, not to be confused with UserGroups.
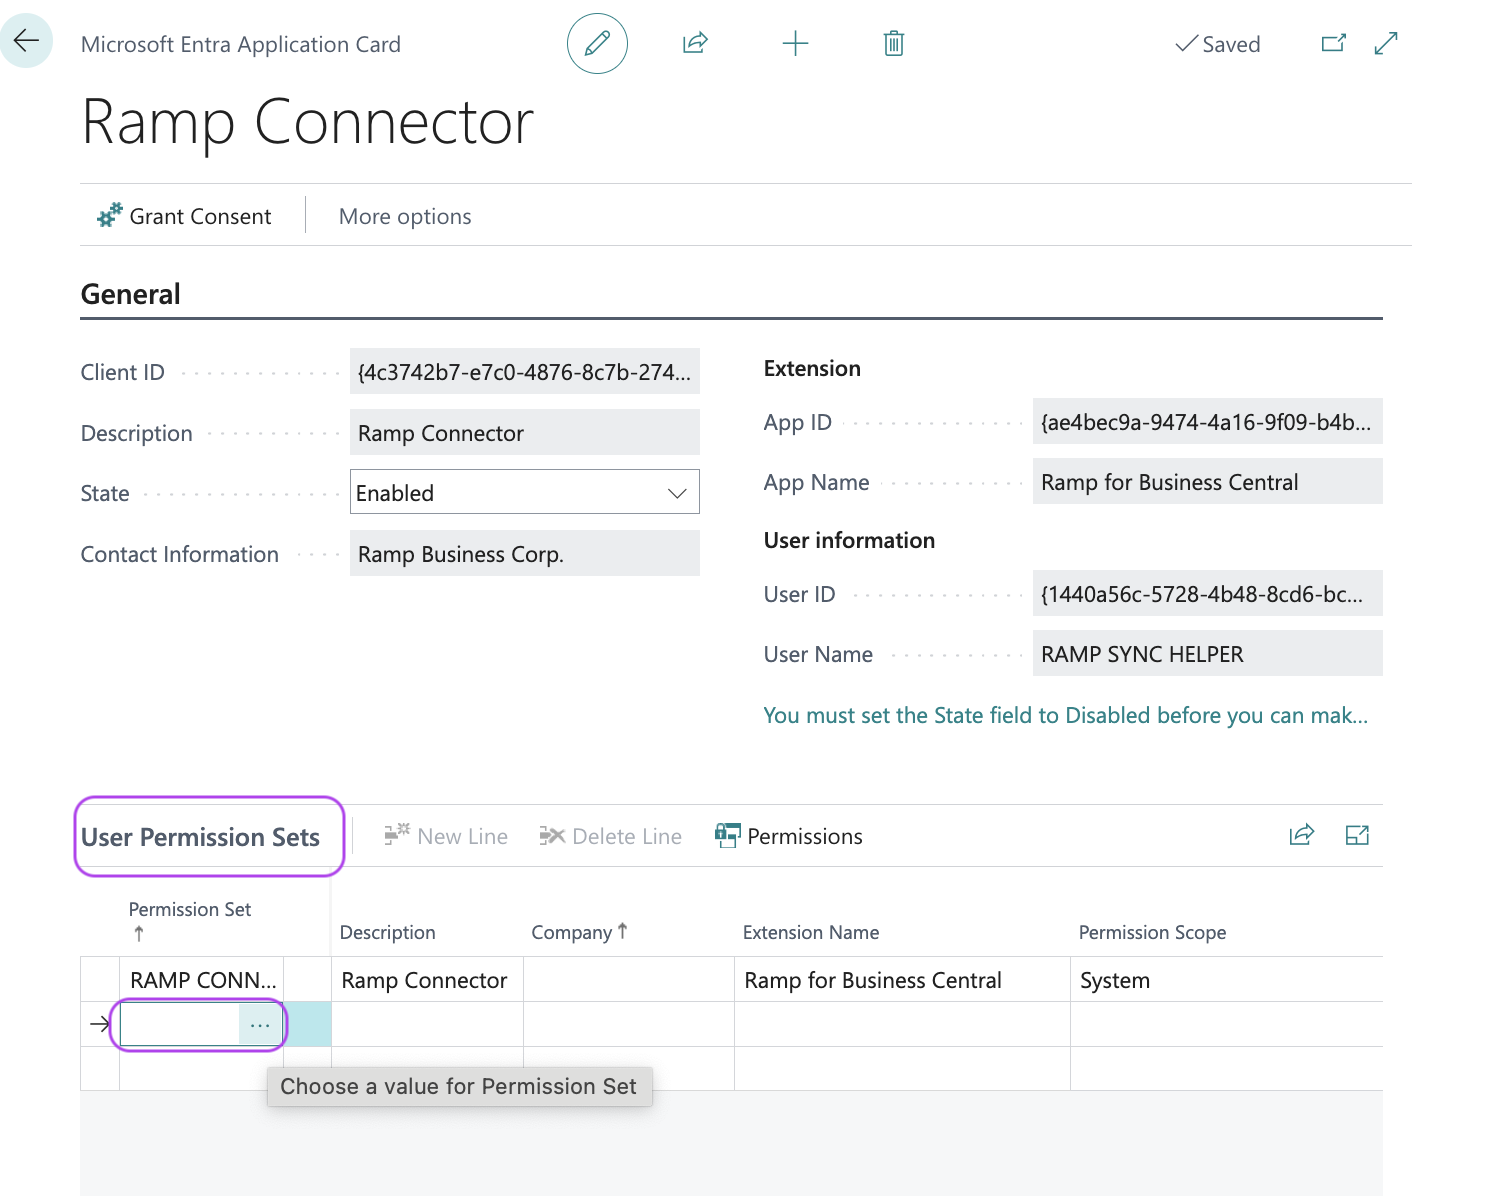
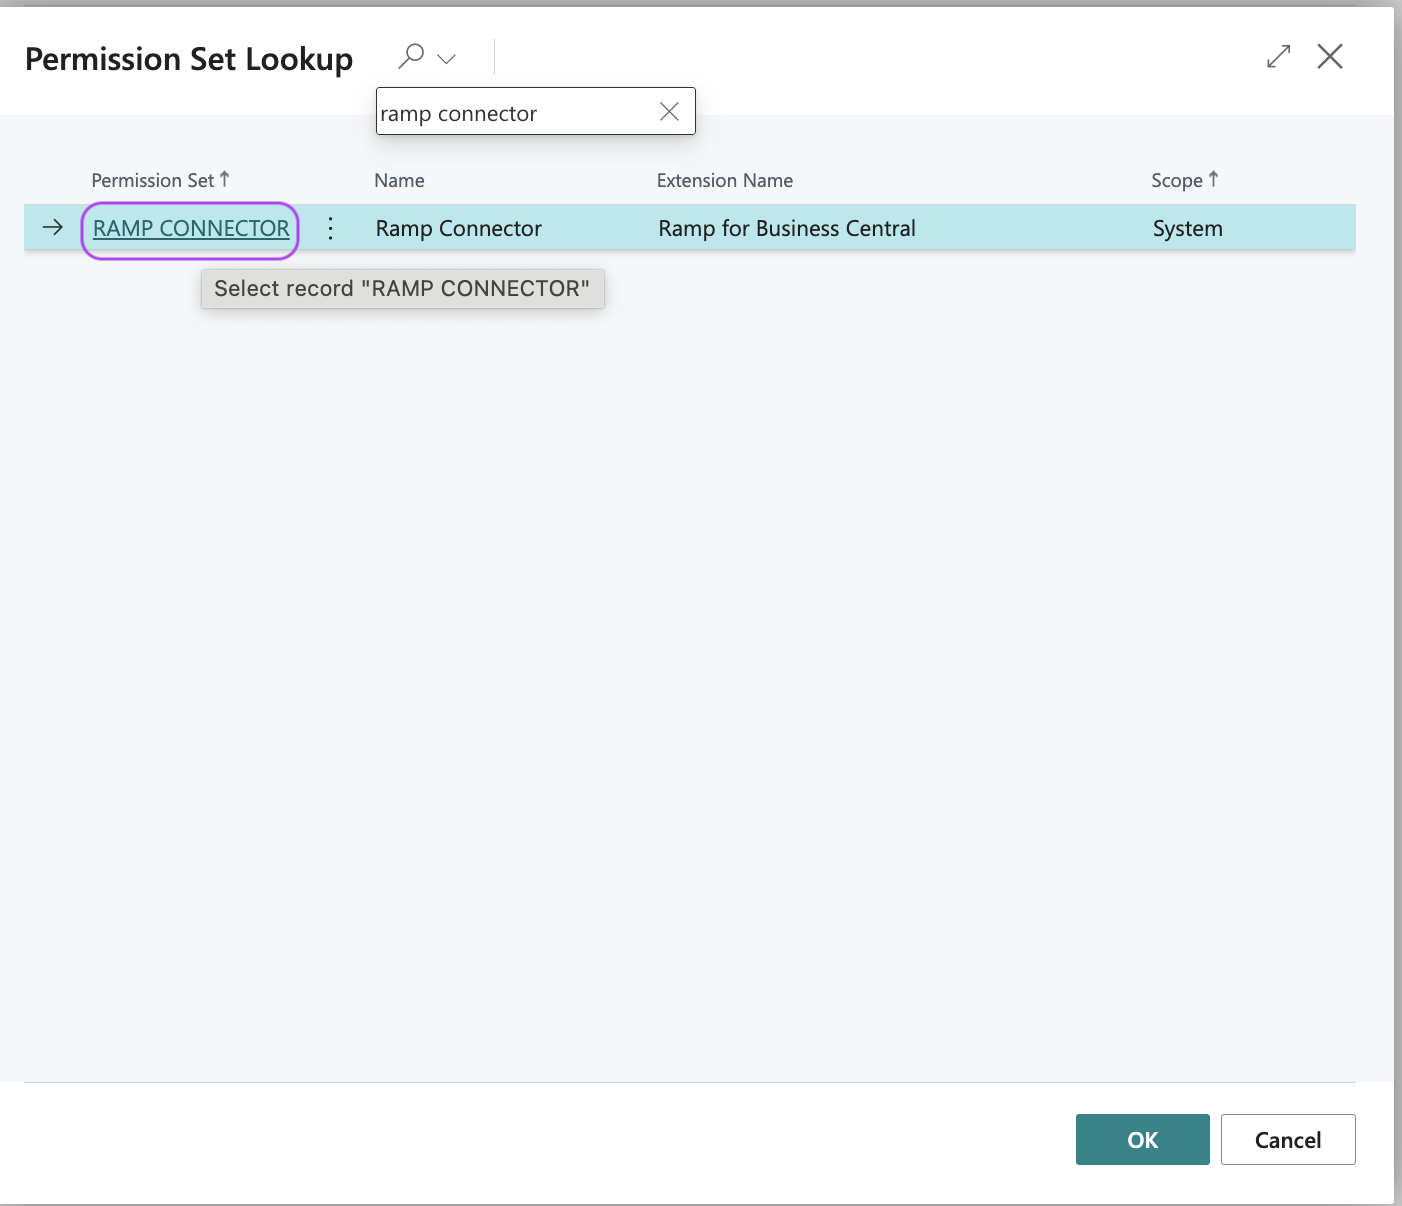
- Then, assign theRamp Connectorpermission set to this user.
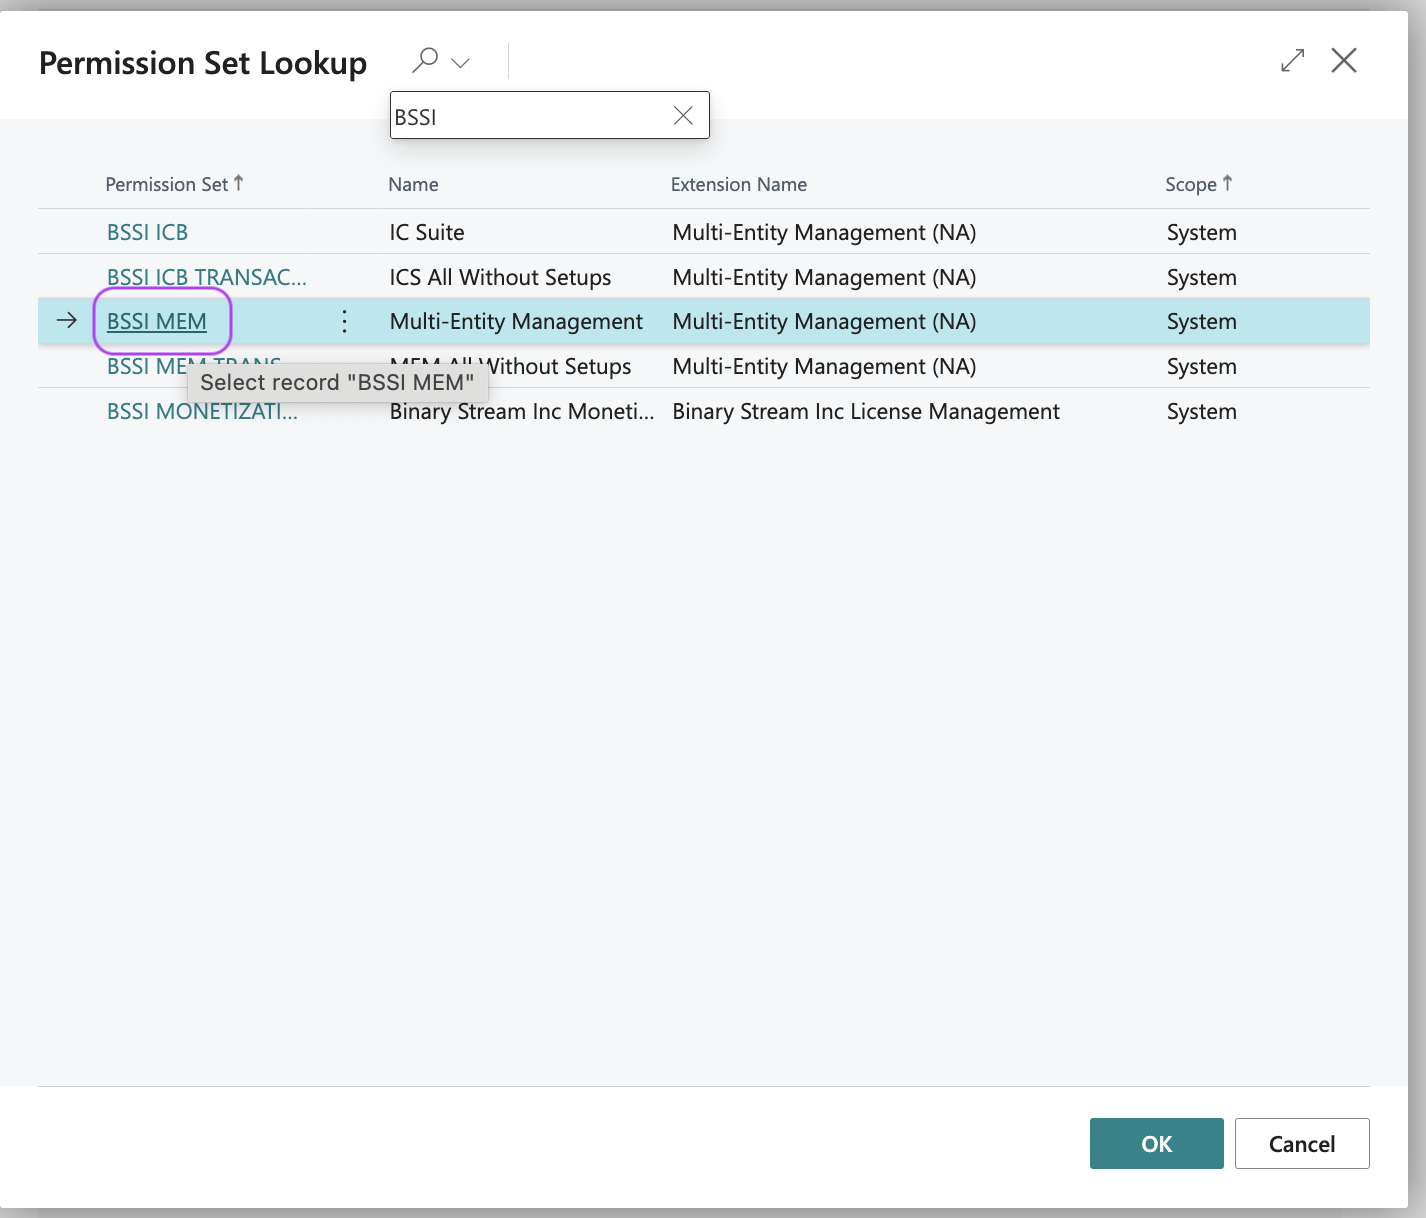
Step 7: Enable the BSSI MEM permission set
1.Click openUser Permission Sets, not to be confused with UserGroups.
- Then, assign the BSSI MEM permission set to this user.
Step 8: Map your Business Central entity to a Ramp entity
-
Return to Ramp and click Continue to complete the setup.
-
You will then be asked if you want to create a new liability account to track your Ramp card balance or use an existing one.
-
Select the appropriate option and click Continue .
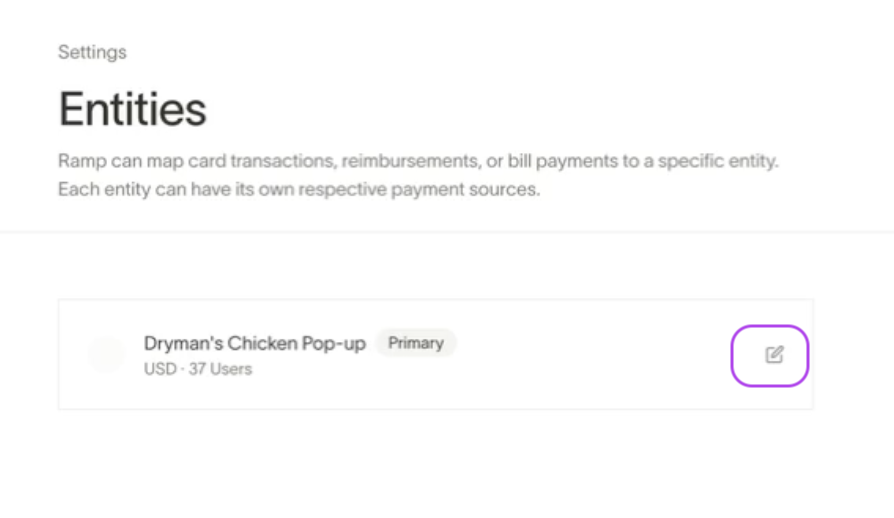
-
You will be routed to Ramp's Multi Entity configuration page. Click the Edit icon.
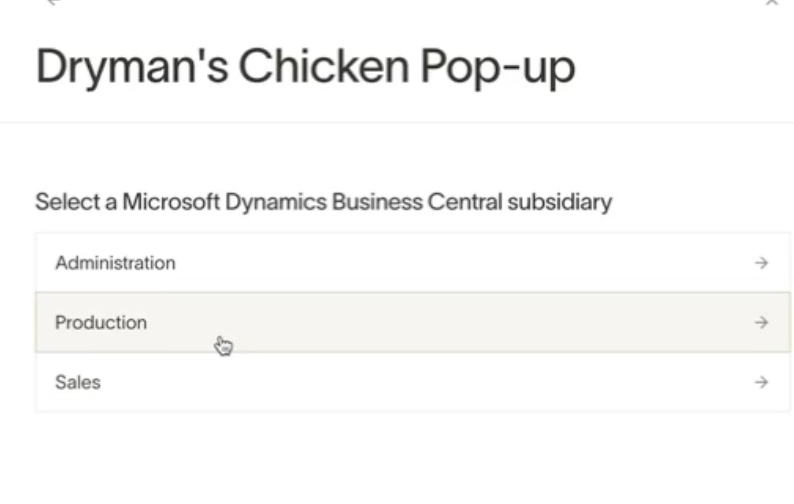
-
Next, click on Change or Assign subsidiary.

-
Next, click the subsidiary from Business Central that you want to map to your Ramp entity.
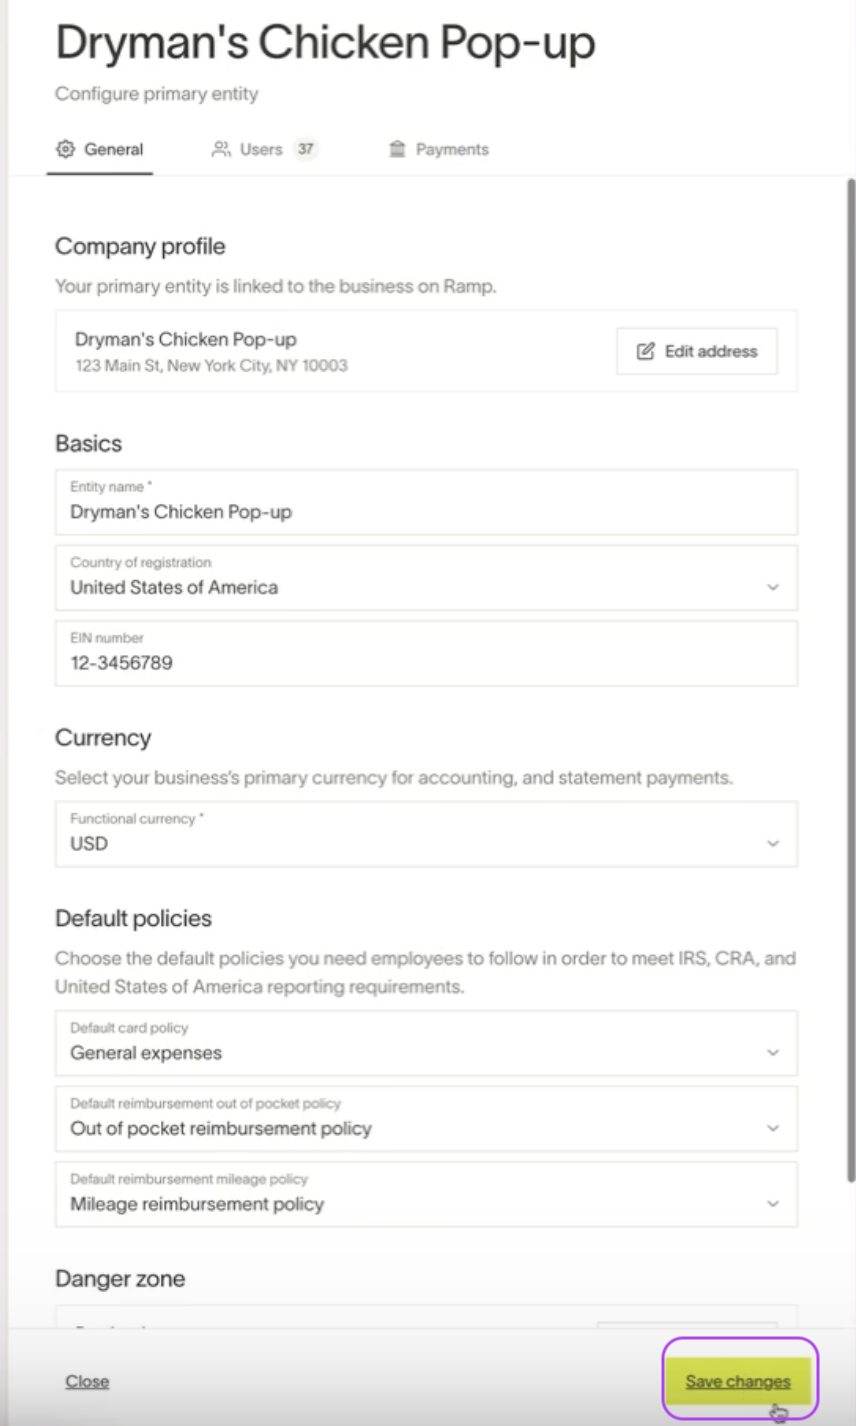
-
Finally, click Save Changes.
Step 9: Integration complete
Your Microsoft Dynamics Business Central is now connected to Ramp. Ramp will now synchronize with your dimensions, such as vendors, and apply them to credit card transactions and employee reimbursements as applicable.