Bill Pay for Universal CSV and QuickBooks Desktop setup
Overview
The following user guide will walk you through setting up your chart of accounts, transaction fields, vendor list, etc., within Ramp and exporting your bill payments to your accounting provider. If you would like more information on setting up Ramp Accounting for Universal CSV and QuickBooks Desktop, you can read the following: Universal CSV Overview and QuickBooks Desktop Overview. More details on the Bill Pay product can be found on this page: Bill Pay Overview

Setup for QuickBooks Desktop (using IIF file format)
Export your required files from QuickBooks Desktop
- Create a liability account to track Card expenses in your accounting platform. Most clients call the account “Ramp Card.”
- Download an IIF file (File > Utilities > Export > Lists to IIF files) containing your chart of accounts, customer list, vendor list, and class list.
- Check out these instructions for how you can export IFF files
Import your required files into Ramp
- Navigate to Accounting > Bill Pay. You’ll see the screenshot below.
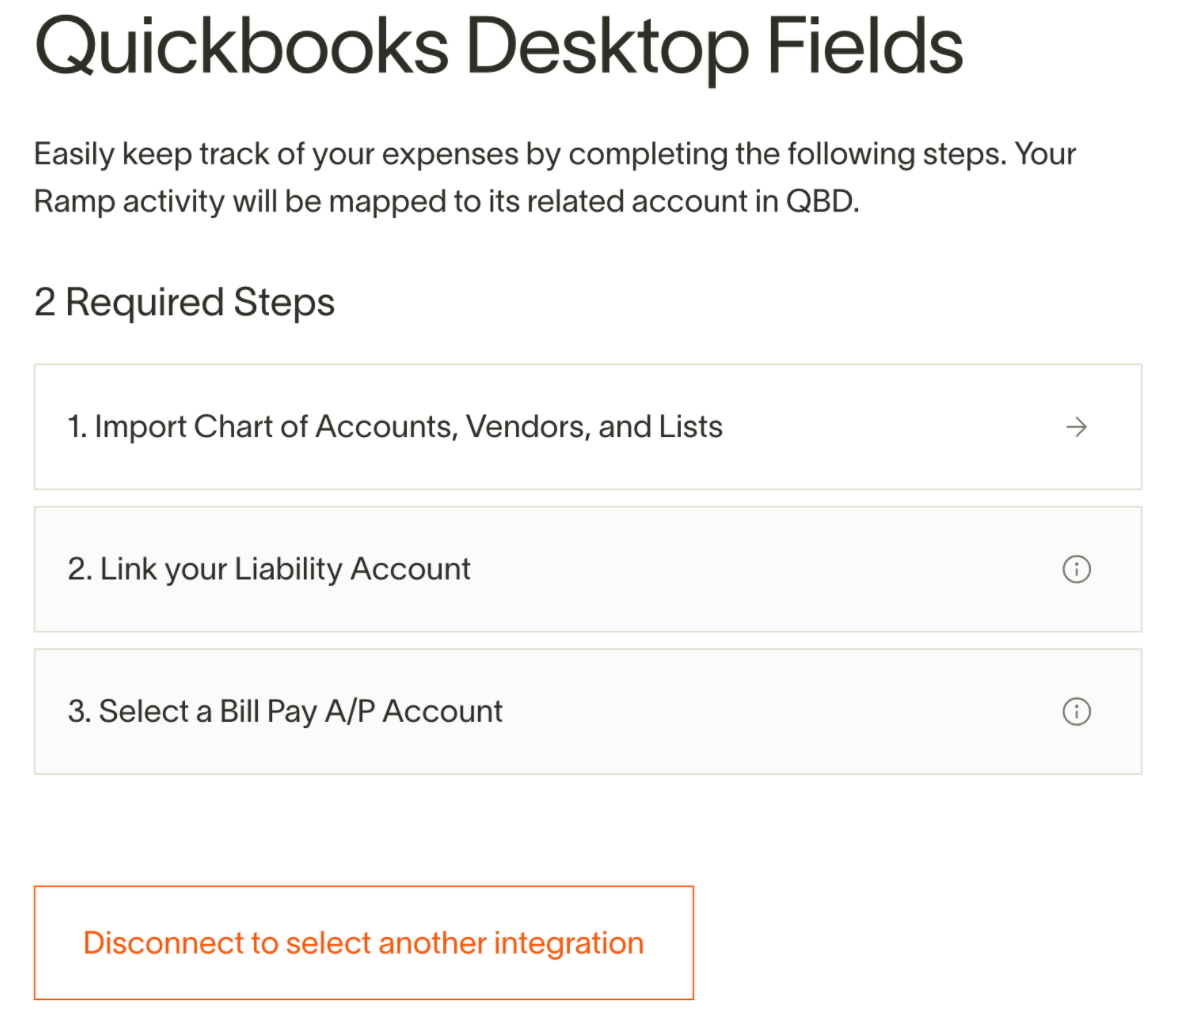
- Import the IIF file containing your chart of accounts, vendors, and lists. Link your liability account and the Bill Pay AP account you use. Now, you’ve fully set up the QuickBooks Desktop accounting integration for both the Ramp card and Bill Pay products.
- Navigate to Bills and begin uploading bills.
Setup for Universal CSV (non-QuickBooks desktop software)
Export your required files from your accounting provider
- Download a .csv file for your Chart of Accounts
- Download a .csv file for each additional transaction field you use for coding bills
- Example: if you want to code transactions by Department, Location, Class and Customer, you will have four different .csv files
- Identify the cash account in your accounting platform that corresponds to the bank account that you plan to use to pay bills and has been connected to Ramp.
- Write down the account name and GL code number
- Download a .csv file with all the vendors you pay
- the name of the vendor (make sure the second column, Column B, that has the vendor names has the header: ‘Vendor’)
- Segment ID (make sure the first column, Column A, that has the Segment IDs has the header: ‘Segment ID’)
- Optional column: the unique ID that your accounting provider assigns to the vendor
Import your chart of accounts into Ramp
- Sign in to Ramp as an Administrator or Business Owner
- Navigate to Accounting > Bill Payments > All Other Providers
- Add the account name and GL code number (ID) for the cash account you use to pay bills
- Click on “Import Chart of Accounts”
- Using the template downloaded from inside Ramp, format your Chart of Accounts downloaded from the Accounting Provider in step 2 above.
- Import the newly formatted Chart of Accounts
Import your vendor list into Ramp
- Download the “Vendor template” CSV. Using your downloaded list of vendors, format your vendors to match this format.
- Upload this reformatted list of vendors on this page,
- Navigate to Bills and begin uploading bills.
Exporting bills from Ramp to upload into your accounting provider
With our UCSV and QuickBooks Desktop integrations, bills can be exported from theAccounting> Bill Payments page. We've written more about which bills can be exported here.
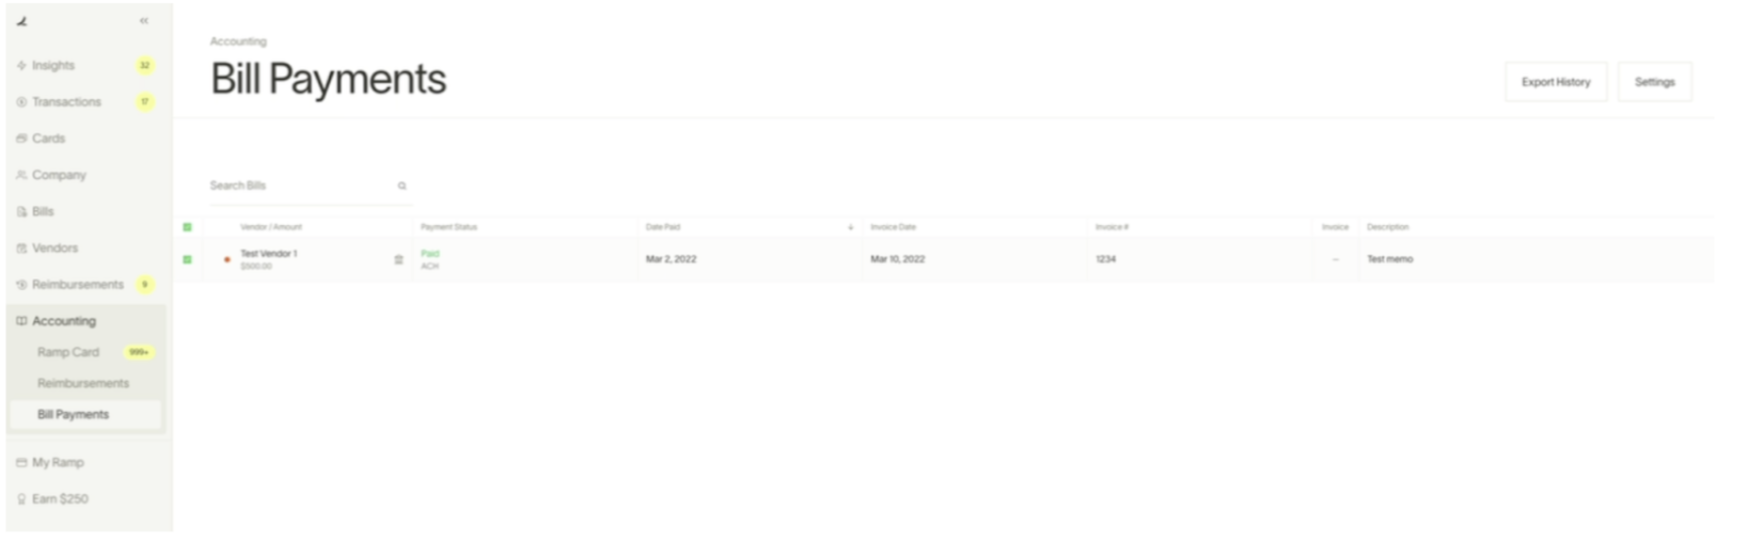
If this is the first time you've paid a vendor, you'll create a new vendor when you pay the bill. On the next screen, you'll see all the bills and vendors to be exported.
This will download two CSV files: one with any new vendors you've created and another with journal entries for the bills you've paid. In the bills file, we create two journal entries per bill: a) the bill itself and b) the bill payment.
*If you're using QuickBooks Desktop:*you'll have the ability to export a single IIF file containing bills, payments, and vendors. You can then import this in one step and you're done.
Import your bills and vendors into your accounting software
This process depends on your accounting system.If you're using QuickBooks Desktop, here's a helpful guide.
(Optional) add your accounting system's IDs to your vendors and re-import them into Ramp
So you've exported your vendors once. How can you ensure that future bills you pay to those same vendors you've already exported are synced to the correct vendors on your accounting system?
Some accounting providers will require you to upload bills matched to vendors by their ID. If you're uploading bills for vendors you've paid before and the import fails, this may be the problem.
To solve this:
- Export new vendors from Ramp and import them into your accounting software
- Then, export those vendors from your accounting software with their unique ID
- Go to Accounting > Bill Payments > Settings and download the vendor CSV template. Format the vendor list you just exported with the unique ID in the same format as the vendor CSV template, then upload this to Ramp.