Microsoft Entra integration: Set up SAML SSO
Note: This article primarily applies to Ramp Administrators. Cardholders may find other articles in theRamp overviewsection to be more applicable.
Overview
If your company uses Microsoft Entra ID (fka Azure Active Directory), you can set up the single sign-on feature for use with Ramp. This gives your employees the convenience of a one-click sign-in, without using additional multi-factor authentication.
Set up Microsoft Entra ID on Ramp
Step 1
Begin the setup process in Ramp by clicking Begin setup under Identity providers. SelectMicrosoft Entra ID from the new page to see the step-by-step guide.
Step 2
Setup Microsoft Entra ID SAML Application:
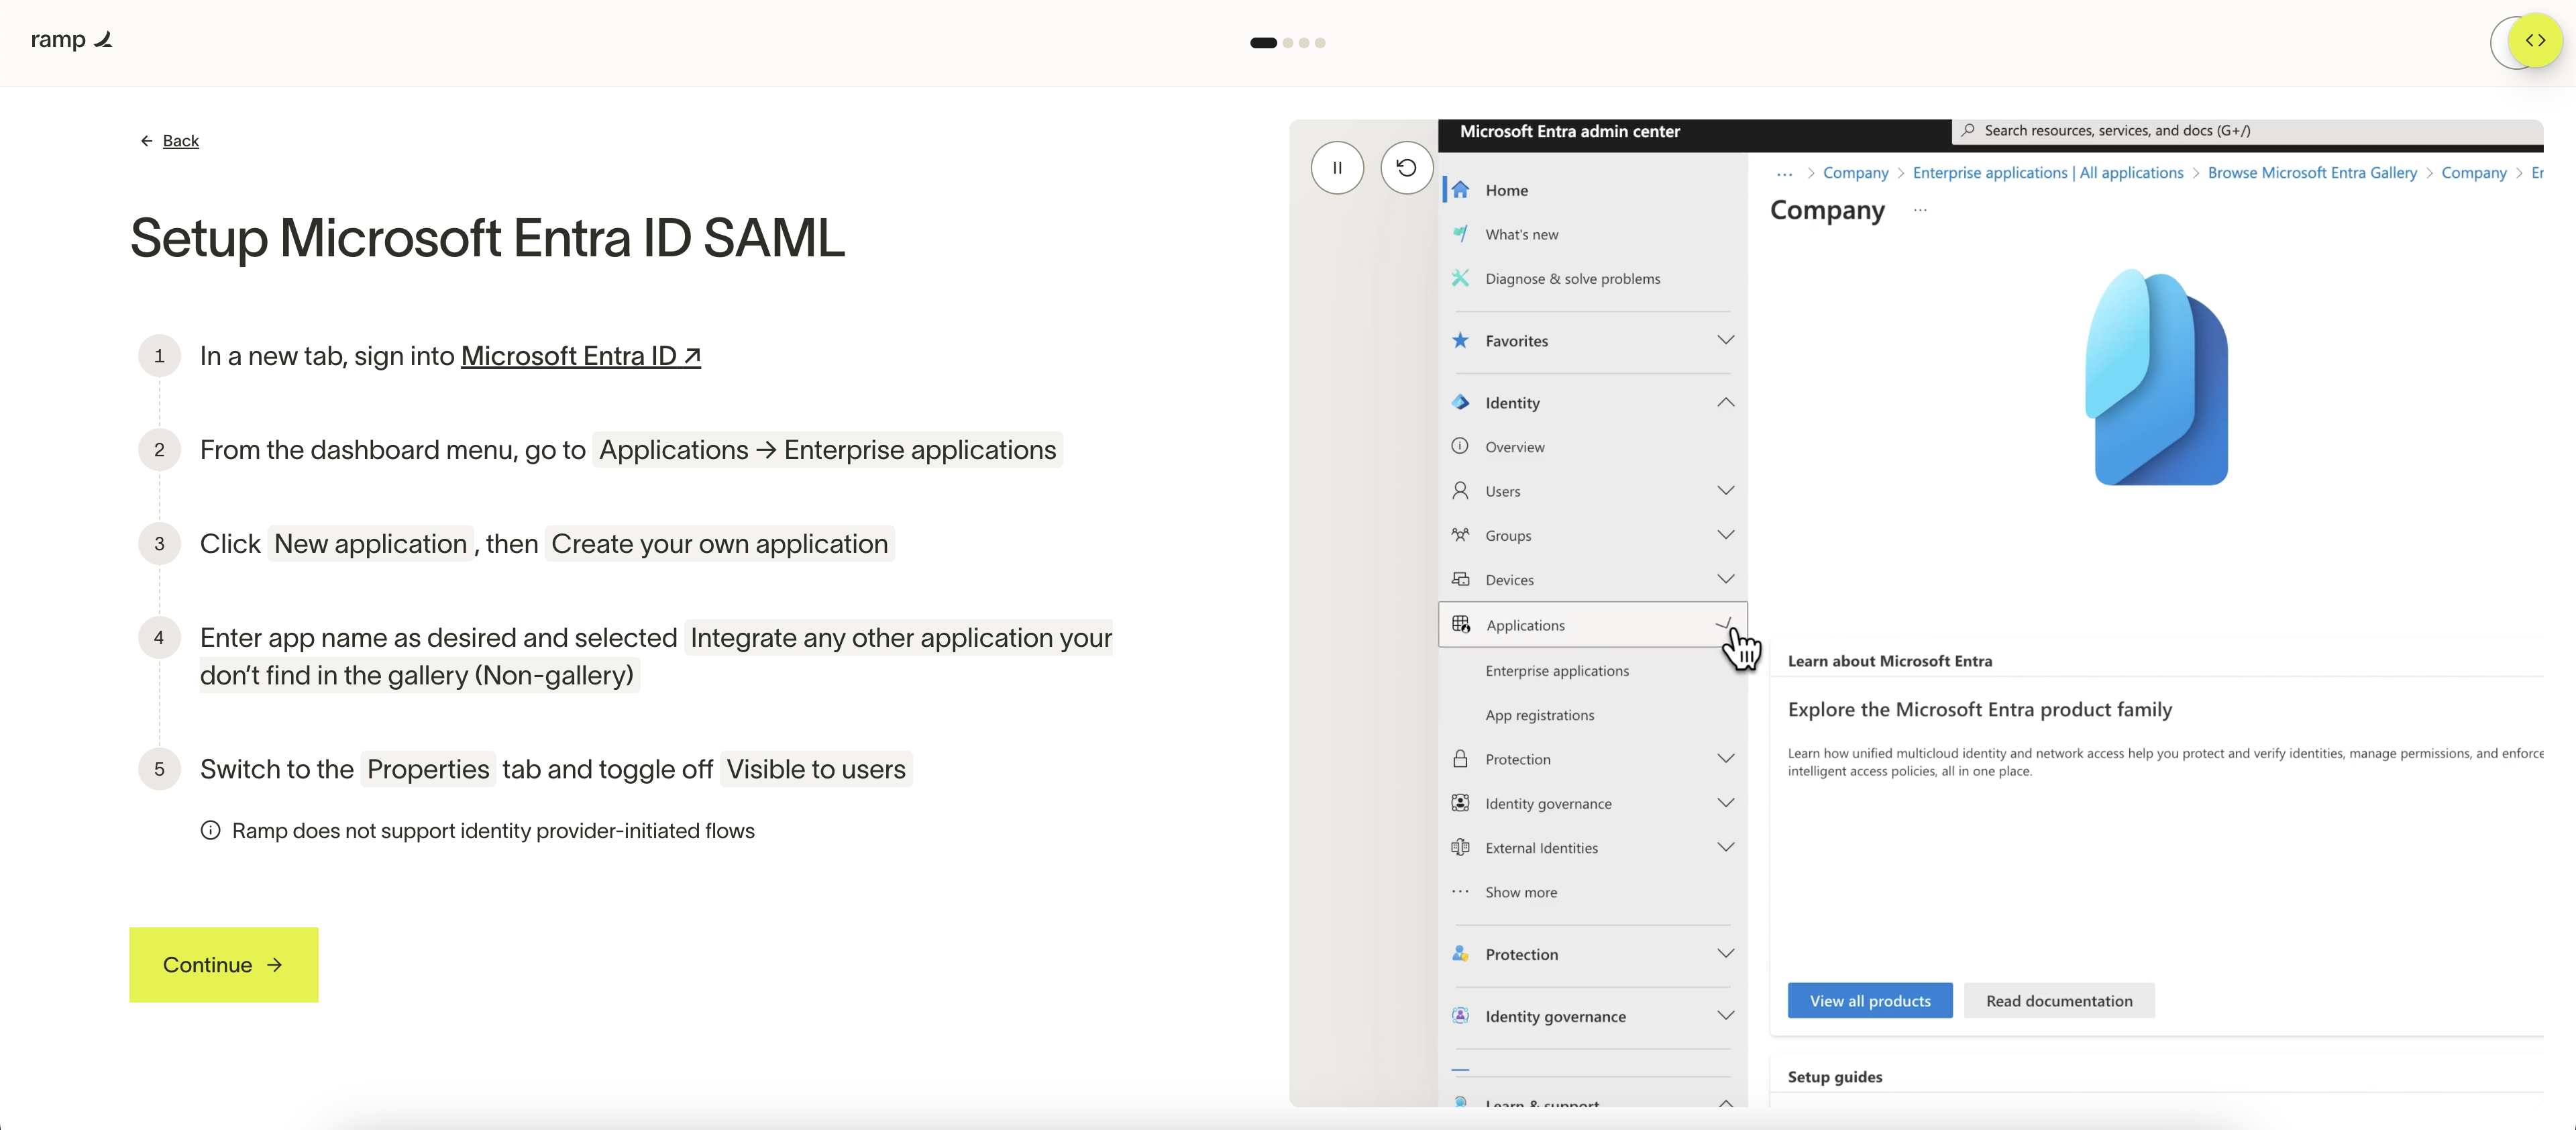
- Sign in to Microsoft Entra ID and click on Enterprise Applications in the left sidebar.
- Click on the +New application button.
- Click on the +Create your own application.
- Choose Integrate any other application you don't find in the gallery (Non-gallery)" and click Create.
- Switch to the Properties tab and toggle off Visible to users.
- At this point, go back to the Ramp application and click Continue.
Step 3
Configure Microsoft Entra ID SAML Application:
-
Switch to the Overview tab in Microsoft.
-
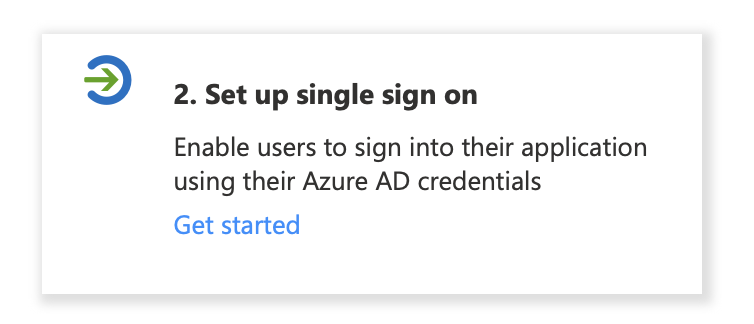
Click on Set up single sign on and choose SAML.
-
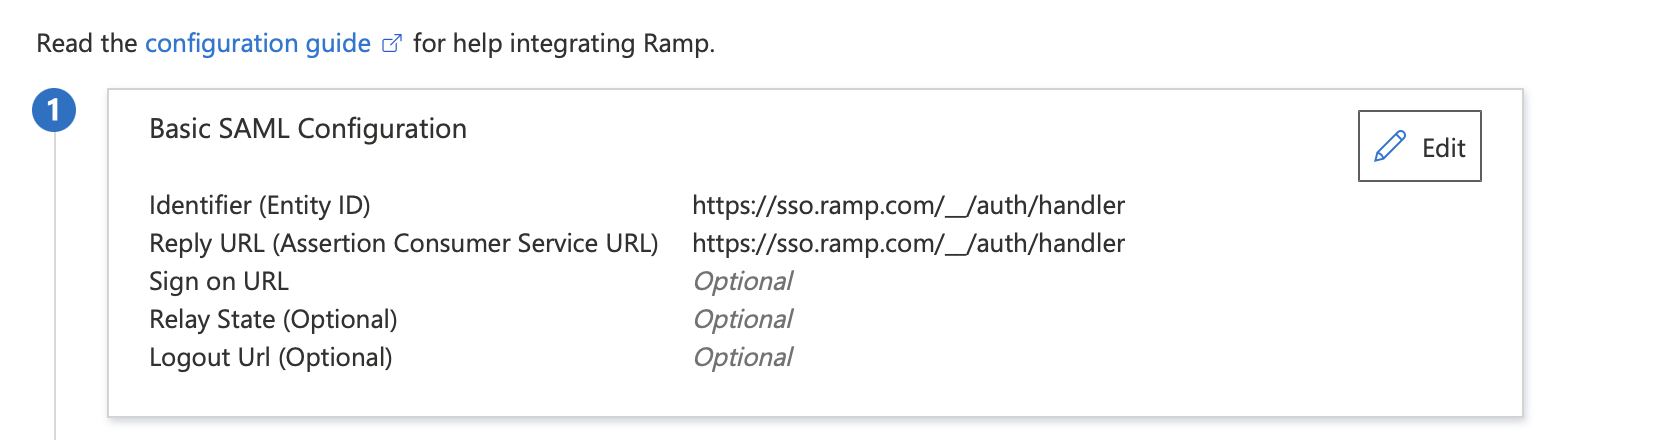
In the Basic SAML Configuration section, click Edit.
-
Copy the following handler URL, paste it in for Identifier (Entity ID) and Reply URL, then click Save.
https://sso.ramp.com/__/auth/handler
Step 4
Setup SAML claims in Entra:
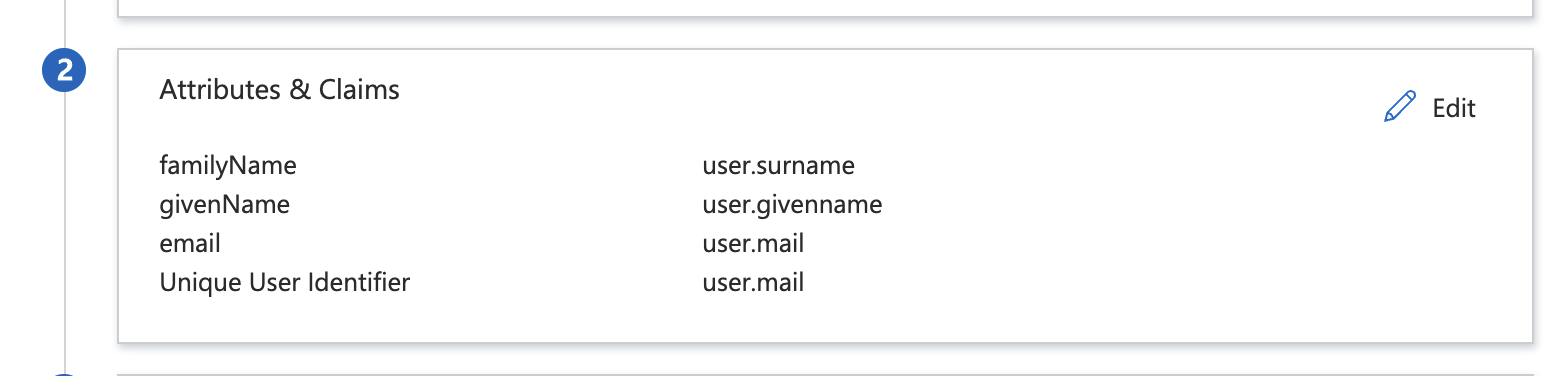
- Under the Attributes****and Claims section, click Edit.
- Configure the Required claim section with the Unique Identifier ID with user.mail , user.userprincipalname , or equivalent. See Important Notes below for details.
- Delete any existing Additional Claims, then add the following below:
- givenName: user.givenname
- familyName: user.surname
- email: user.mail
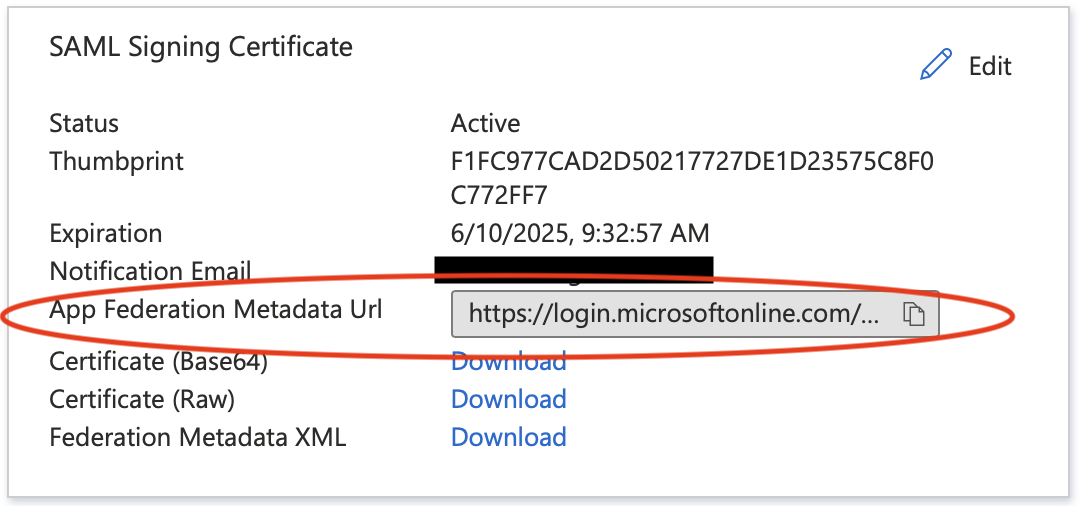
- Under SAML certificate, copy the App Federation Metadata Url from the Entra ID page, navigate back to Ramp, and paste it into the App Federation Metadata URL field.
Here's where this appears in Entra ID:
Important notes
Please make sure to preserve capitalization for the names above, for example, "givenName" (make sure the 'N' is capitalized). Also, claim values can be different in your system if they have been customized. The most important factor in a correct setup is that each of the claims listed above corresponds to the following user info, even if the mapped attribute source is different:
- Unique User Identifier (Name ID): User's email address
- givenName: User's first name
- familyName: User's last name
- email: User's email address
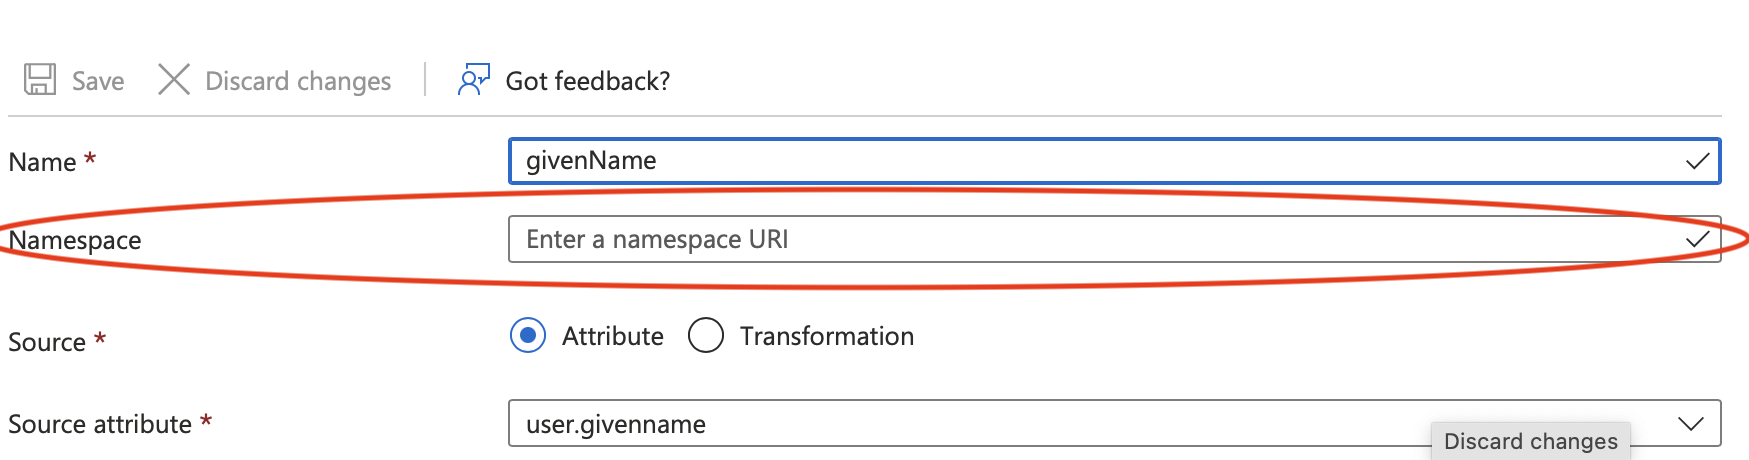
When configuring the claims, make sure to set the "namespace" field for ALL attributes to empty:
Step 5
Complete setup:
-
In Microsoft Entra ID, switch to the Users and groups tab to assign users to the application.
-
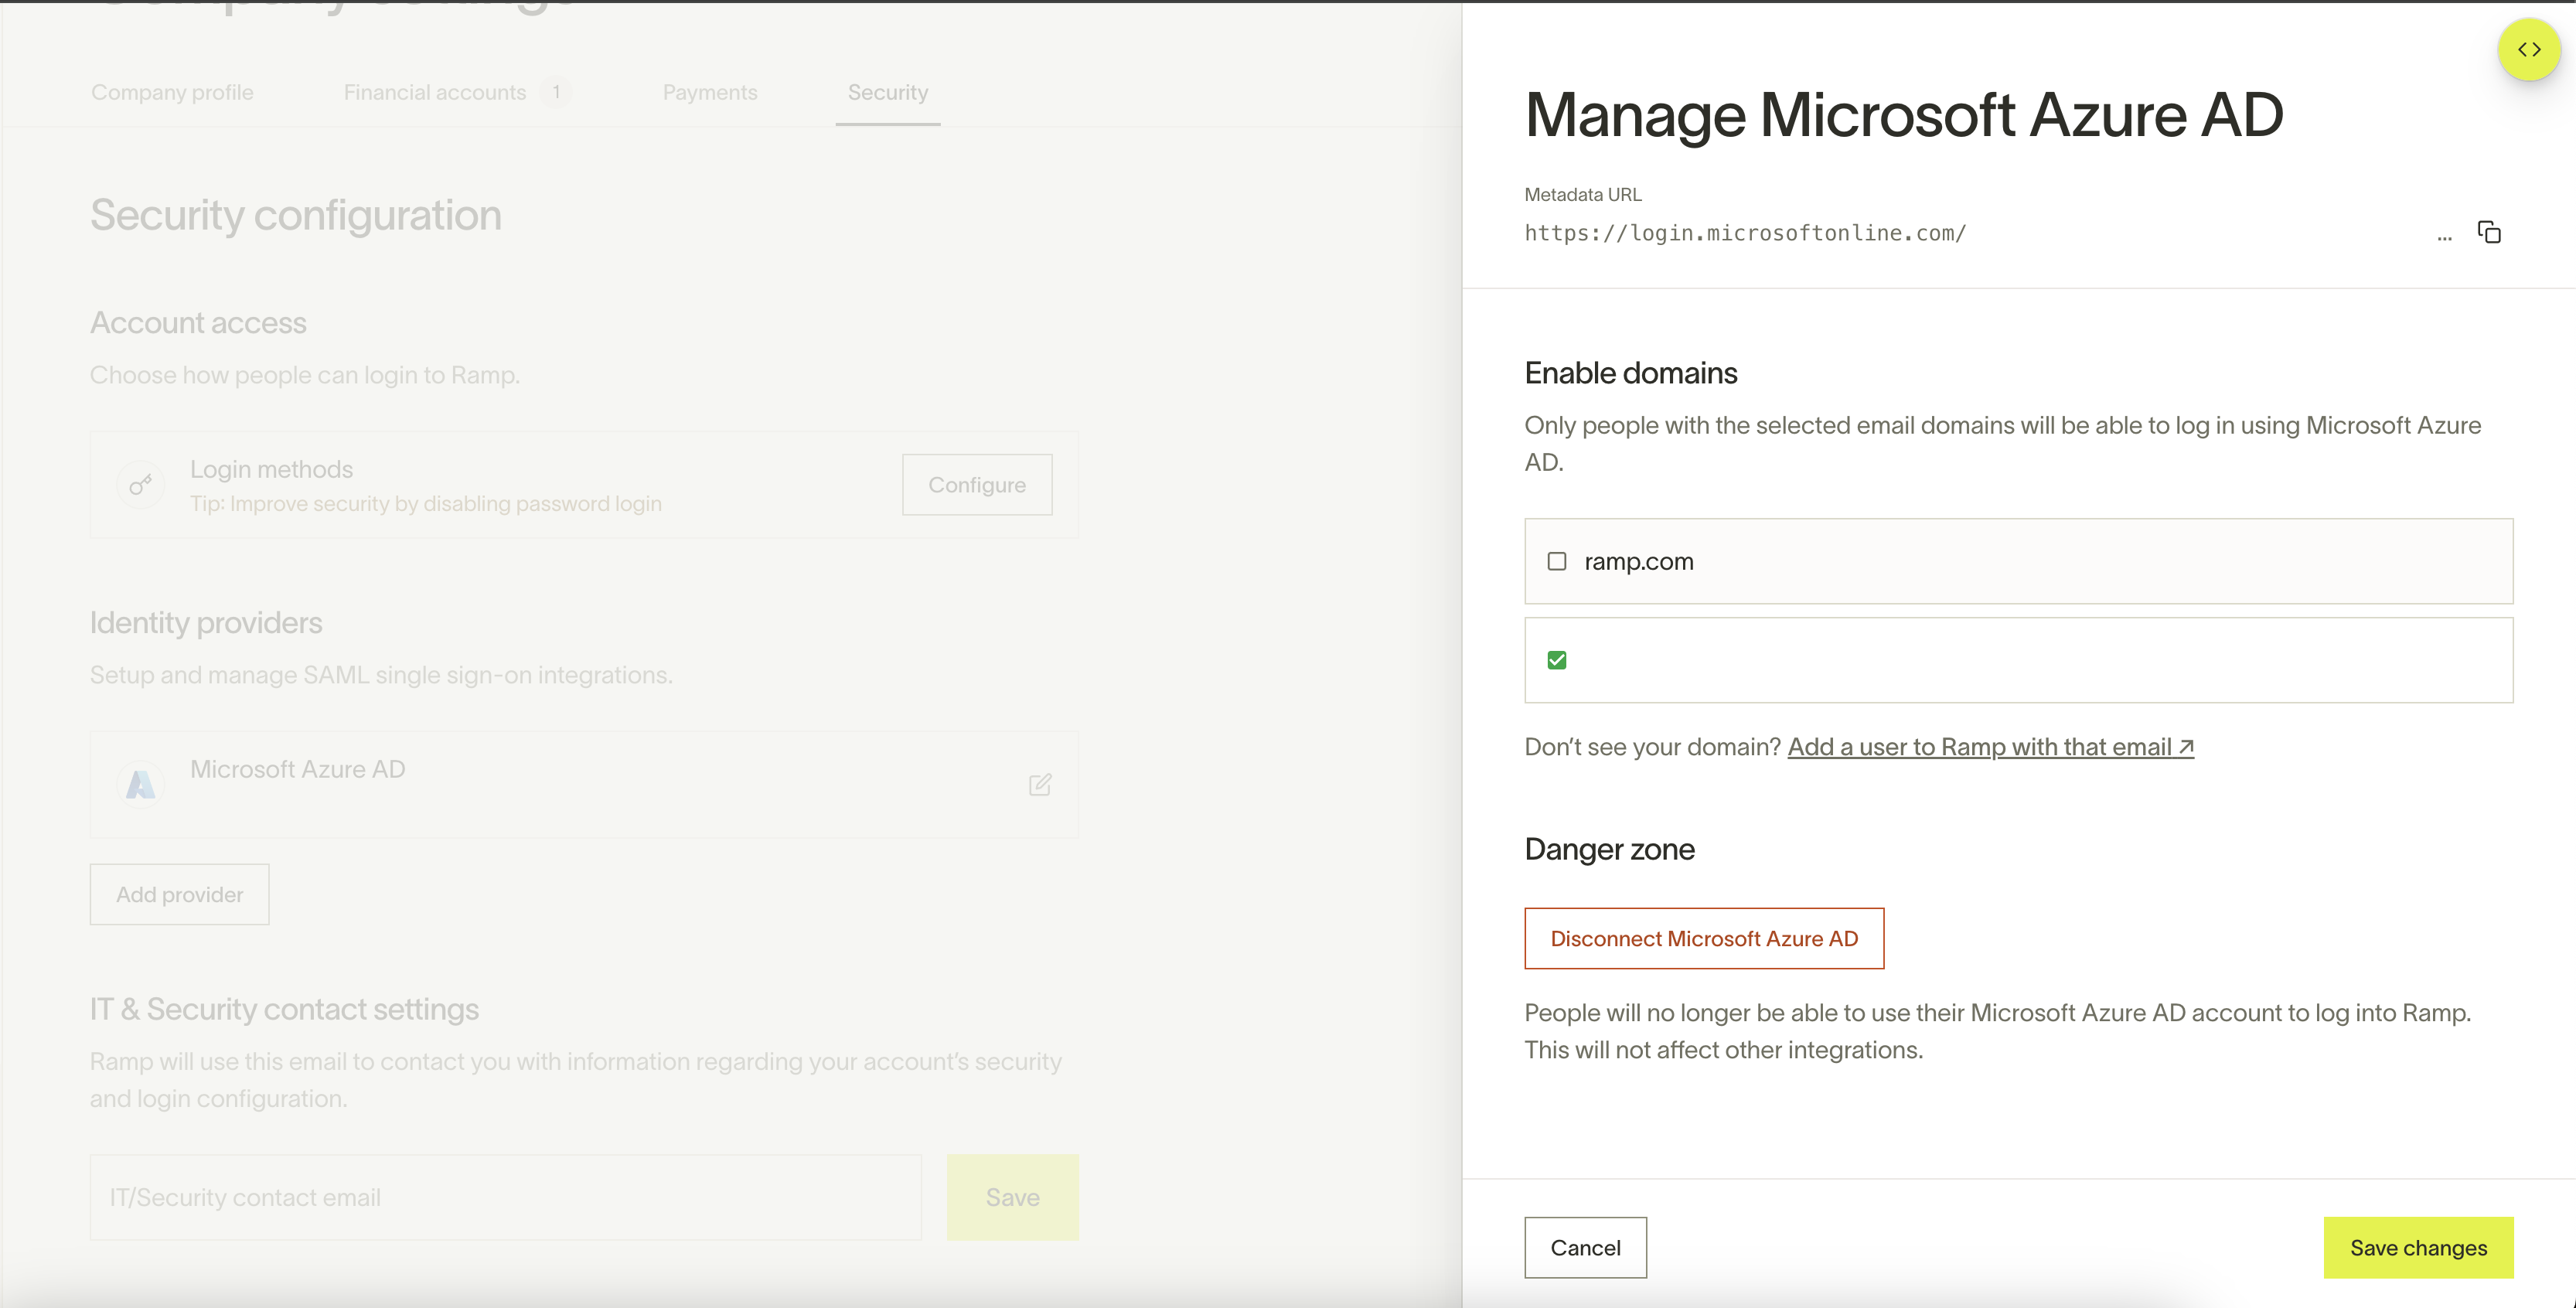
In Ramp, select the email domains to enable in Okta. Email domains in existing use by this IdP will be locked.
-
Click Exit and test to test the flow.
-
Upon successful test sign-in, you will be directed to the Sign-in methods tab, with Microsoft Entra ID now displayed as a method for each user role.
Here's how this will appear in Ramp: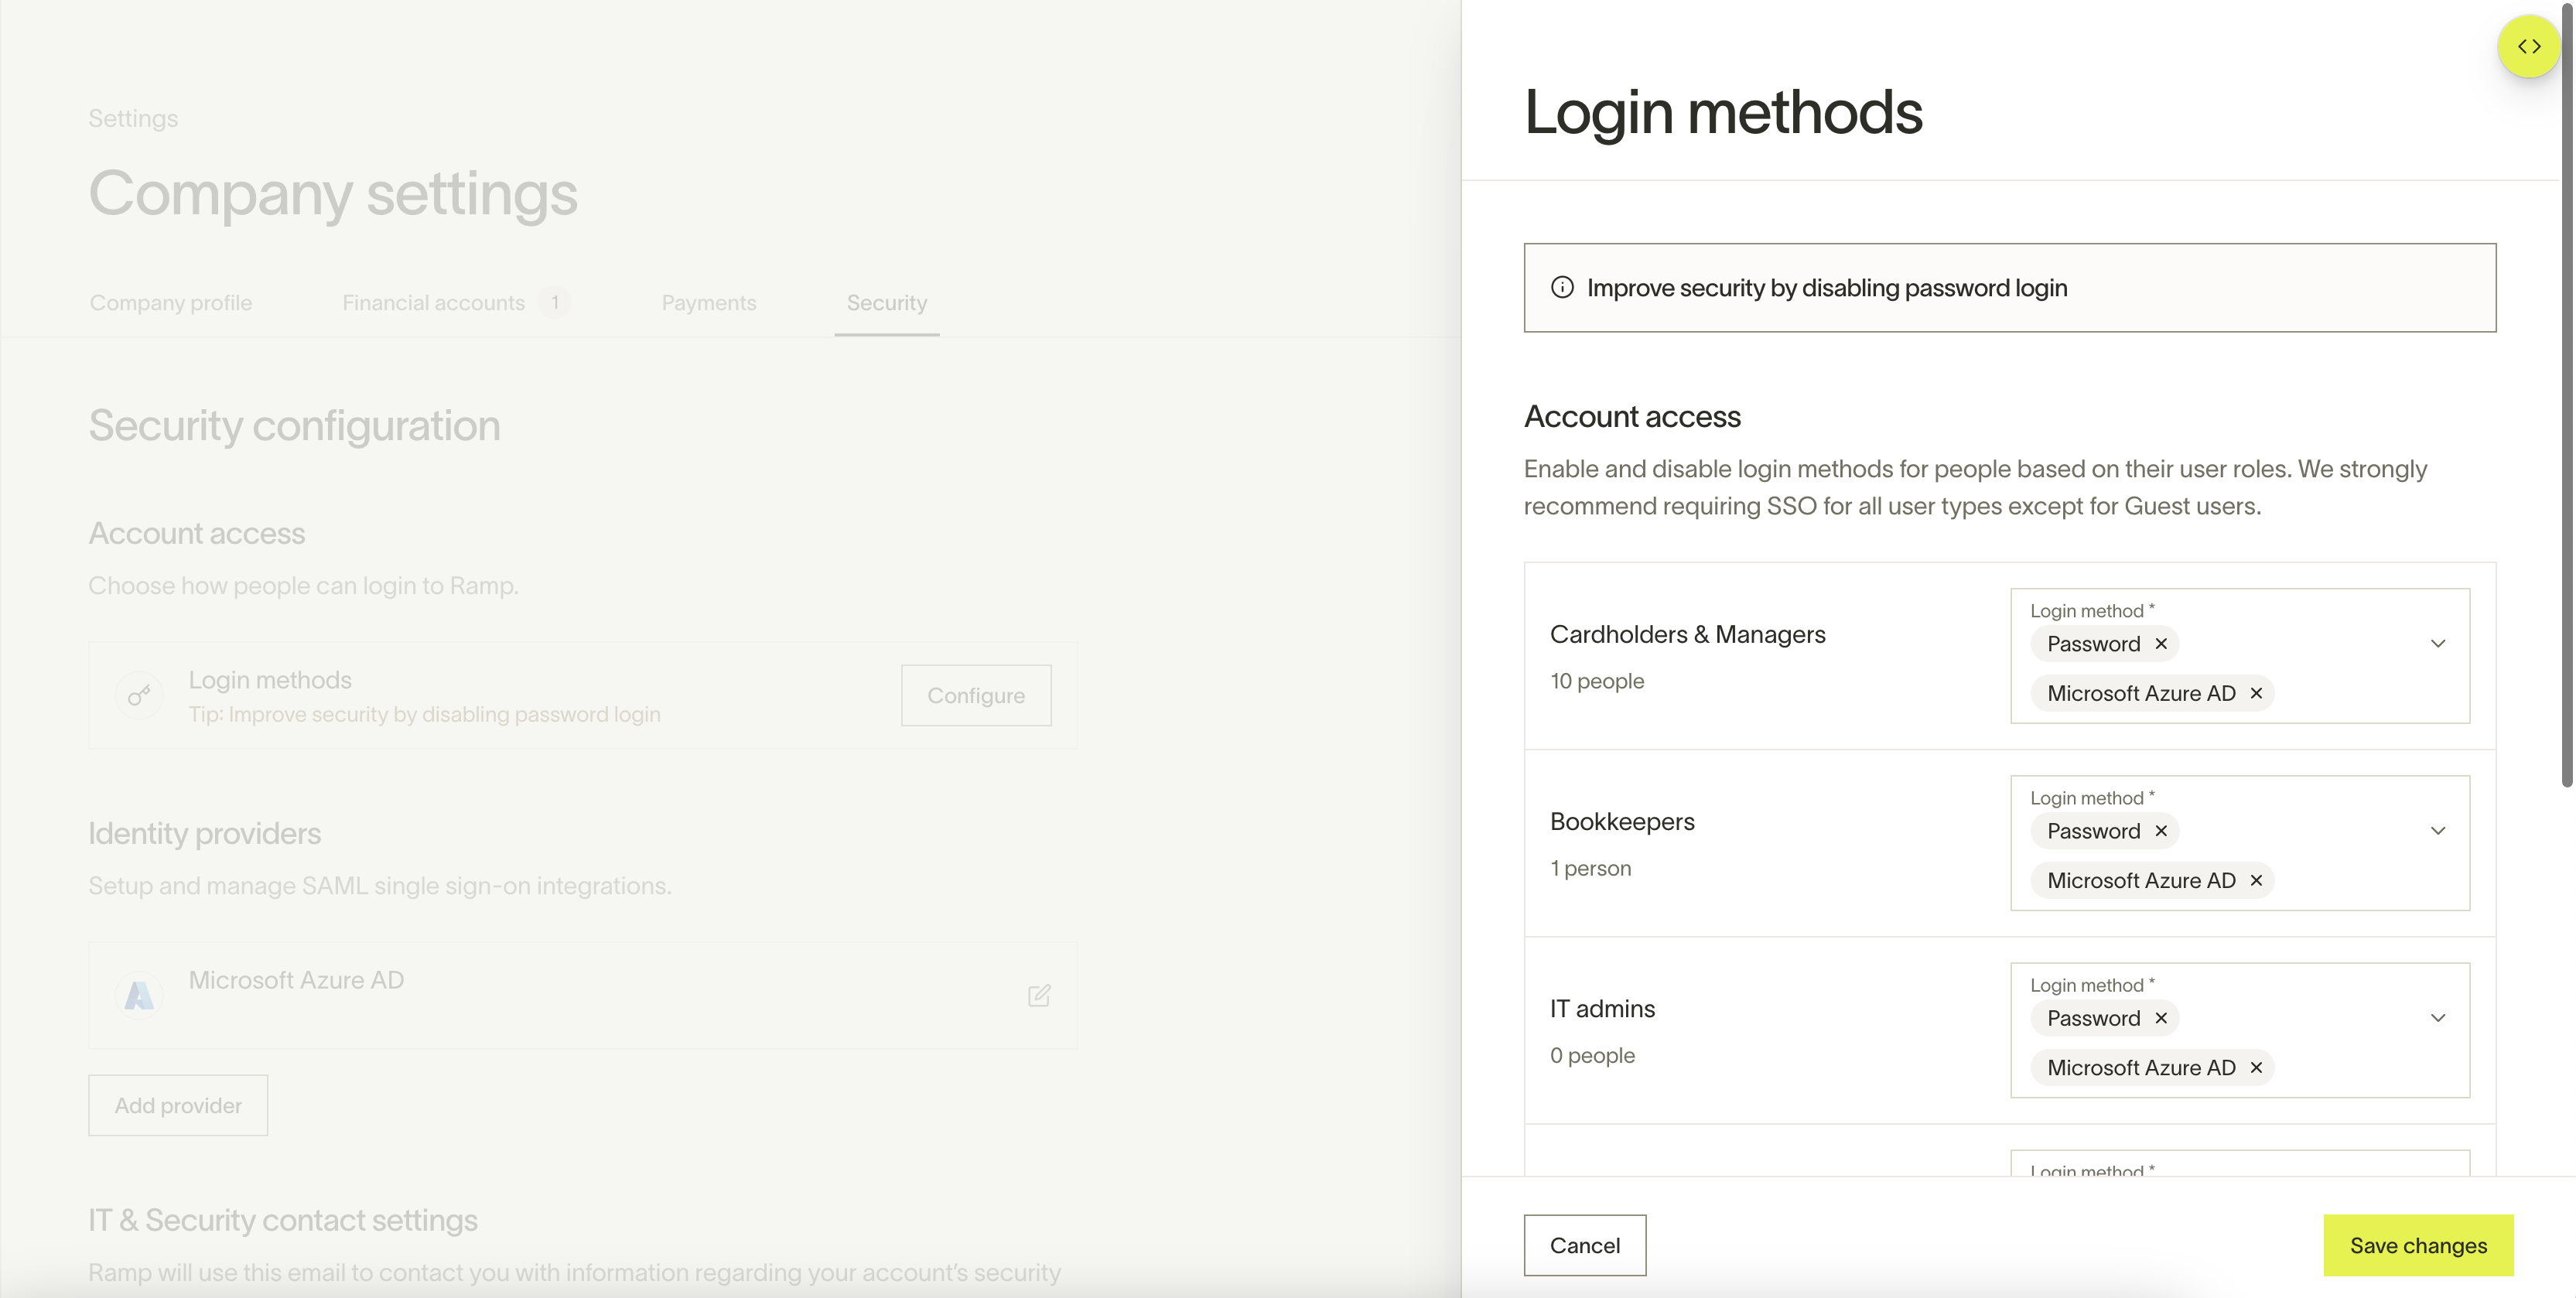
Configure an existing Entra ID setup
If you need to modify the Microsoft Entra ID setup parameters such as metadata URL or supported domain, click on it under Identity providers.