NetSuite integration: Set up Ramp Checking Account bank feeds
Overview
This article applies to both Ramp Checking Accounts and Ramp Operating Accounts. Bank feeds do not support Ramp Investment Accounts.
Connect your Ramp Checking Account or Ramp Operating Account to the NetSuite Bank Feeds SuiteApp to automatically import account transactions into NetSuite for reconciliation. You configure the connection in NetSuite and authorize it with a Ramp Admin account.
Watch walkthroughs for setting up the connection and viewing transaction data.
Connect Ramp to NetSuite Bank Feeds
Before you begin, verify that the Bank Feeds SuiteApp is installed in NetSuite. Use a NetSuite role that can manage financial institution connections, have a Ramp Admin authorize the connection when prompted, and allow browser popups from NetSuite. If Connect New Institution does not open the connection window, allow popups for the NetSuite site in your browser and try again.
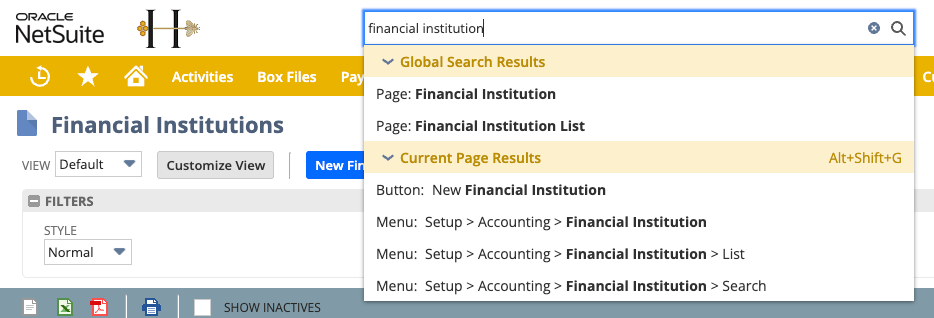
- In Global Search, enter
Financial Institutions, then open Financial Institutions List.
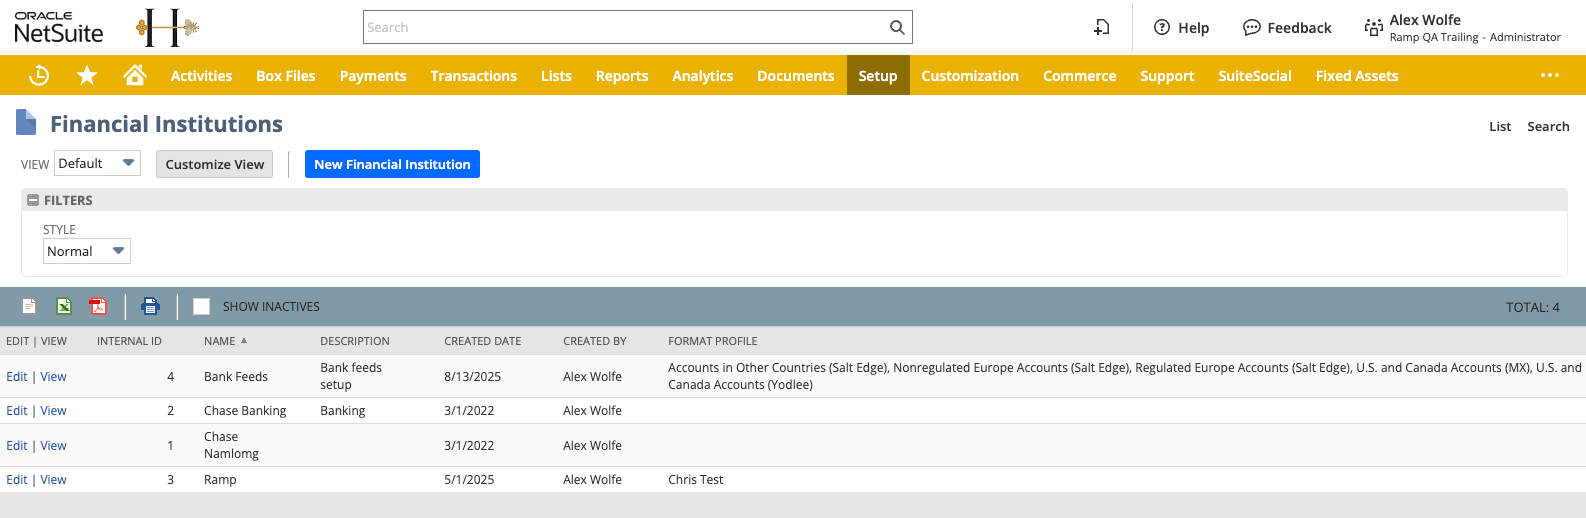
- Select Edit next to Bank Feeds, which includes the U.S. and Canada Accounts (MX) format profile.
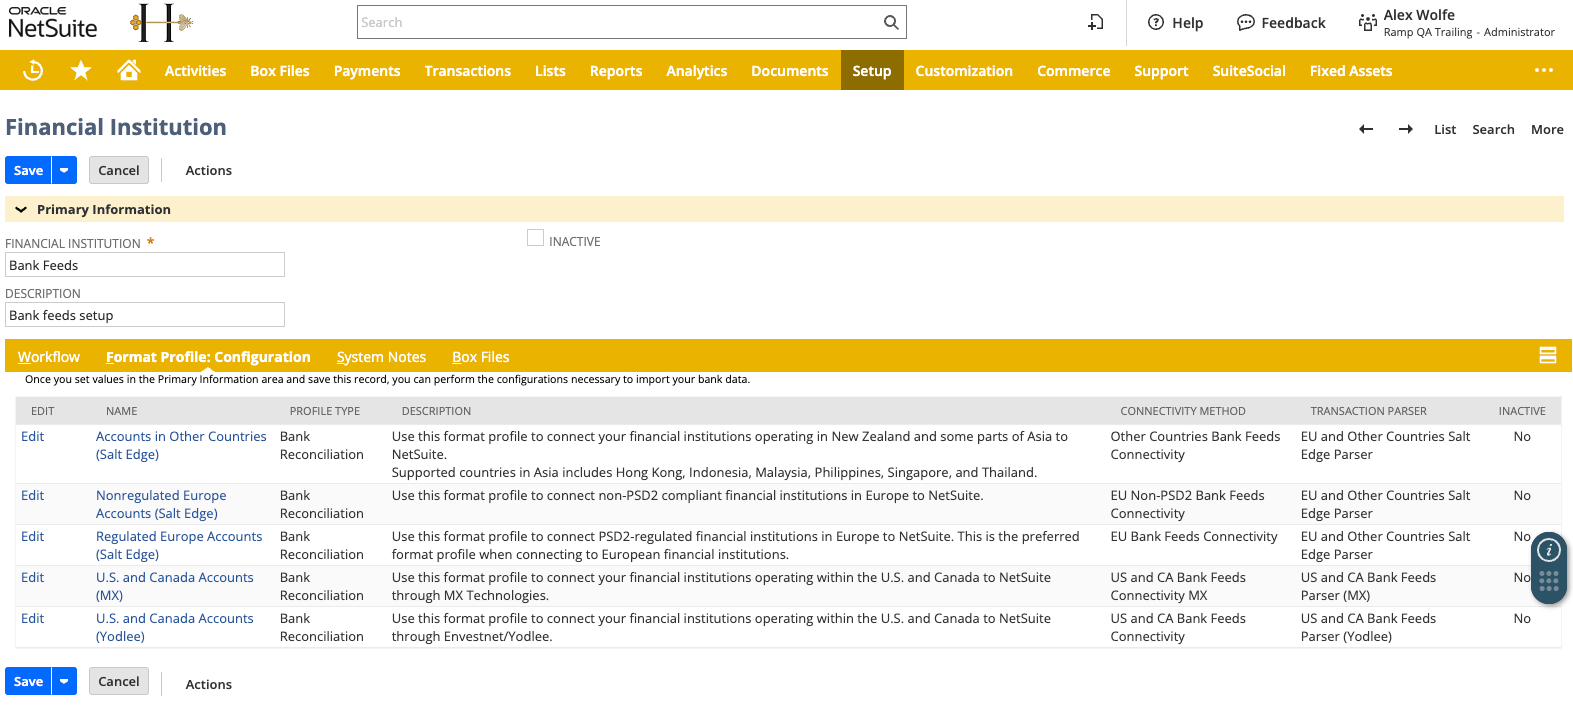
- On Format Profile: Configuration, select Edit next to U.S. and Canada Accounts (MX).
- Select Connectivity Configuration.
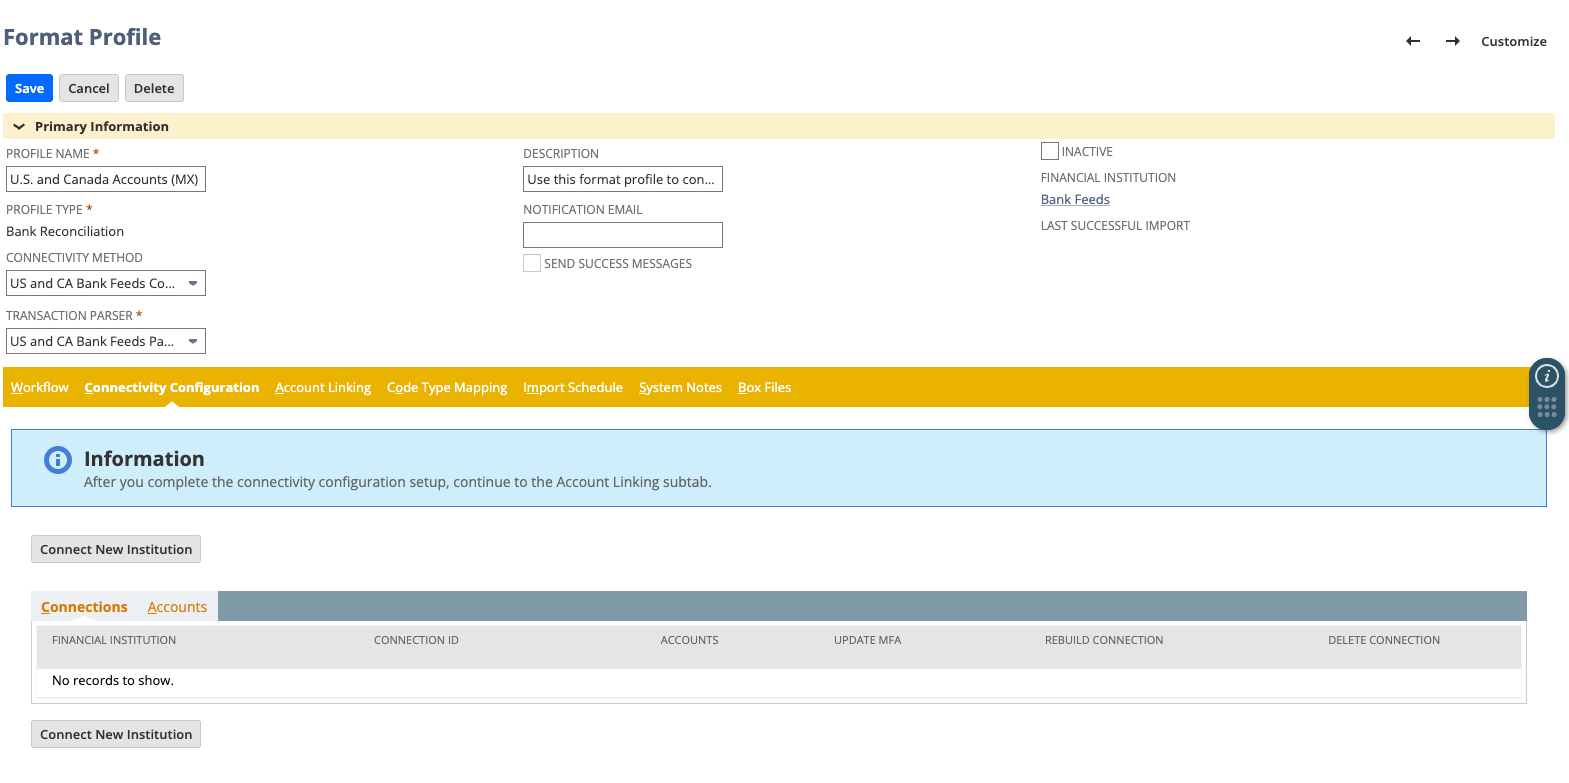
- Select Connect New Institution.
- Search for and select Ramp. Make sure you are signed in to Ramp as an Admin, then follow the prompts to authorize and complete the connection.
See NetSuite's documentation on connecting a U.S. or Canada financial institution for more information about this connection flow.
View and reconcile Ramp Checking and Operating Account transactions
NetSuite applies its reconciliation rules to imported bank lines. Review any lines that are not automatically matched.
Important: NetSuite currently imports up to the last 60 days of transaction data. Choose the earliest available transaction date carefully before saving. After the initial import, NetSuite only lets you change this date by changing the linked account.
- Return to the U.S. and Canada Accounts (MX) format profile, then select Account Linking.
- For each Ramp account, select the corresponding NetSuite GL account from Linked GL Account, set the earliest transaction date to import, then select Save. Link each Ramp account to only one NetSuite GL account.
- Go to Transactions > Bank > Bank Matching and Reconciliation > Match Bank Data.
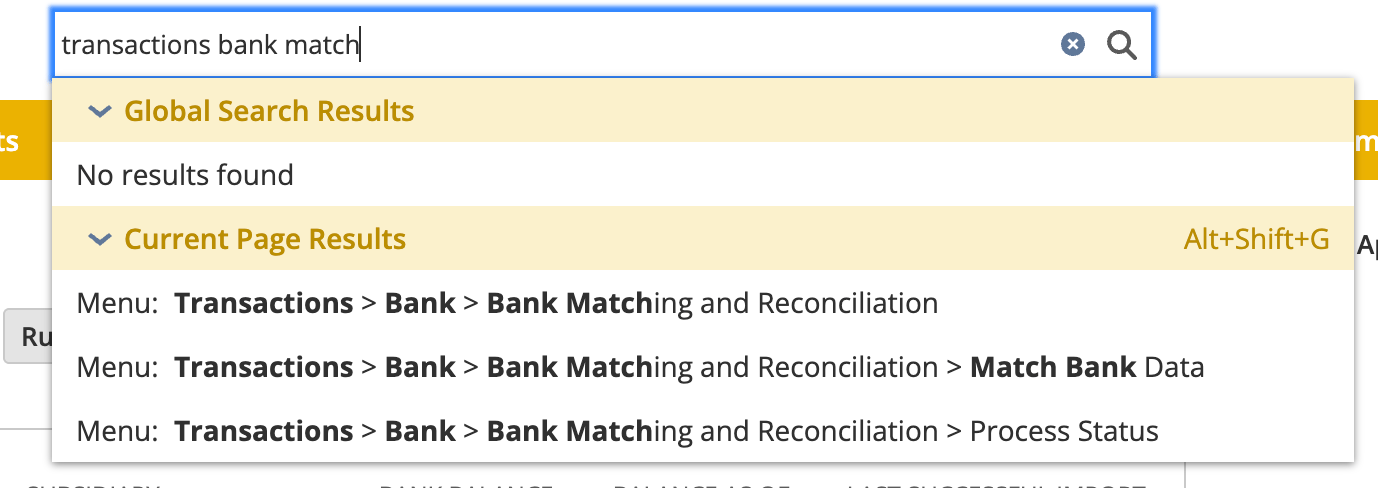
- From Account, select the linked NetSuite GL bank account.
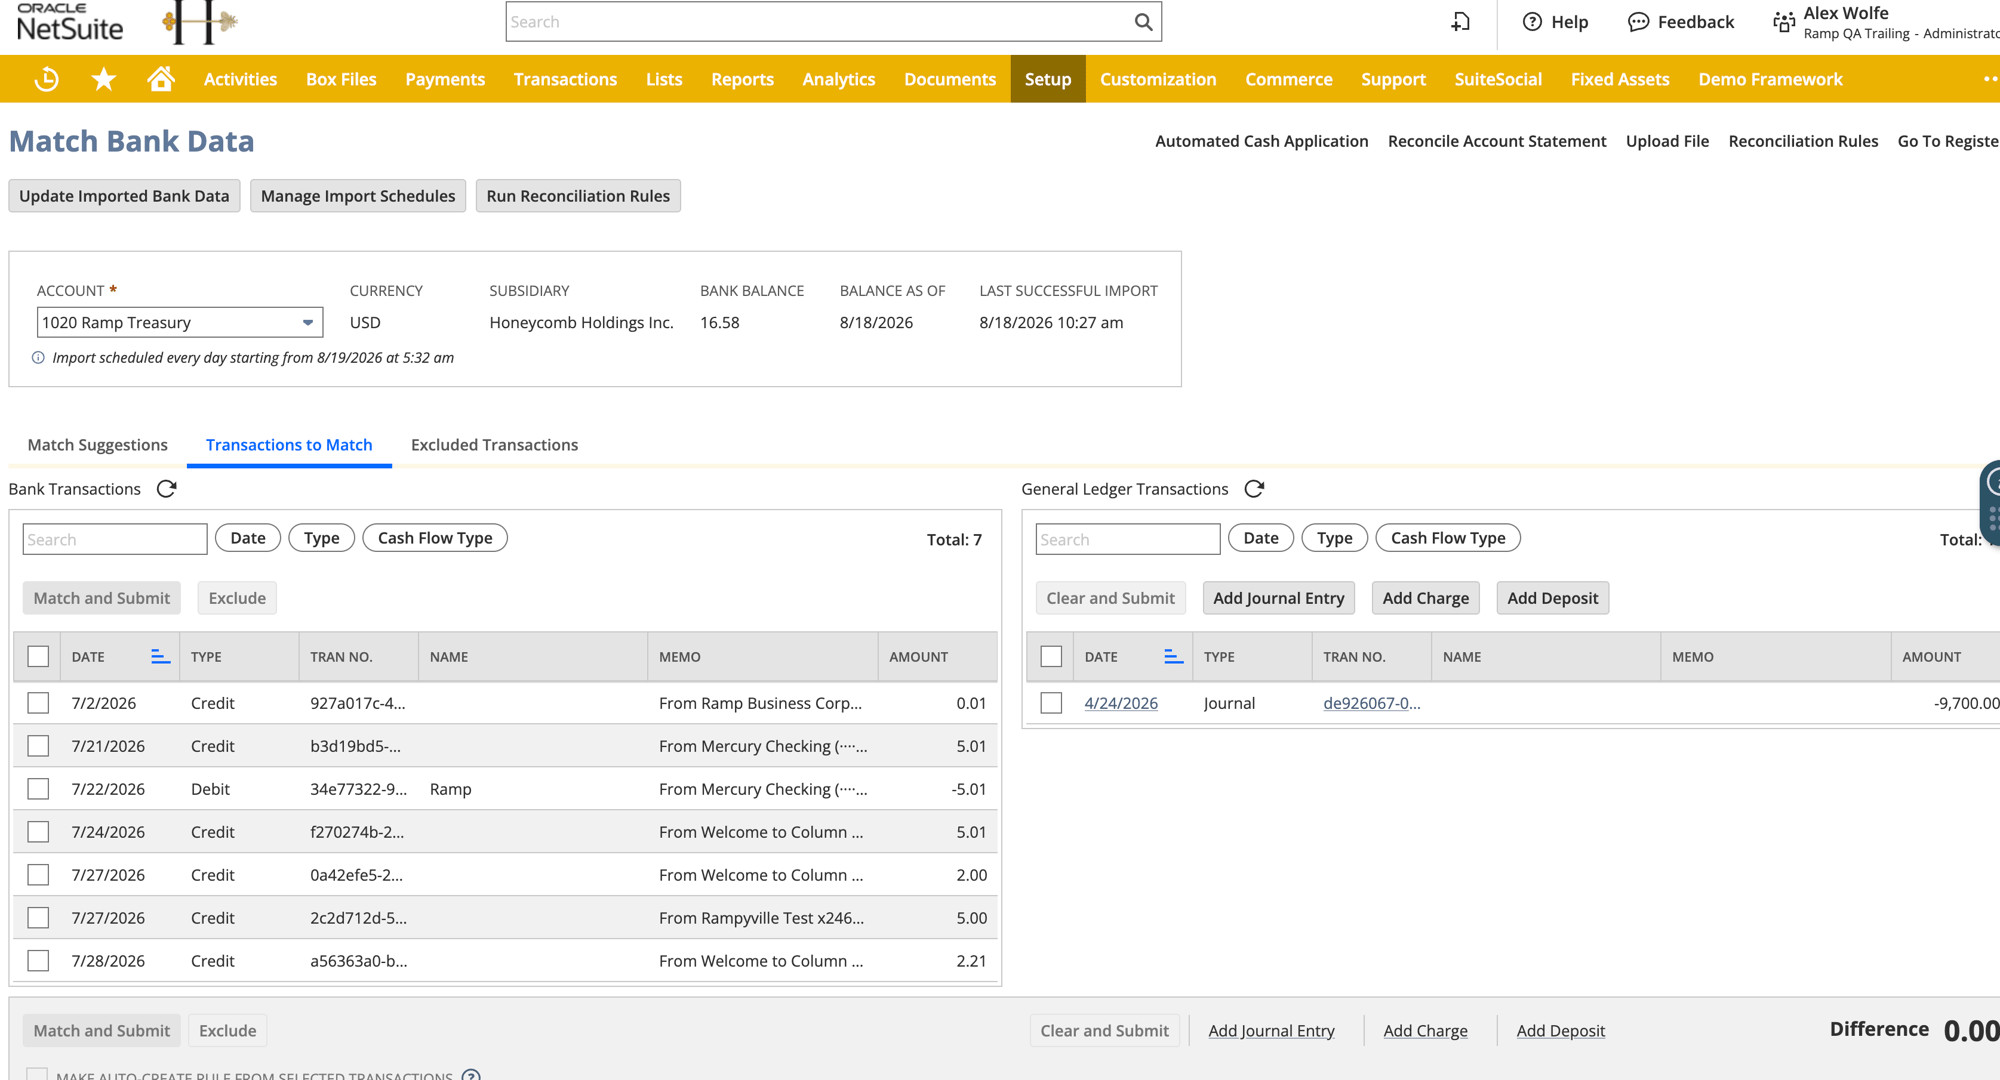
- Review the imported bank lines and match them to the corresponding NetSuite transactions.
NetSuite begins importing transactions after you save the format profile. For more information, see NetSuite's documentation on linking accounts for financial institution connectivity and matching bank data.