Partial receiving (Universal CSV)
Overview
Partial receiving allows Universal CSV (uCSV) customers to record the exact quantity of items received against a purchase order line item, rather than marking the entire line as received or not received.
Previously, purchase orders (POs) for uCSV customers could only be marked as fully received or not received at all. With partial receiving, procurement and finance teams can track goods more accurately as they arrive, keeping accounting and export data aligned with real-world fulfillment.
Note: Partial receiving applies to item-coded line items only. Expense-coded lines continue to support only received or not received status.
Note: If you are looking for information on item receipts for a native and direct ERP integration (e.g., NetSuite or Sage Intacct), this article does not apply. This article covers partial receiving specifically for Universal CSV (uCSV) customers.
How it works
To enable partial receiving, you need to create an item-type accounting field, add it to your procurement program, and then use it when coding line items on a purchase order. Item-coded lines can then be partially received when creating an item receipt.
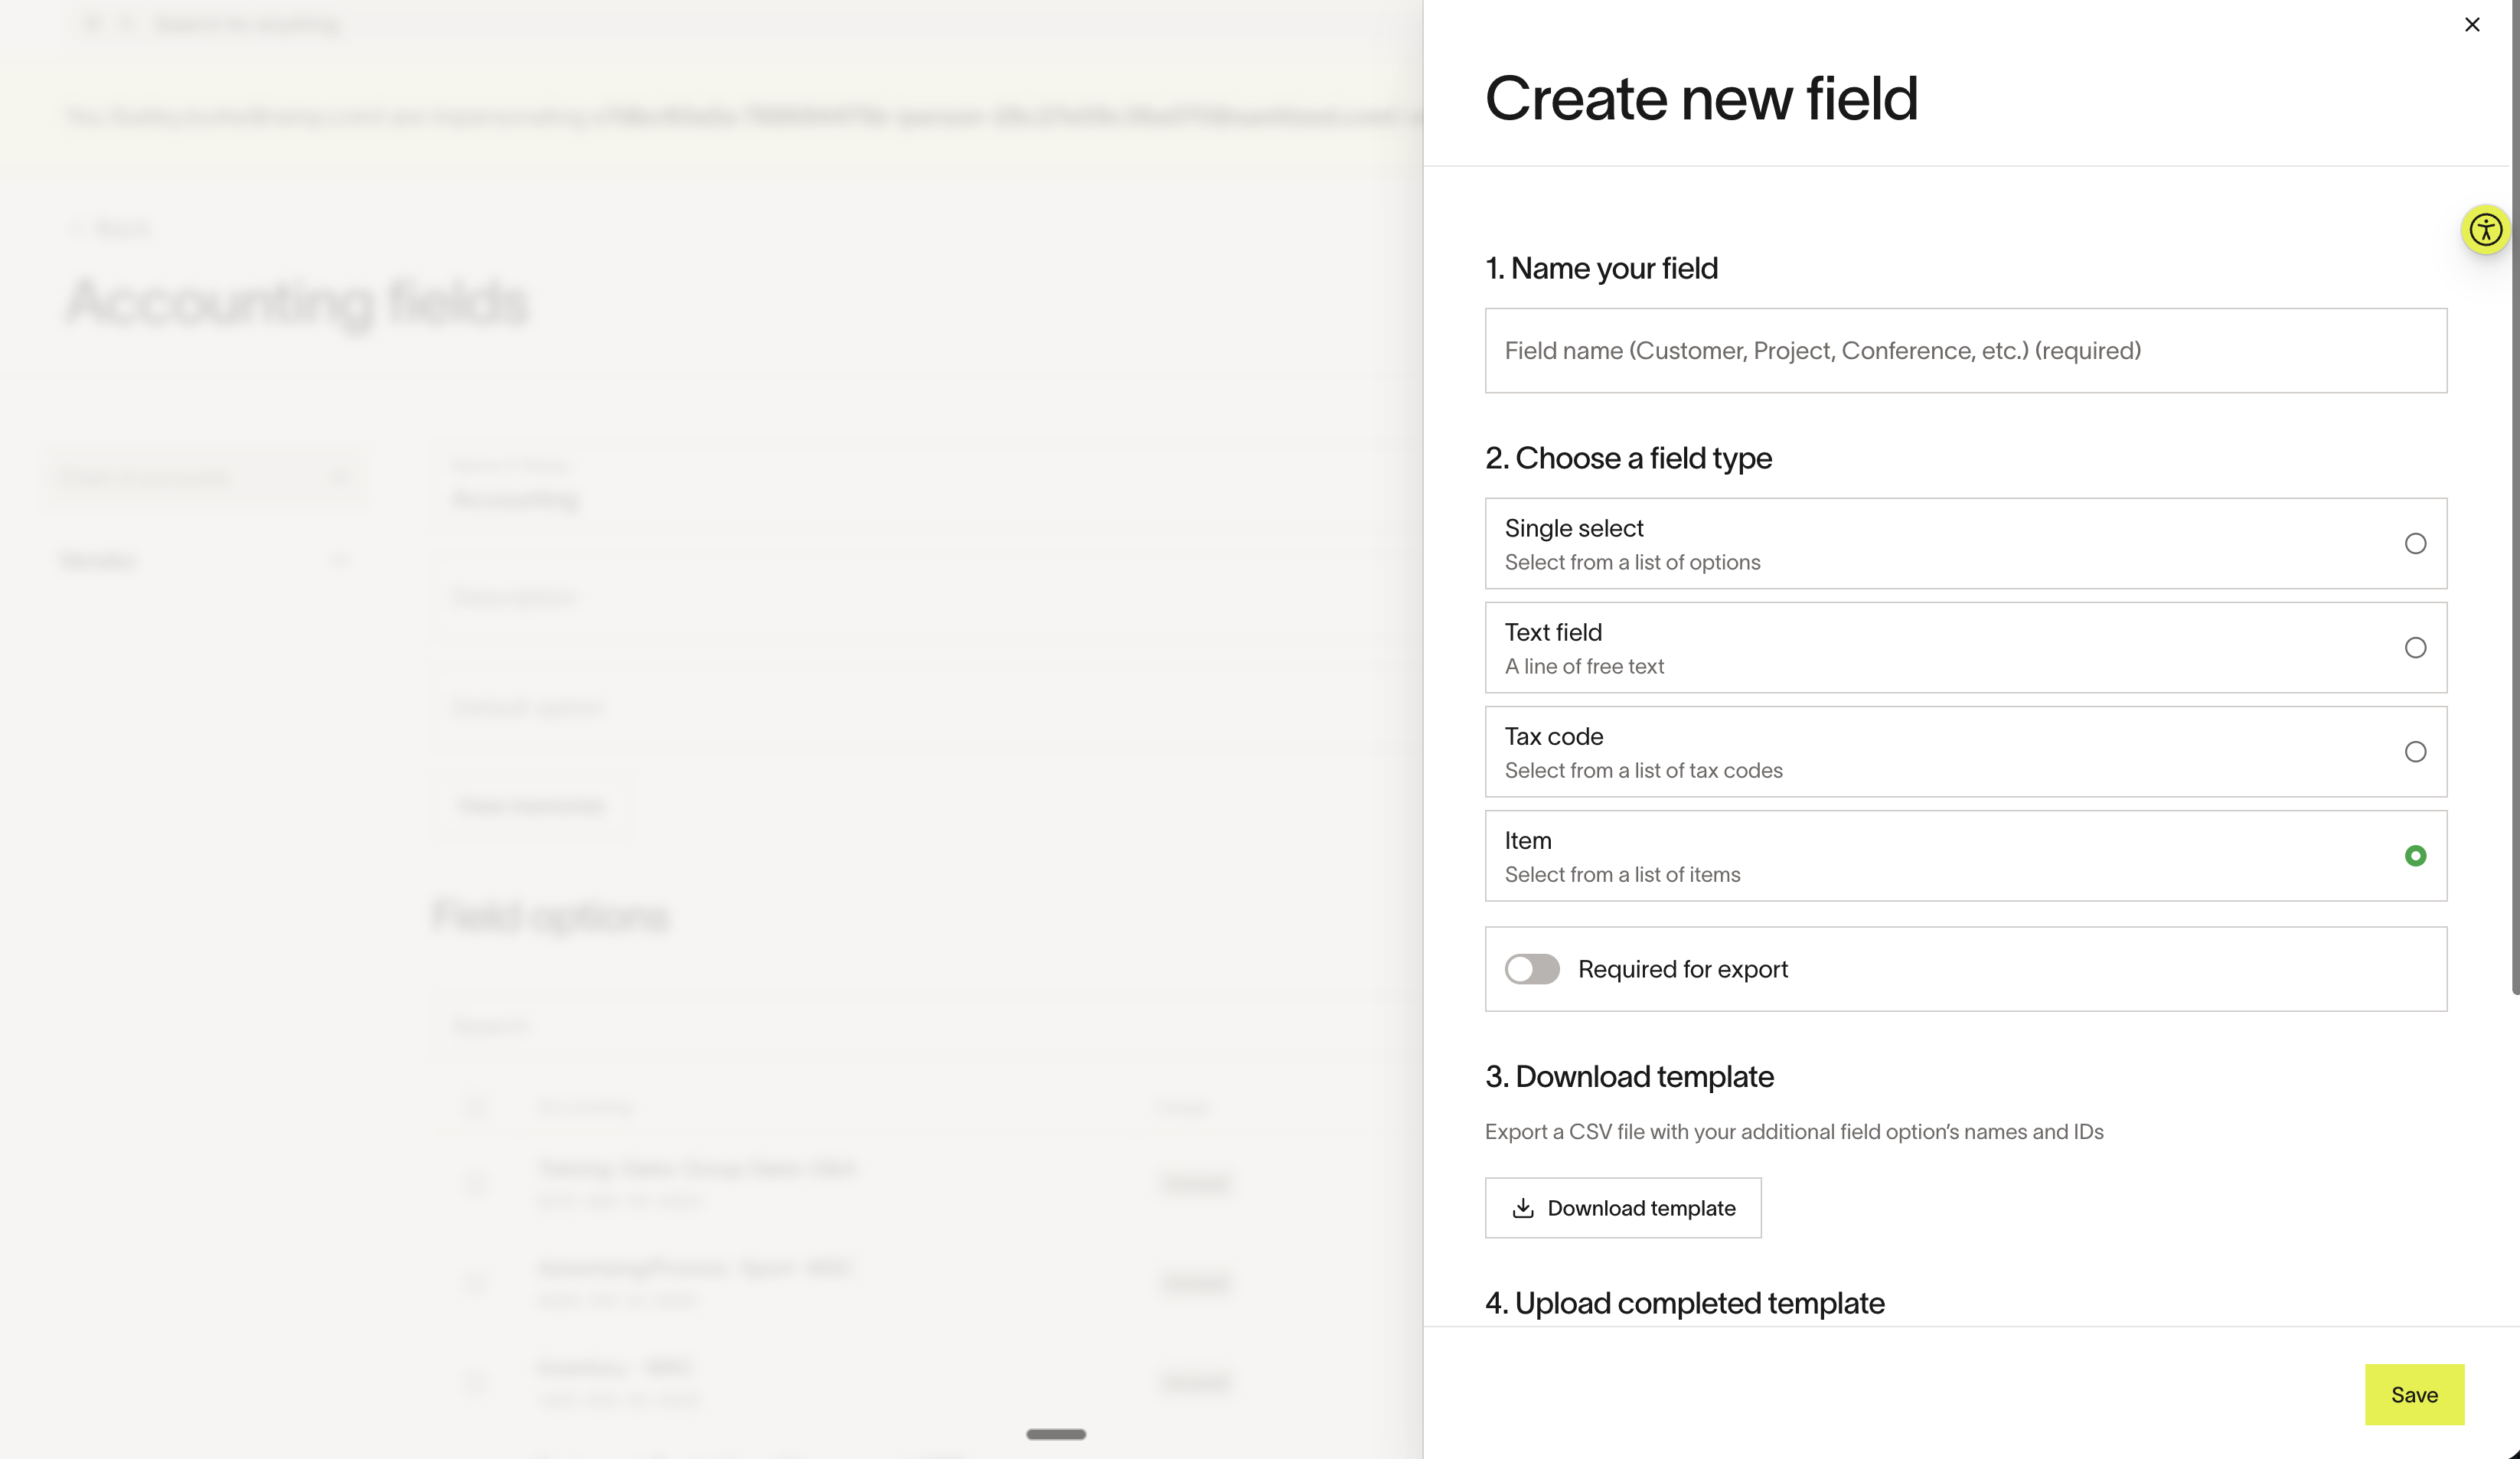
Step 1: Create an item accounting field
- Go to Accounting > Settings > Accounting fields .
- Select Add new field .
- Choose the Item field type.
- Name your field (e.g., "Item").
- Upload items in bulk using a CSV file. Each item option requires an associated Segment ID and GL account.
- Select Save .
Once saved, each item option displays its associated GL account. You can remap GL accounts, add new options, or bulk update options via CSV upload at any time.
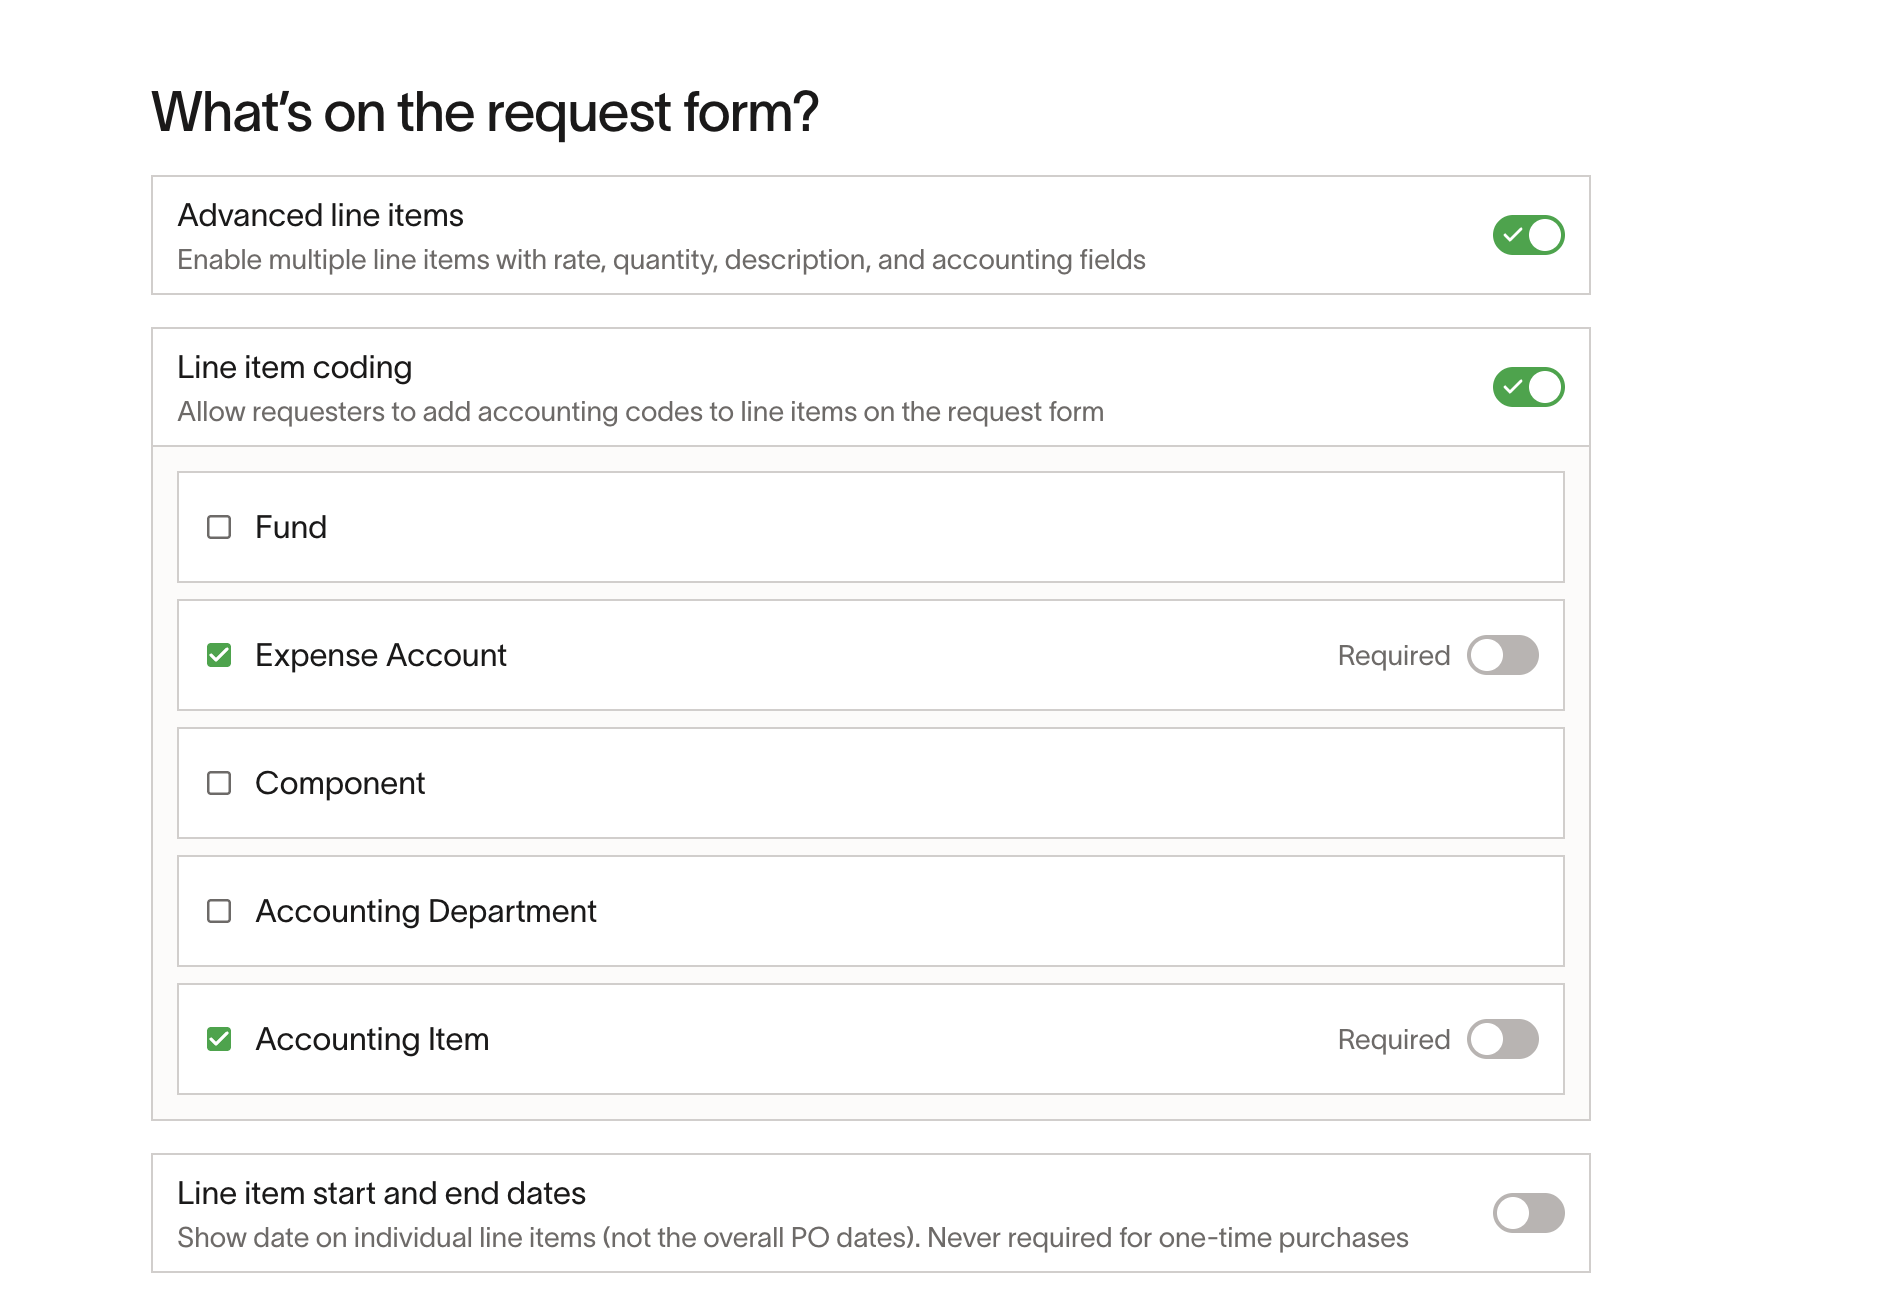
Step 2: Enable item coding in your procurement program
- Navigate to your procurement program settings.
- Edit an existing program or create a new program.
- Enable Line item coding .
- Add the new item accounting field to the coding configuration. You can optionally prompt requesters to code this field when creating purchase orders, or you can make it required.
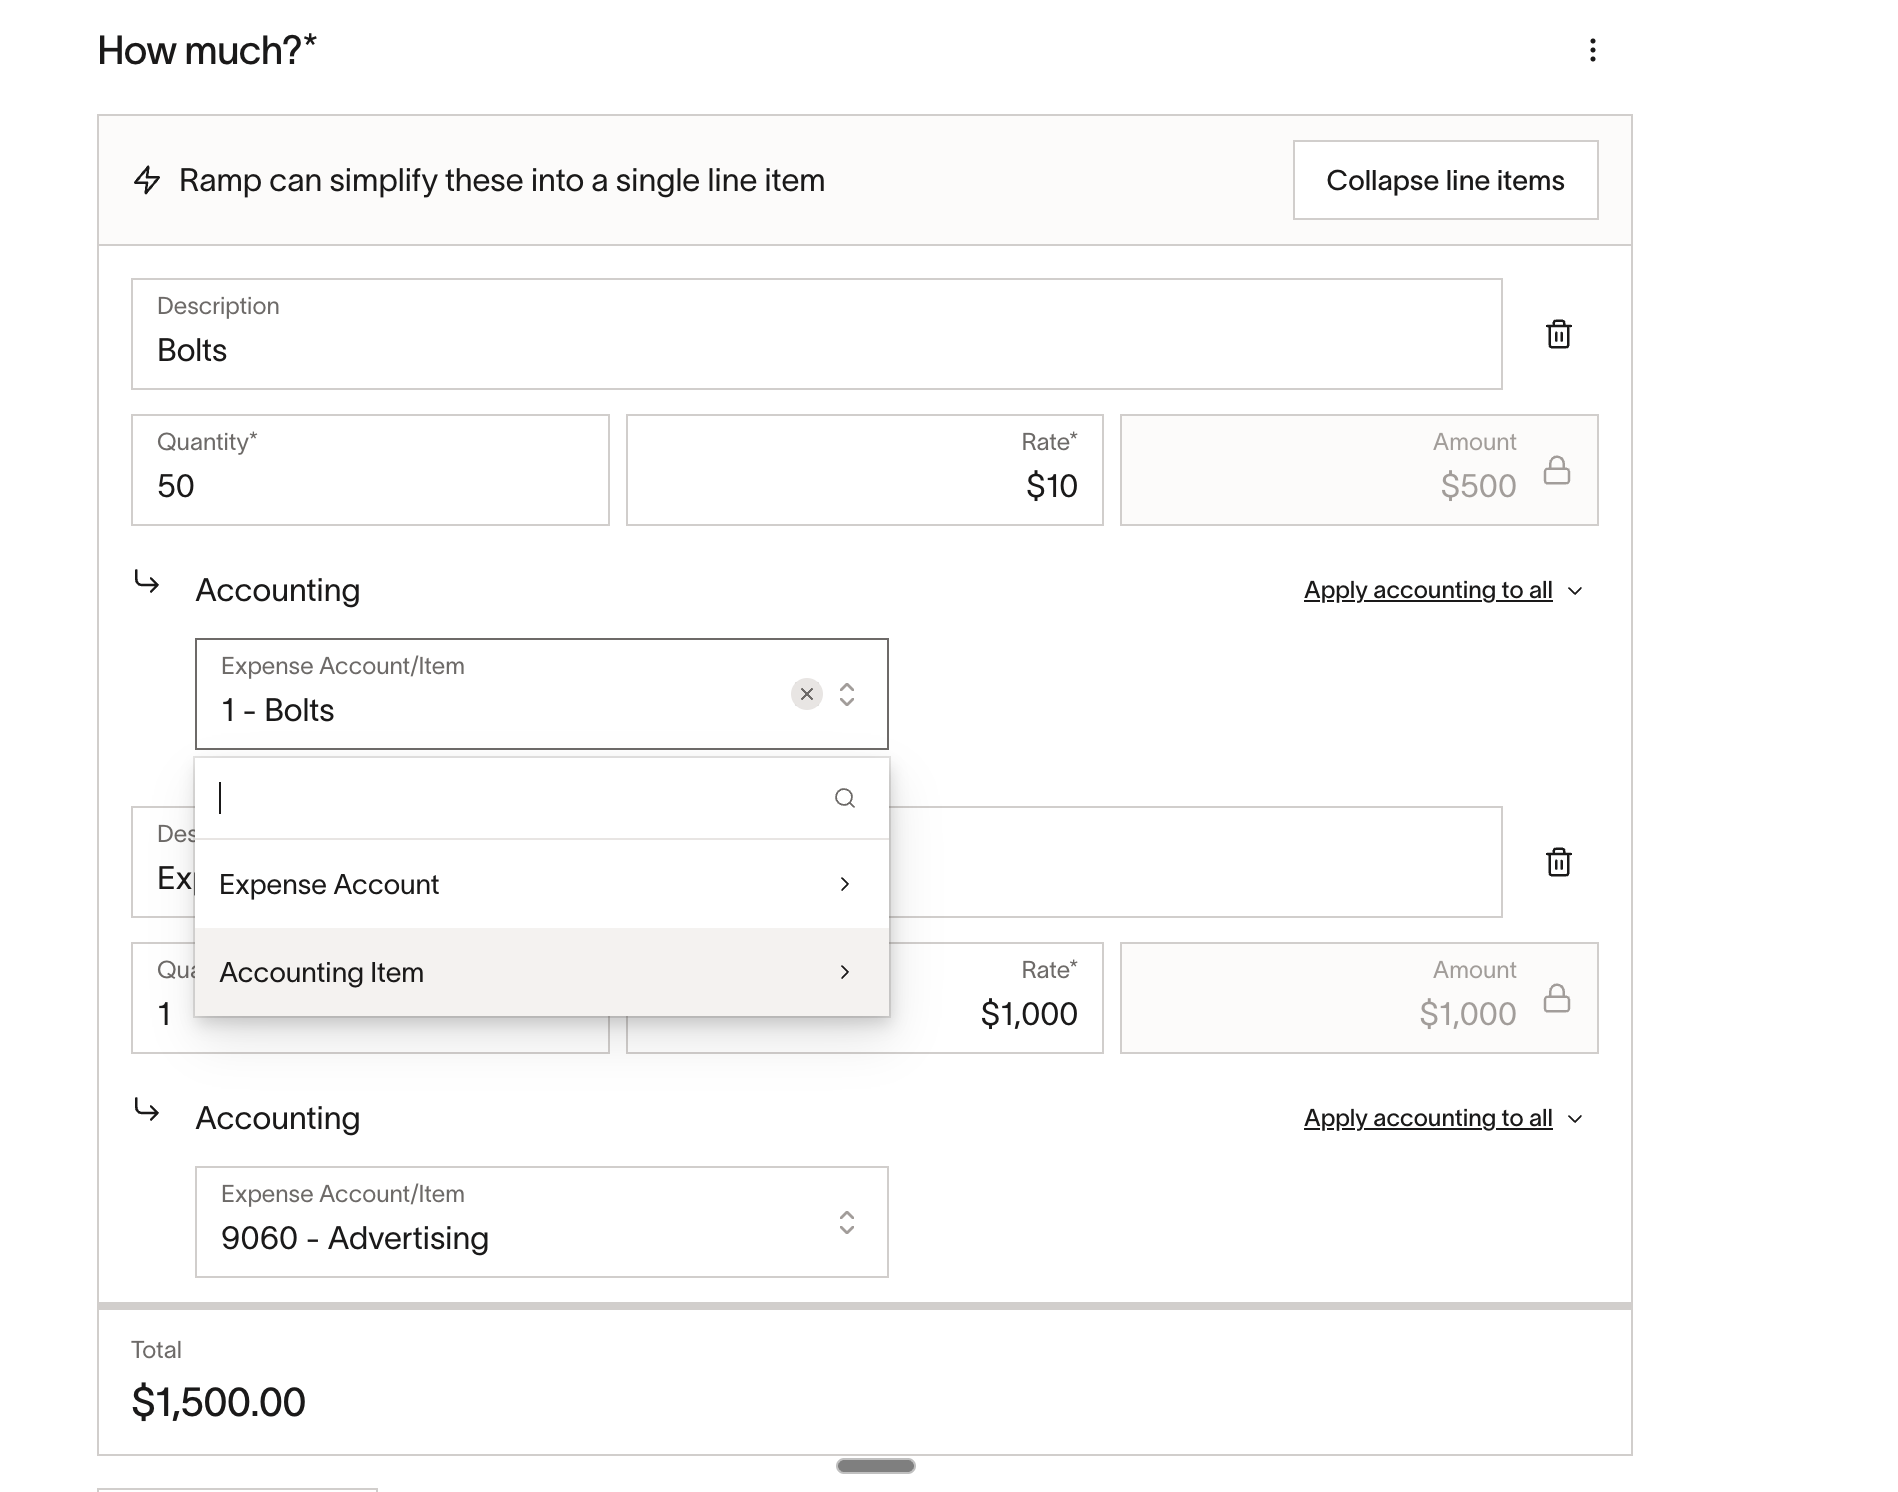
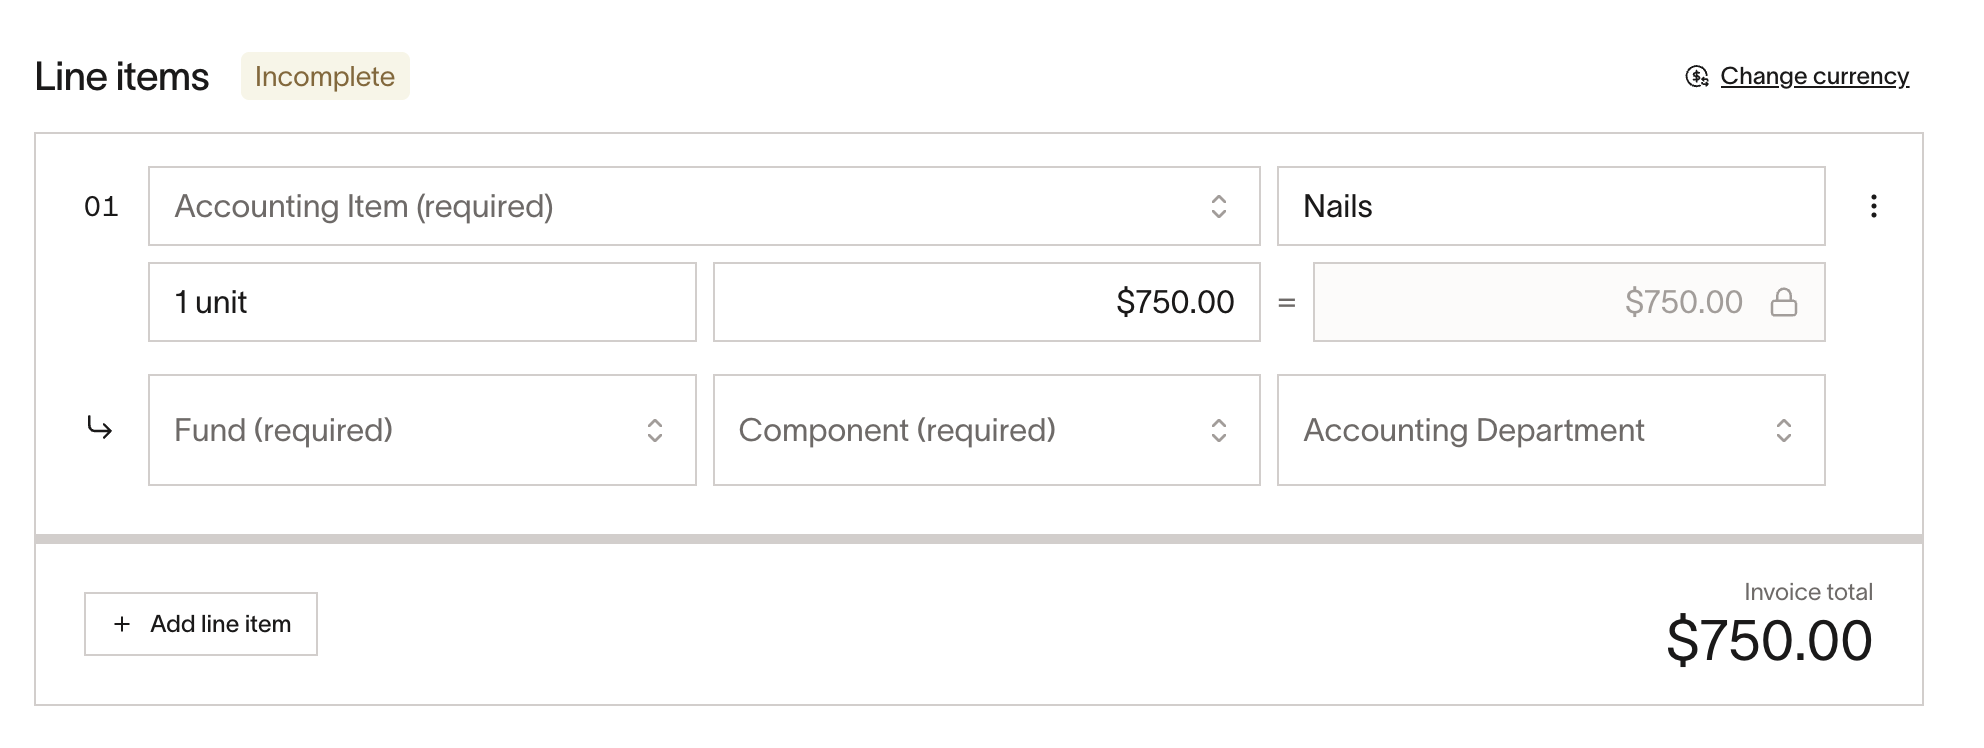
Step 3: Create a purchase order with item-coded lines
- Create a new purchase order within your procurement program.
- Add line items with the relevant quantity and rate.
- For each line item, choose how to code it within the Accounting section:
- Item line — Select a value from your item accounting field. This line will support partial receiving.
- Expense line — Assign a GL account directly. This line will only support received or not received status.
- Submit the purchase order.
Step 4: Partially receive items
- Open an approved purchase order.
- Select Add receipt to create a new item receipt.
- For each item-coded line , enter the quantity received (e.g., 50 out of 100 ordered). You can also receive more than the ordered quantity if needed — the item receipt will reflect the over-received amount.
- For each expense-coded line , mark the line as Received or Not received .
- Select Create item receipt .

You can create additional item receipts as more goods arrive until the full quantity has been received.
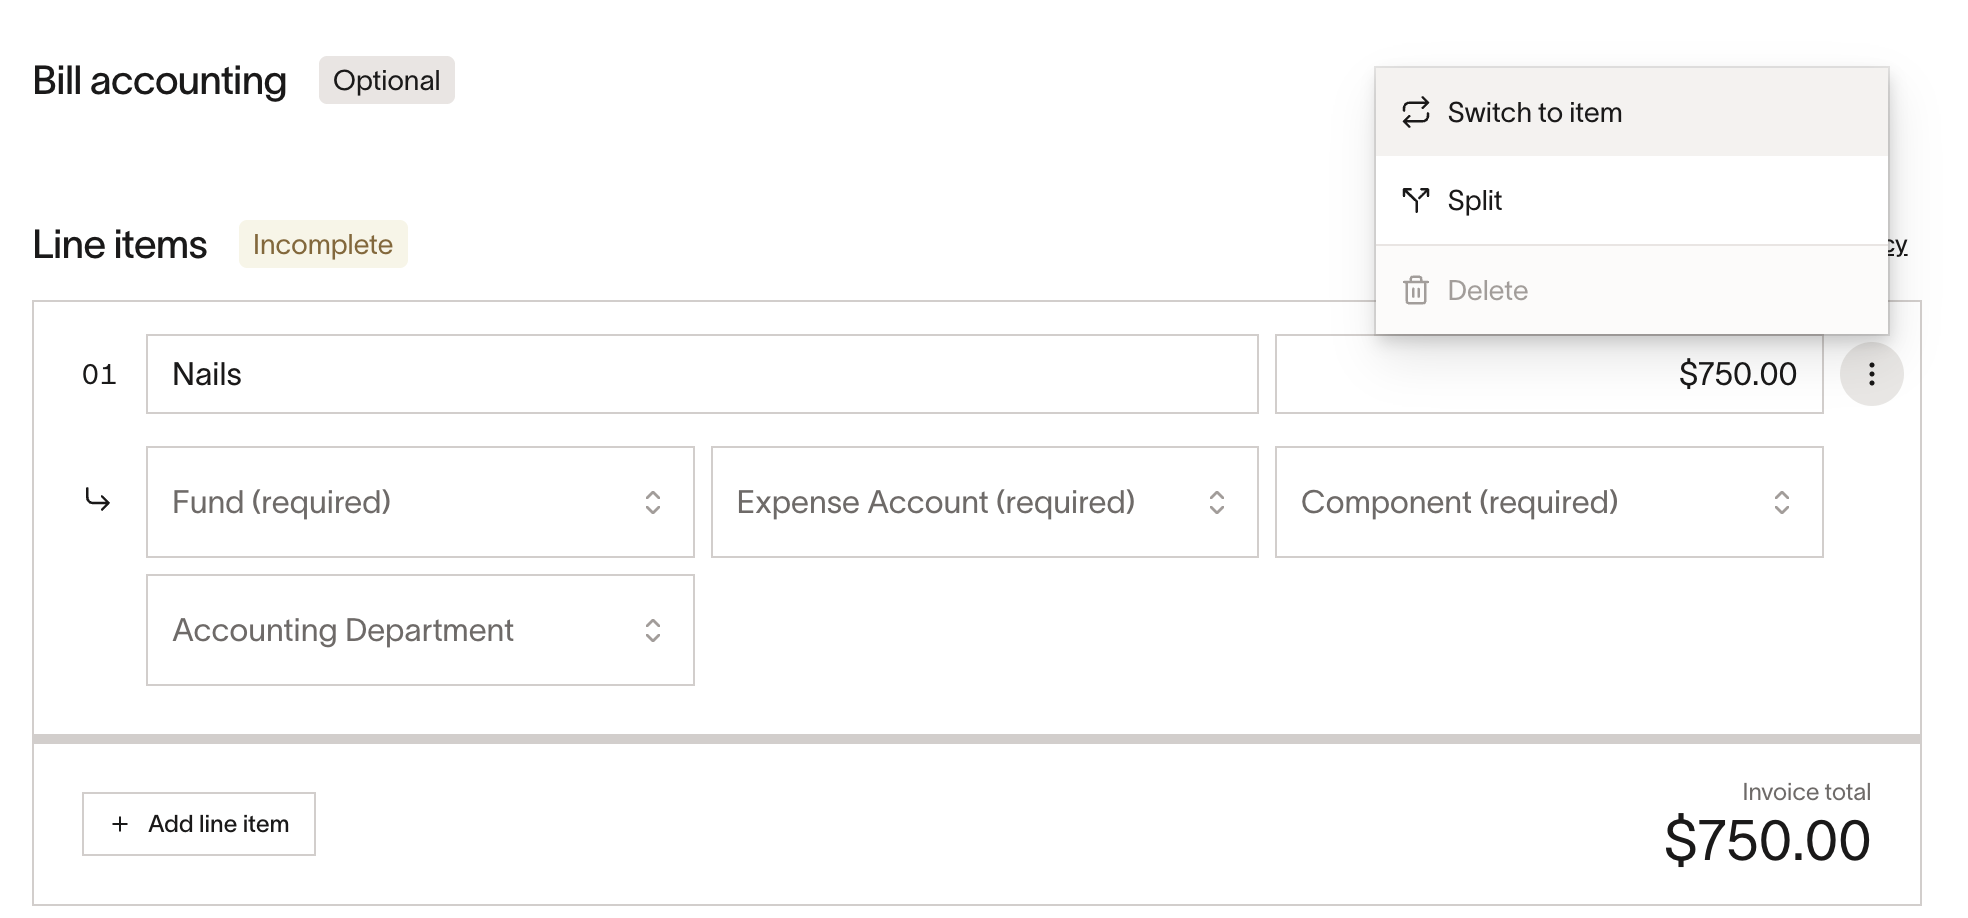
Using item coding in Bill Pay
Item coding is also available on bills for uCSV-connected providers. This allows you to apply the same item accounting field used in procurement to your Bill Pay workflows.
- Go to Bill Pay .
- Open or create a bill.
- On an eligible line item, switch the line type to Item .
- Code the line using your item accounting field.
Note: The option to switch a line to the Item type is only available when all of the following conditions are met:
- Item-based line items are enabled.
- An item-type accounting field has already been created in your accounting settings.
- The line item is not matched to a purchase order line that locks its type.
If these conditions are not met, the option to switch to Item will not appear or will be unavailable.
Configuring Bill Pay exports
Bill Pay exports now support item-level data for uCSV configurations, giving you more flexibility when setting up your export format.
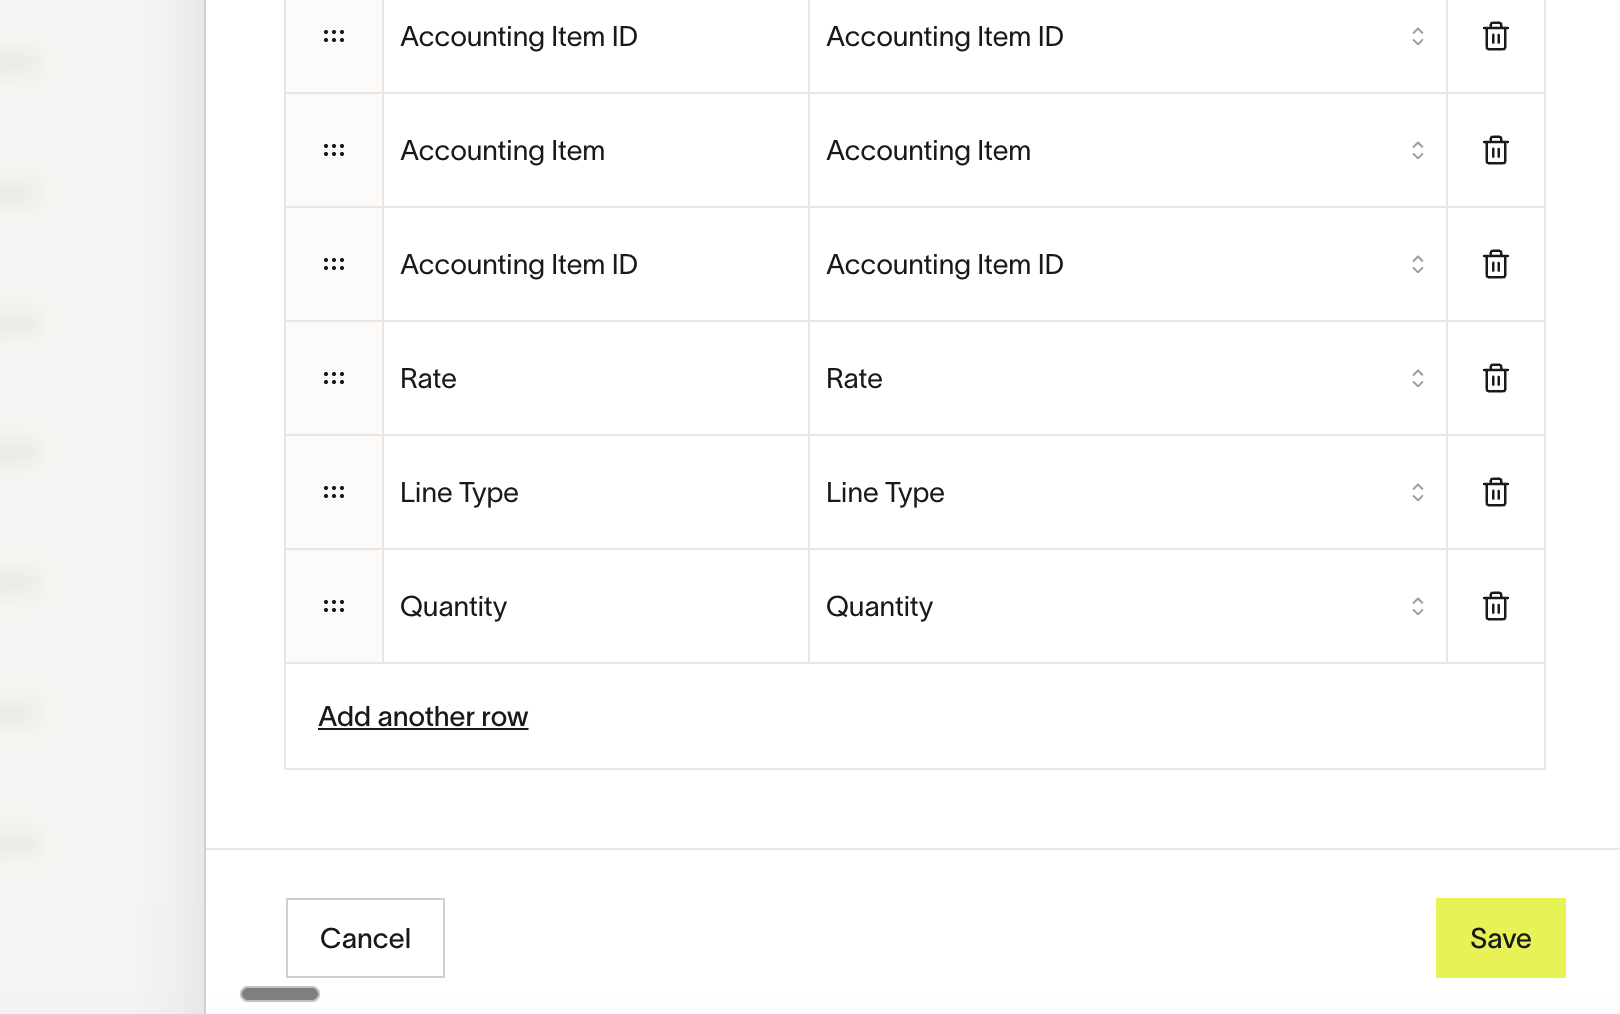
- Go to Accounting > Bill Pay > Setting > CSV Customization.
- Open your uCSV bill expense export configuration.
- Add any of the following available fields:
- Accounting line item — the item field value
- Line type — item or expense
- Quantity
- Rate
Best practices and tips
- Assign GL accounts when creating item options. Every item option requires an associated GL account, so lines coded with that item are automatically mapped to the correct account.
- Separate item lines from expense lines on your POs. Only item-coded lines support partial receiving. If a line item represents a countable good you plan to receive incrementally, code it with your item accounting field.
- Update your export configuration. The new item-level fields (line type, quantity, rate) are not added to your export automatically. Add them to your uCSV export settings to include item data in your accounting exports.
Frequently asked questions
Can I partially receive on expense-coded line items?
No. Partial receiving is only available for line items coded with an item accounting field. Expense-coded lines can only be marked as received or not received.
Can I add new items manually?
Yes. When setting up your item, the initial configuration has to be done via CSV upload, however, you can add more options manually for your item after setup.
Can I create multiple item receipts for the same purchase order?
Yes. You can create additional item receipts as more goods arrive.
Do I need to update my export configuration to include item data?
Yes. The new item-level fields (line type, quantity, rate) are available in your uCSV export settings but are not added automatically. Add them to your export configuration if you want them included in your accounting exports.
Does partial receiving work with non-uCSV ERP integrations?
Yes. Partial receiving is also available for select native ERP integrations. This article covers the uCSV workflow specifically.
Can I use the item accounting field on bills in Bill Pay?
Yes, if you have item-based line items enabled, an item-type accounting field exists in your accounting settings, and the line item is not locked by a matched purchase order. When these conditions are met, you can switch eligible line items to the Item type and code them using the same item accounting field used in procurement.