Get started with Ramp Procurement agents
Overview
Accelerate complex procurement reviews by customizing AI agents to perform research and embedding them into workflows.
- What this feature does: Lets you describe — in natural language — what you want a Procurement agent to handle during procurement reviews (e.g., legal, security, finance). The agent then performs the upfront research normally done by humans (analyzing attached documents, searching the web for privacy policies, etc.), to accelerate reviews. These agents do not make approval decisions.
- How it works: Once you define an agent and add it to a workflow, it automatically runs whenever that workflow triggers. Agents never approve or reject items — reviewers stay fully in control. The agent's job is to gather information, summarize risk, and prepare context to speed up human decisions. Based on an agent's outcomes, you can conditionally route the request to the right next approvers, and show downstream approvers the agent's results so the decision trail is consistent and transparent.
- Who should set it up: Ramp Admins configure and manage agents. Admins can share individual agents with subject-matter experts (e.g., Legal, Security) to help refine the agent definition. Only admins can add agents to workflows (required to "activate" the feature).
- Best for: Teams with recurring procurement reviews who want faster cycle times, more consistency, and less manual digging.
What this feature is and why it matters
What are Procurement agents?
Procurement agents let you turn your team's review criteria into natural-language instructions that an AI agent follows every time a procurement workflow runs. Instead of repeatedly searching for vendor documents, scanning contracts, or pulling out key clauses, the agent performs that upfront research automatically and delivers a structured summary to your reviewers.
The agent doesn't approve or reject anything — it simply prepares the information your team normally gathers manually. You can reference agent outcomes in downstream Split paths conditions to route requests based on the agent's findings.
Why it matters
Speed without sacrificing control
Procurement reviews often stall because experts need time to hunt for information. Agents shorten this cycle by handling that pre-work instantly while still leaving decisions to humans.
Consistency and completeness
Procurement agents check for the same details every time, reducing the risk of overlooked terms or missing documentation (i.e., human error).
Better use of expert time
Legal, Security, and Finance teams spend too much time gathering information instead of evaluating it. Agents let them focus on judgment instead of search tasks.
Scalable processes
As request volume grows, the manual effort required for reviews grows even faster. Agents help teams scale without increasing headcount or adding friction.
Prerequisites and access
Who can use this feature
Ramp Admins can use this feature by default. Admins can also share agents with subject matter experts like security reviewers or legal reviewers to help define agent instructions. Only Admins can add agents to workflows (required to "activate" the feature).
Procurement Add-on access
This feature is only available via the Procurement Add-on tier, enabled by default. This is not available for Free, Plus, or Procurement Extended Access users.
Set up Procurement agents
Open Procurement agents
- Sign in to Ramp.
- Under Manage spend, open Programs.
- Select Manage in the top right, then select Procurement agents.
- Select an existing agent to edit it, or select New agent to create one.
Create your first agent
-
Select New agent.
-
You have two options for how to create your agent:
-
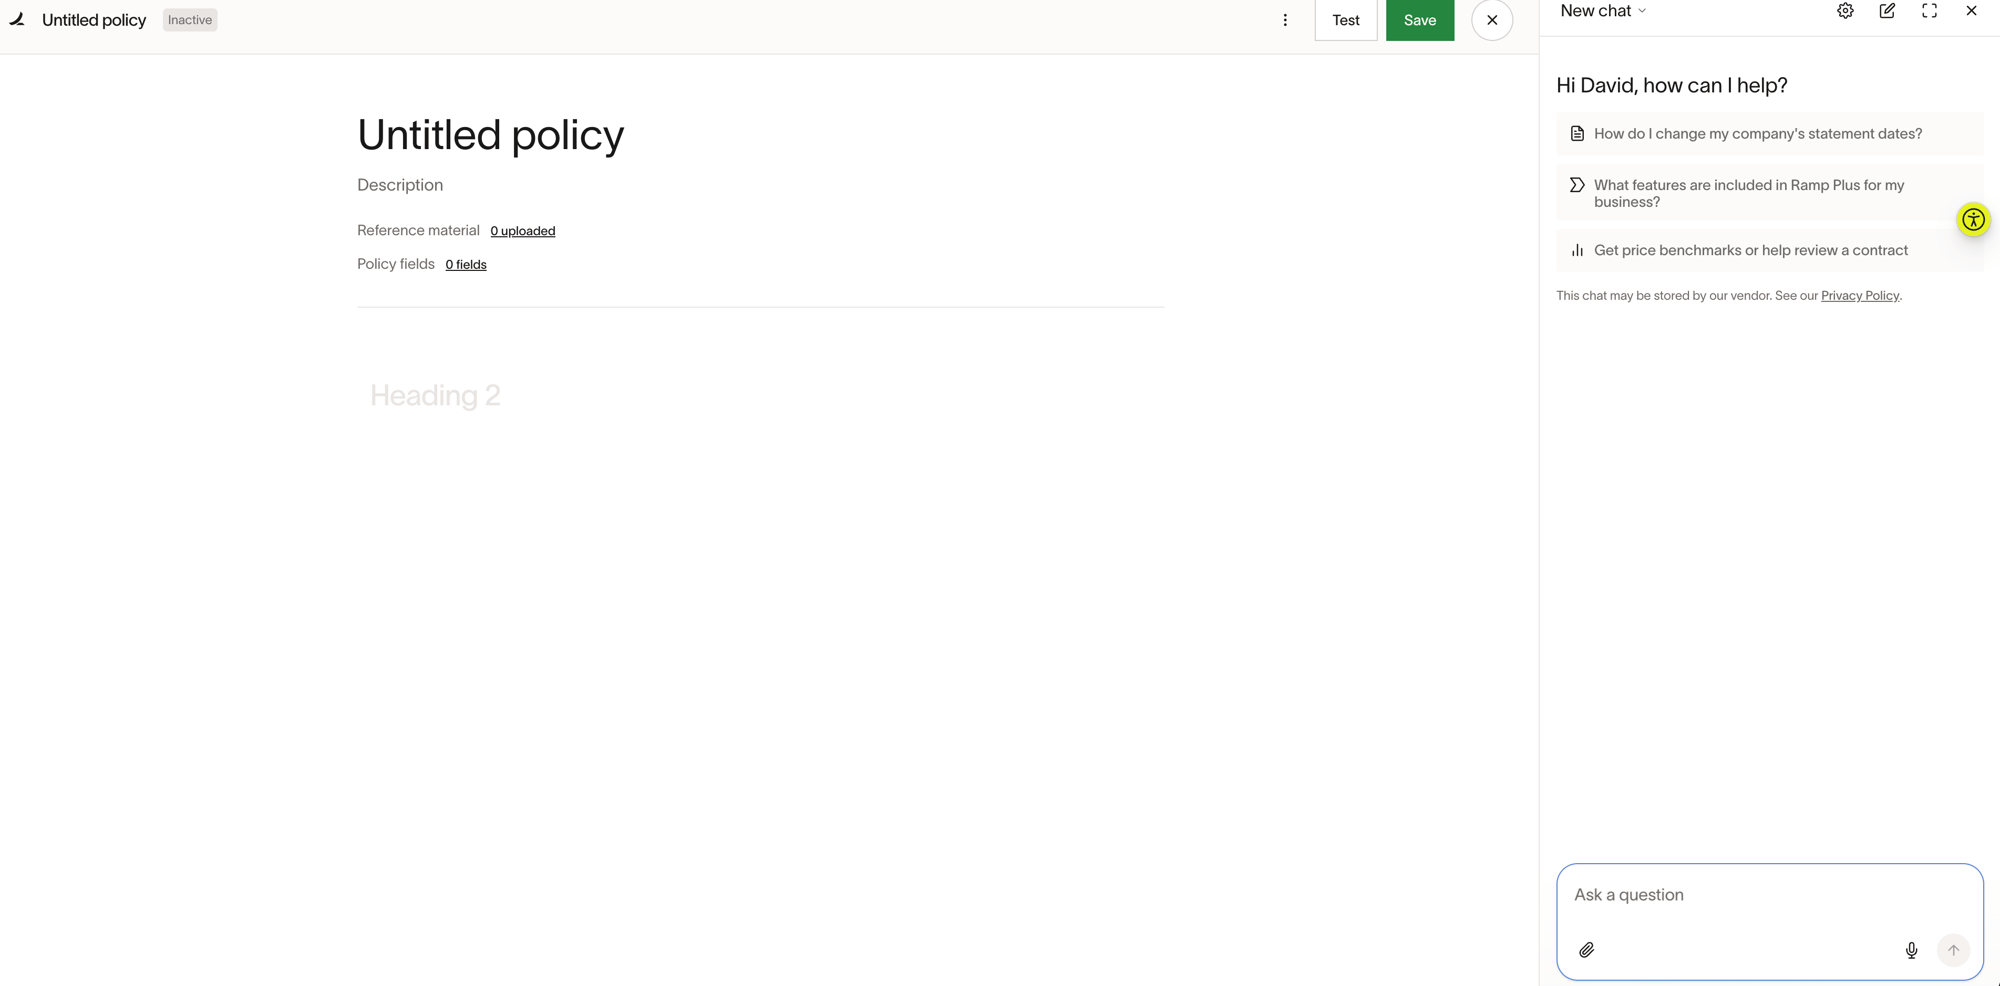
Describe from scratch: Start with a blank agent editor. You can write instructions in natural language describing the process you'd like this agent to follow. The Ask Ramp chat panel appears on the right side of the editor — use it to describe what you want and let Ramp generate agent content from your natural-language descriptions. You can also attach documents like SOPs as reference material to give Ramp more context when drafting your agent.
-
Start from a template: Select one of Ramp's template agents. You can edit these as you wish.
-
Edit your agent
-
Each agent consists of a set of tasks. Each task has its own set of instructions for detailed review.
-
To add a new task, create a new header section anywhere on the page. You can also select "Add block below" via the "+" symbol.
-
To edit an existing task, insert your cursor into any text and start typing or deleting.
-
Ramp supports several tools, which are specific actions the agent can take on your behalf. You can add them by hitting
/while writing. Additionally, the agent will be able to understand the ask without needing explicit instructions. For example, if there's a line that says "Search for the vendor's Terms and Conditions", it will know to explore the web and look for that vendor's T&Cs to attach to the report. Tools let the agent gather information from multiple sources automatically, so reviewers get a complete picture without manual research.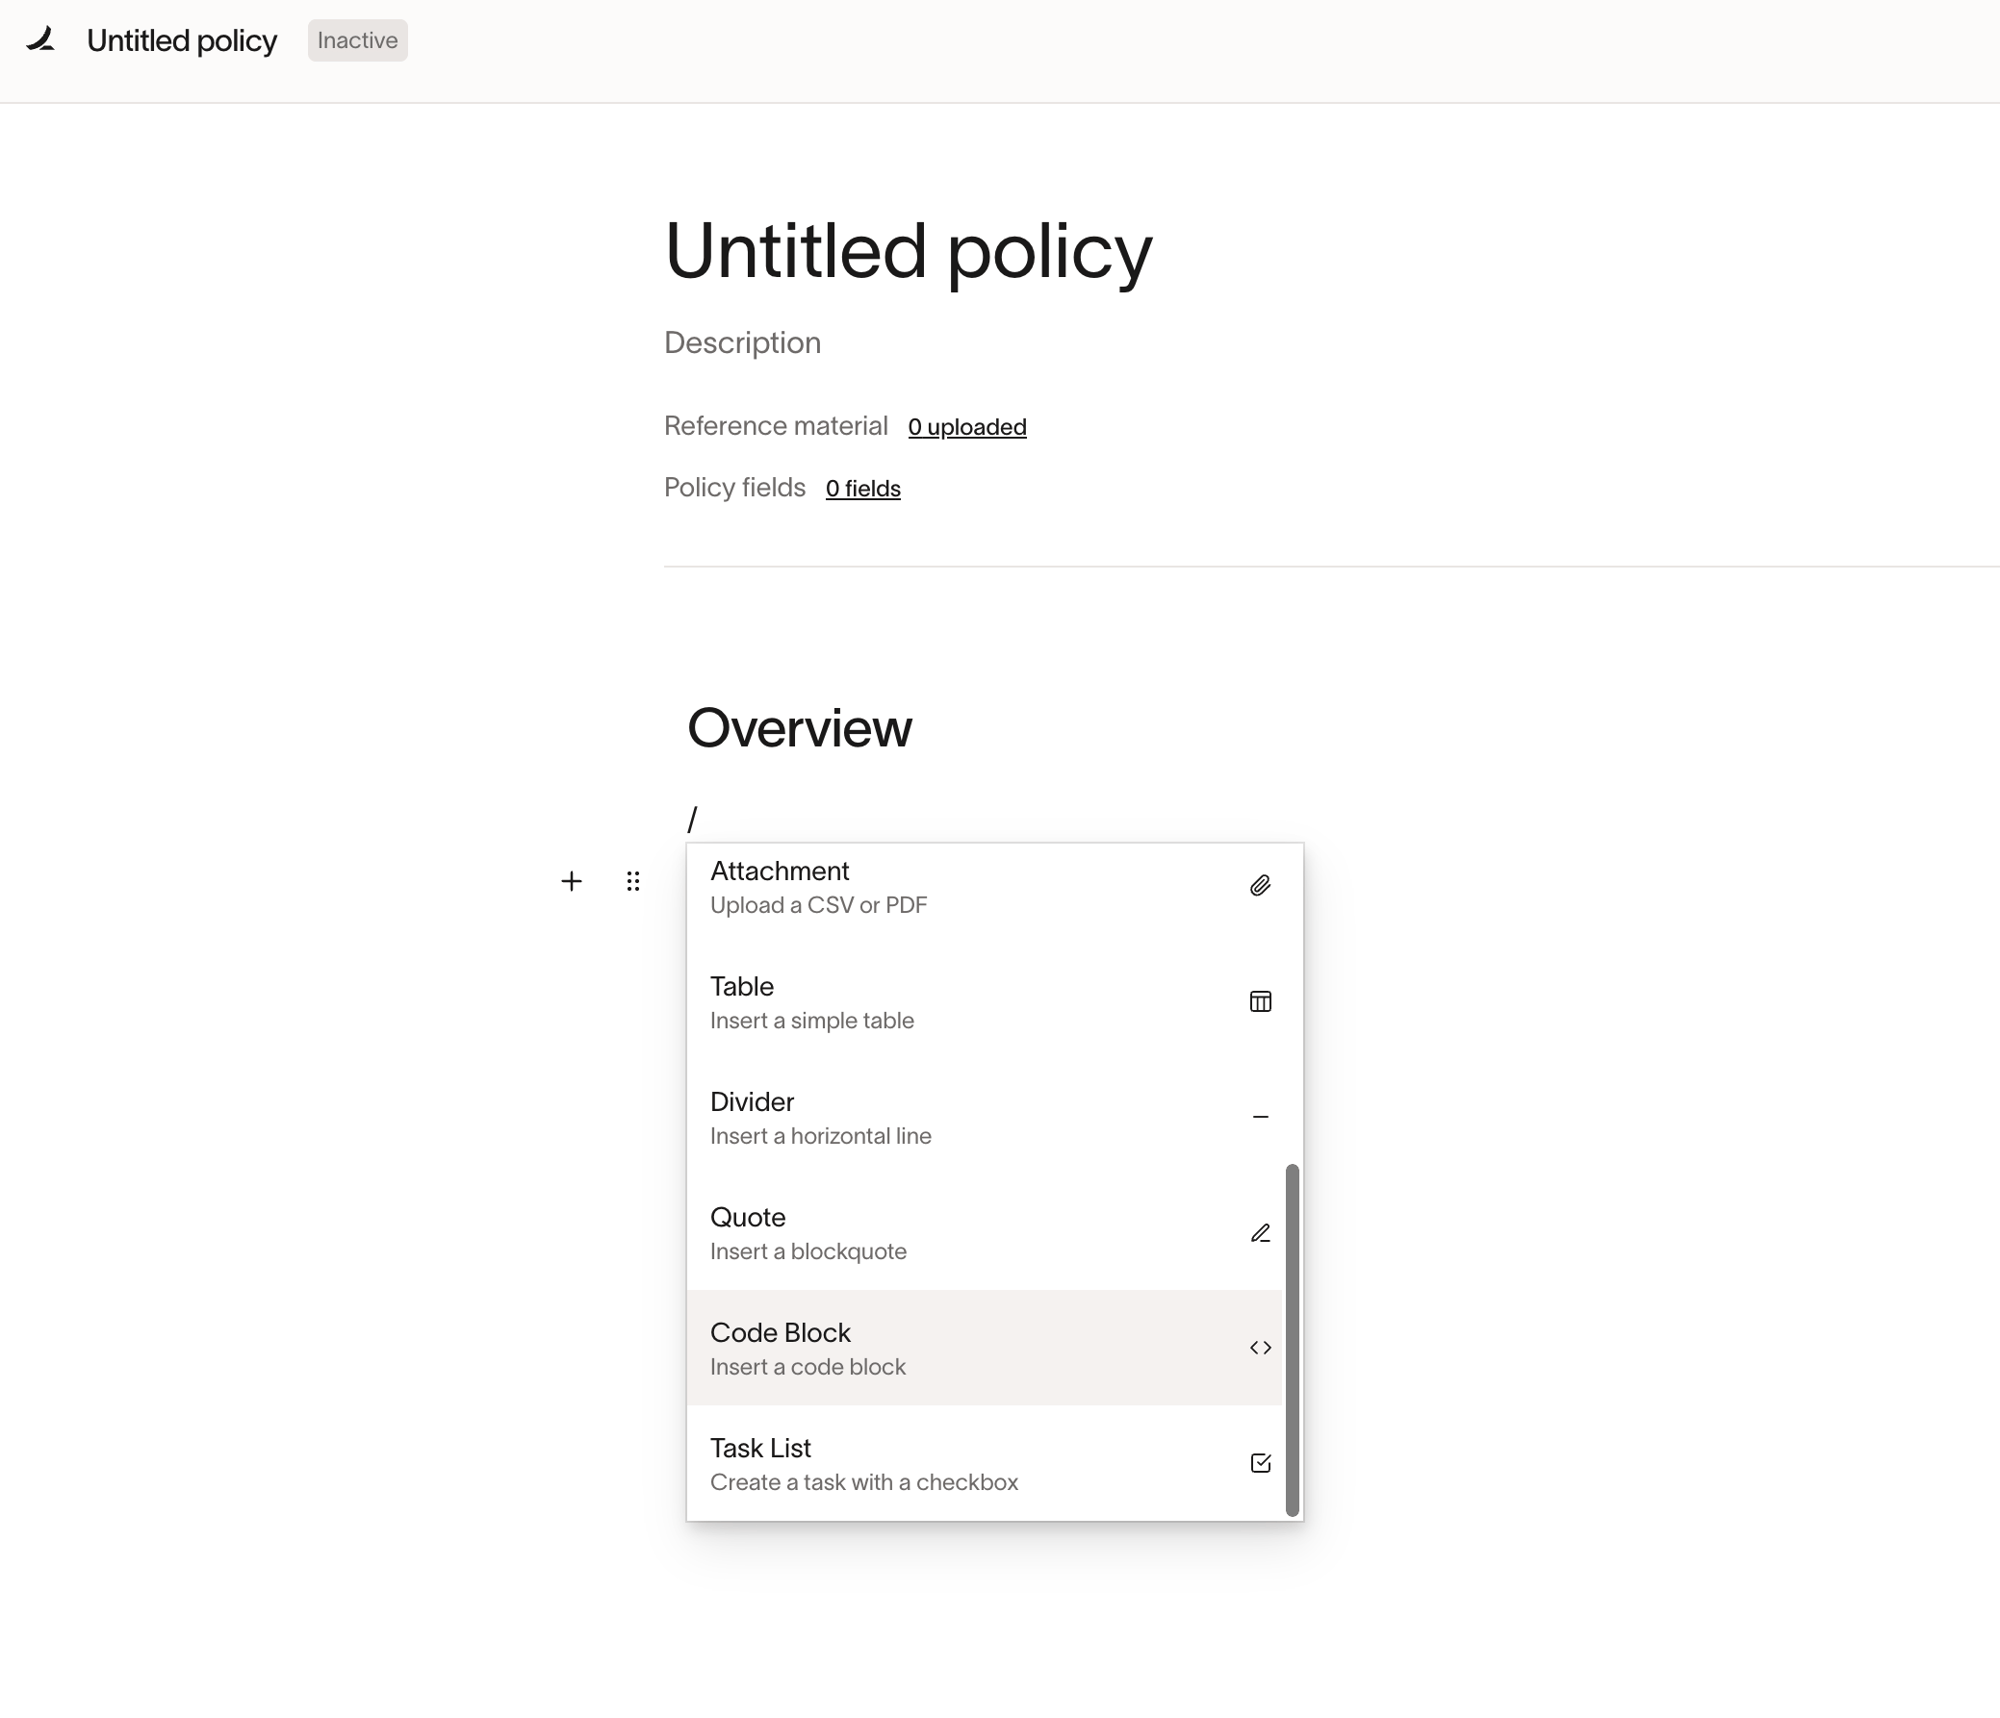
- Search the web — Look up vendor information like privacy policies, security certifications, or public filings.
- Analyze documents — Read and extract details from contracts, invoices, SOWs, or other files attached to the request.
- Pull request data — Reference fields from the procurement request itself (amount, vendor, department, etc.).
Agent fields
Agent fields let you define structured output fields that appear in the generated report. When you create or edit an agent, you'll see an Agent fields link showing the count of configured fields (e.g., "3 fields"). These fields define what specific data points the agent will produce in its report — for example, text summaries for different review areas or single-select fields for risk ratings. Agent fields help ensure consistent, structured output across all agent runs, making it easier for downstream reviewers to quickly find the information they need.
Edit agents with Ask Ramp
Instead of writing every instruction manually, you can use Ask Ramp to help refine and enhance your agent through a natural-language chat experience.
- Open an existing agent (or create a new one).
- In the Ask Ramp chat panel on the right side of the editor, describe what you want to add or change in plain language. For example:
- "Add a section to check for any public legal proceedings against the vendor."
- "Add a final recommendation on whether to proceed with this vendor."
- "Provide any suggestions for this agent. I really care about vendor security."
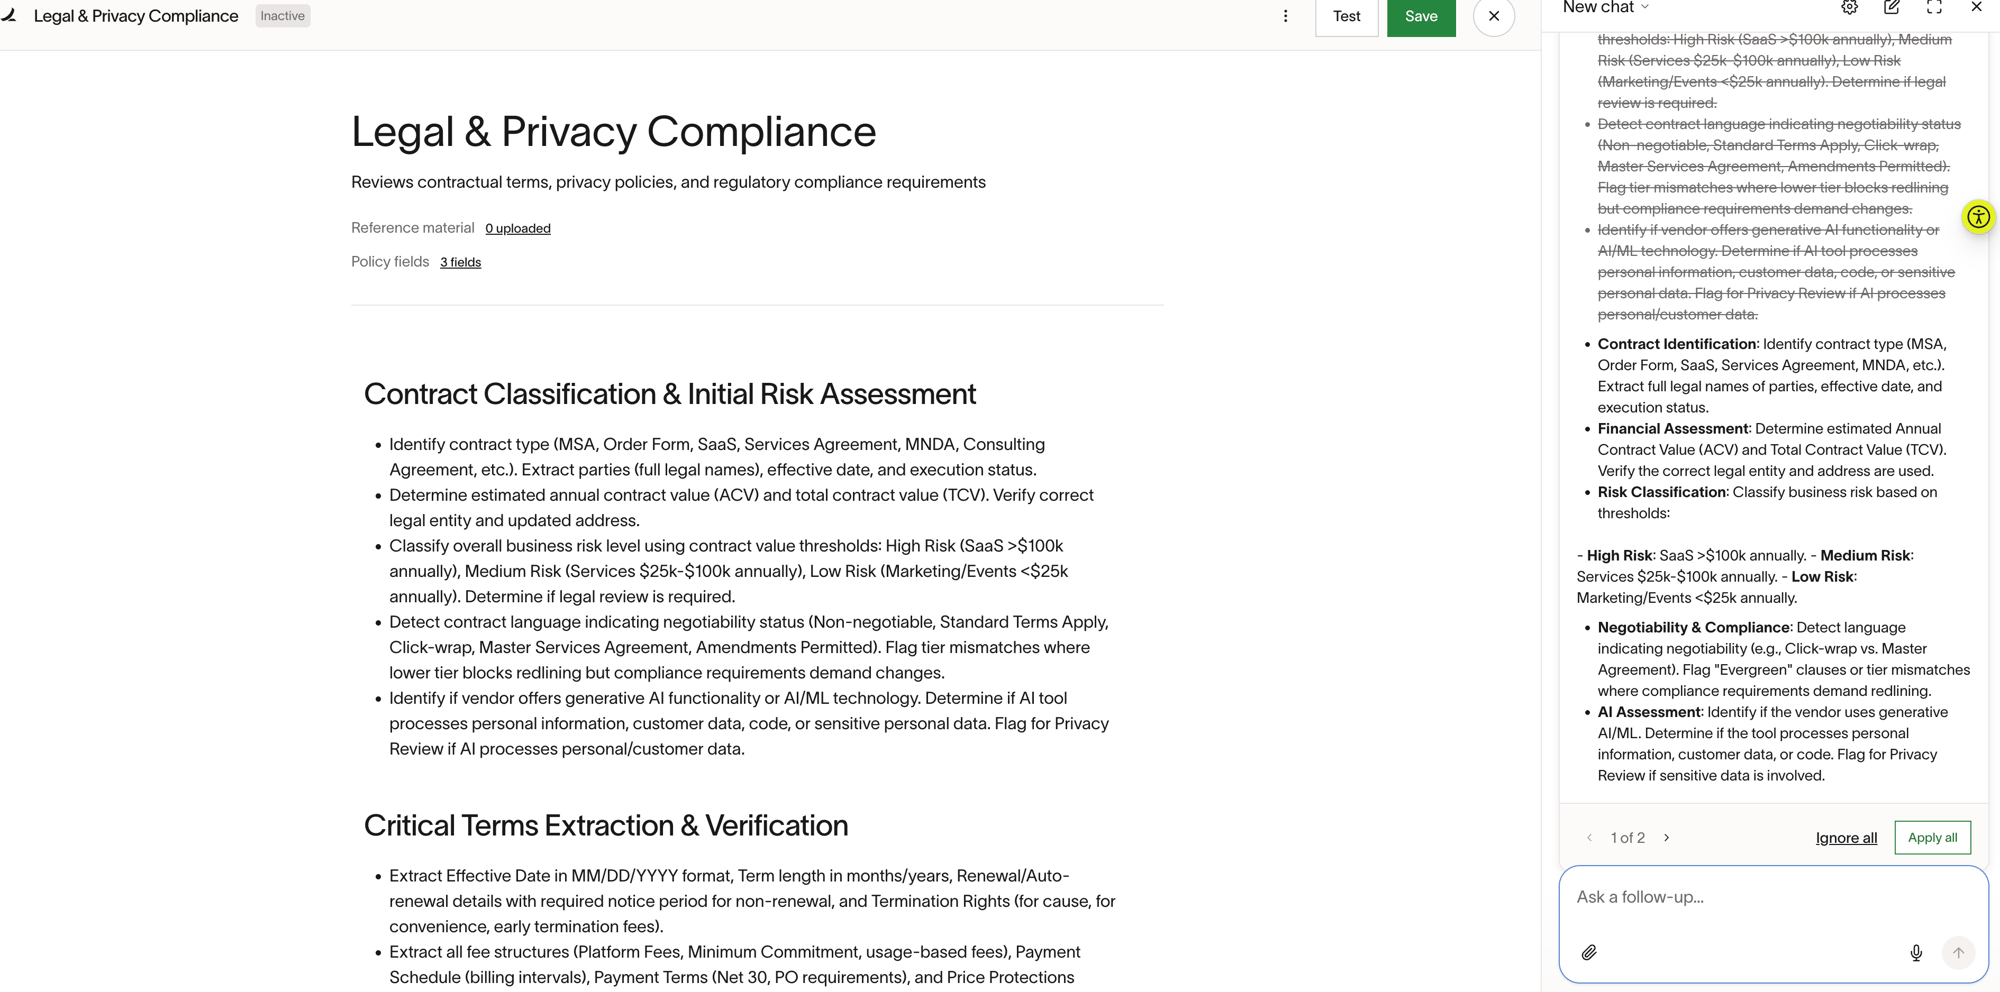
- Ask Ramp suggests changes in a card above the chat. Review the suggestion, then select Apply to add it to your agent.
- Continue the conversation to make additional changes — you can ask Ramp to add, remove, or reword any section.
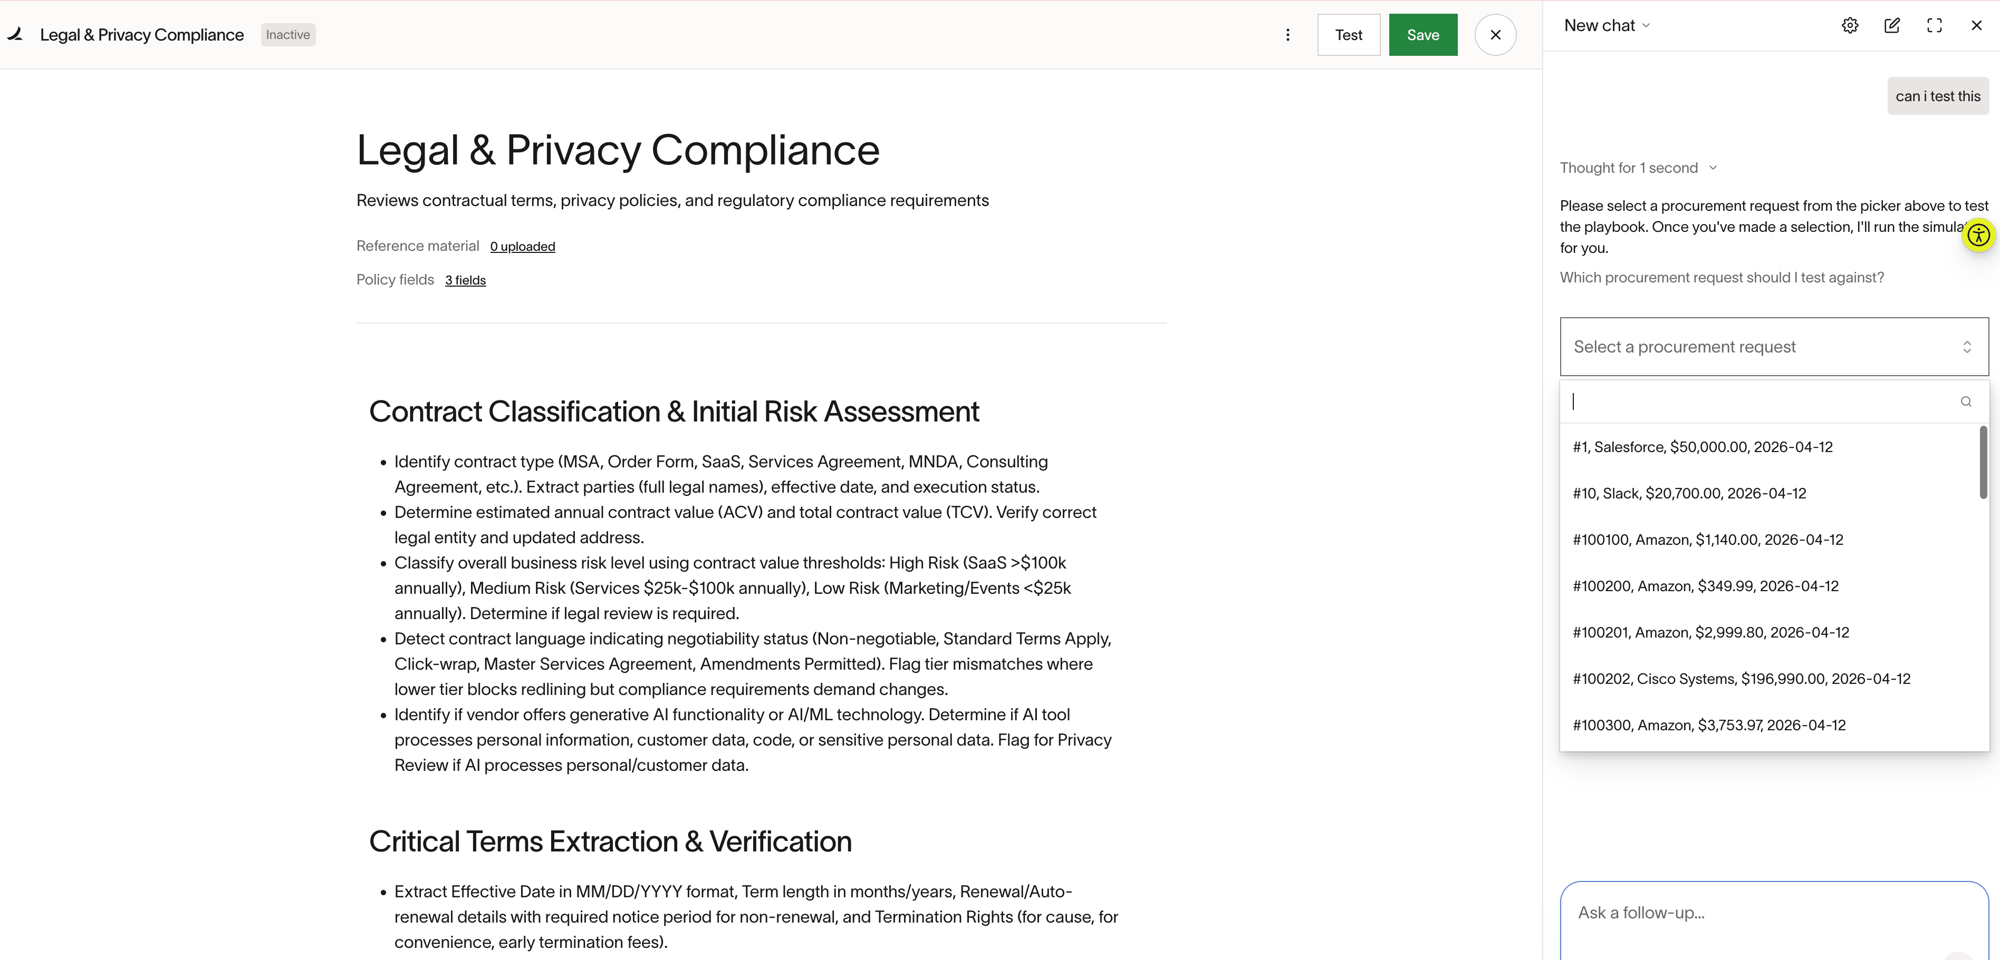
- When you are ready, run a test simulation directly from the chat. Select a prior procurement request to test against — if your agent references attached documents, choose a request that already has documents attached.
- After the simulation finishes, Ask Ramp reviews the results and may suggest further improvements — for example, making certain instructions more prominent if the agent did not produce the expected output.
- Review all suggested changes and click
Apply allto accept them, then clickSave.
Test your agent
You can test your agent in two ways:
- From the toolbar: Click Test in the top right corner to run a simulated version of this agent using a prior request as an example.
- From Ask Ramp: Ask Ramp in the chat panel to run a test simulation. Ask Ramp will prompt you to select a procurement request to test against.
If your agent needs to reference attached documents, be sure to select a request that has documents attached already.
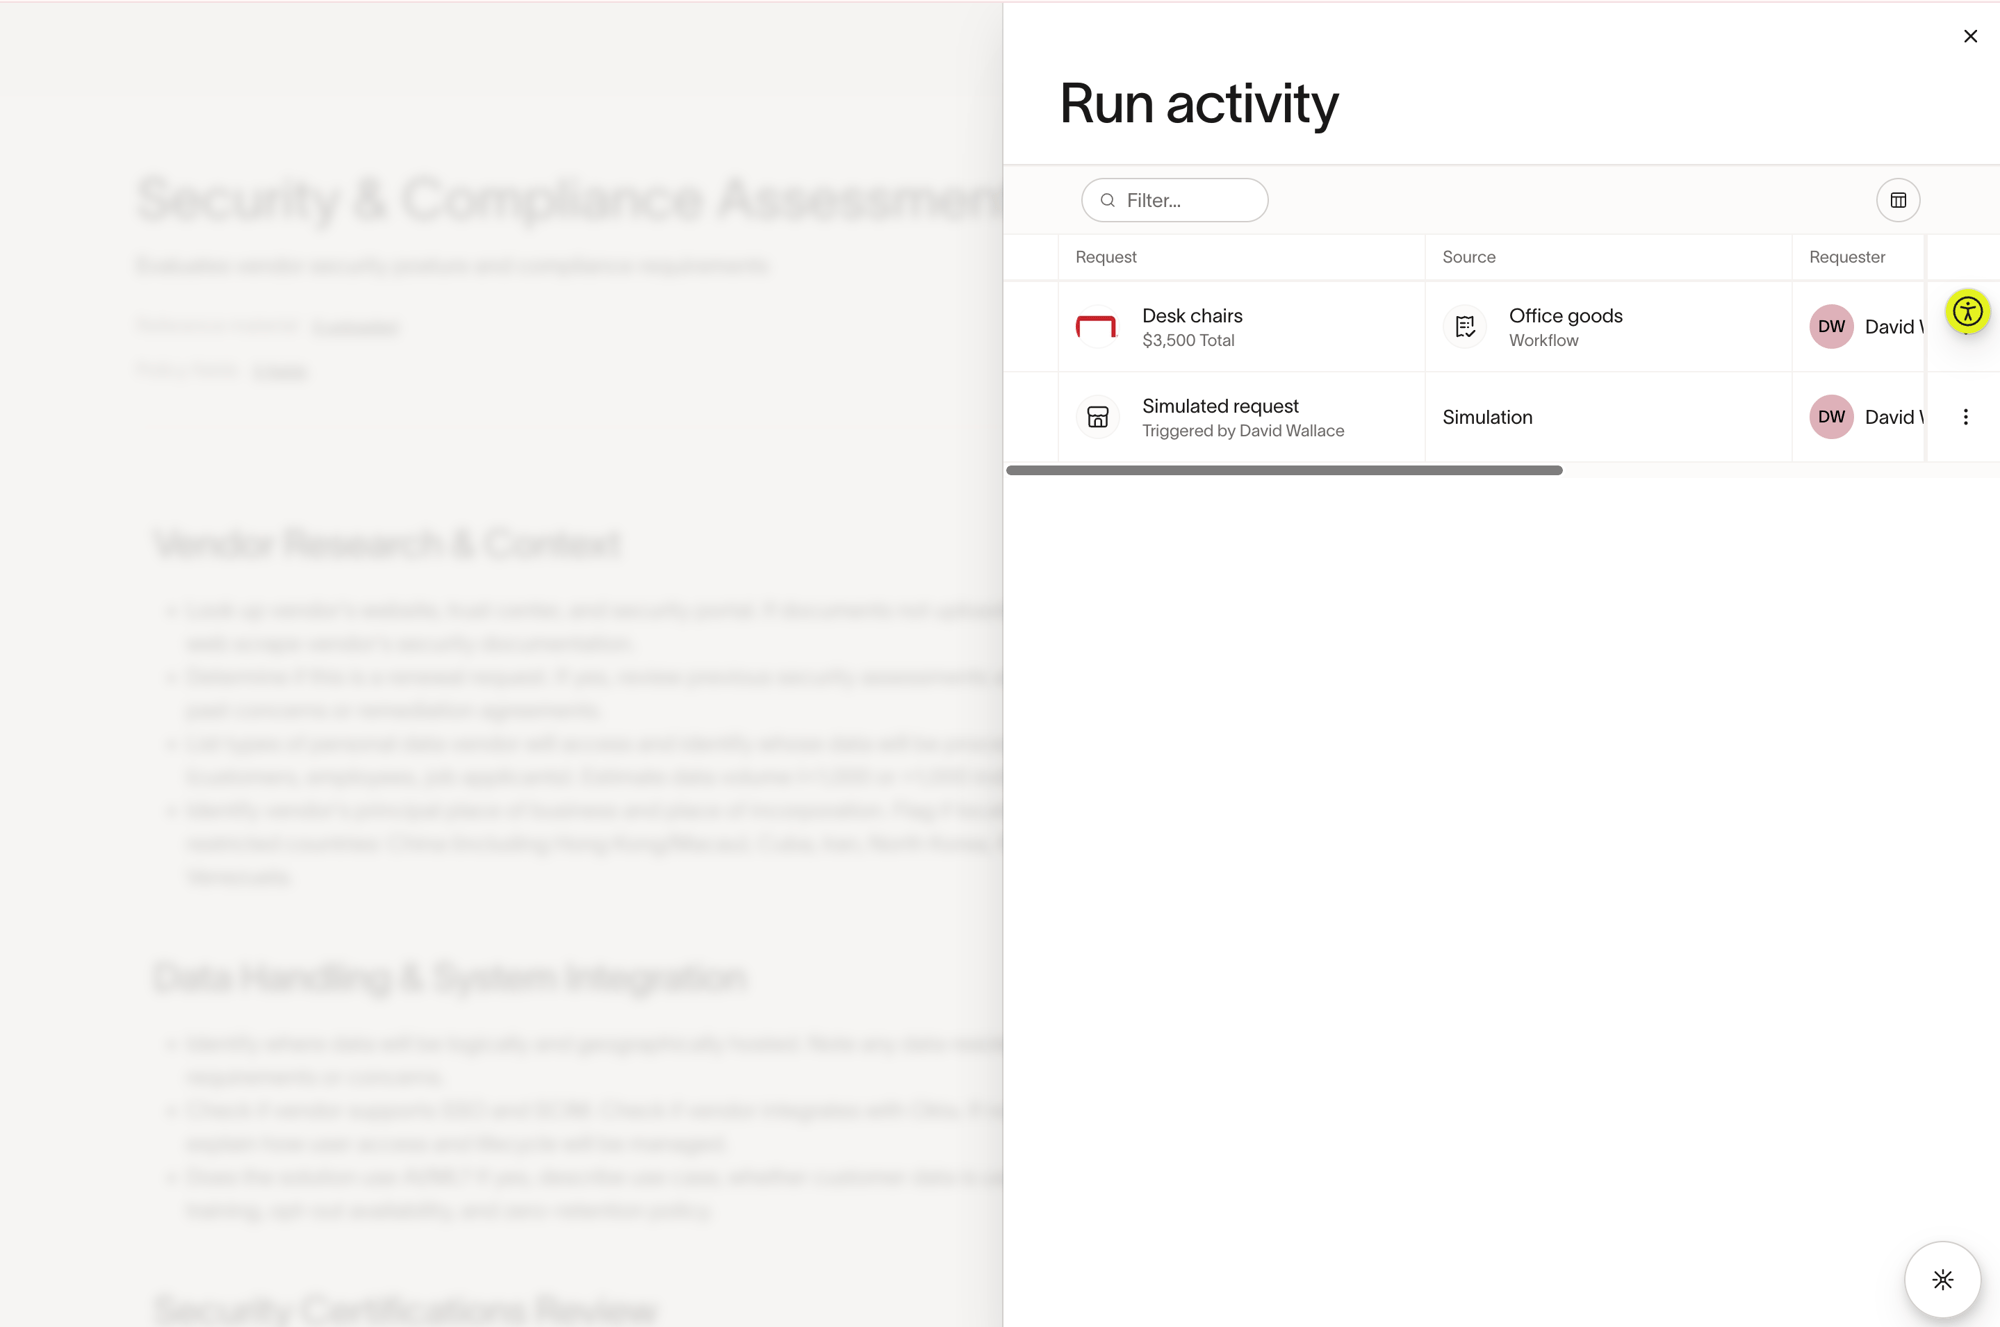
Let your agent test run. This may take several minutes. You may leave the page and come back to the simulated run by navigating to the Monitoring tab.
Once finished, review the generated report to verify the agent is producing the outputs you expect. Check that the right documents were analyzed, the right web searches were performed, and the summary is accurate. If you're content with the report, select Save.
Rename agents
To rename an agent, select the three-dot menu on the agent card and select Rename. Enter the new name and confirm.
Share agents
-
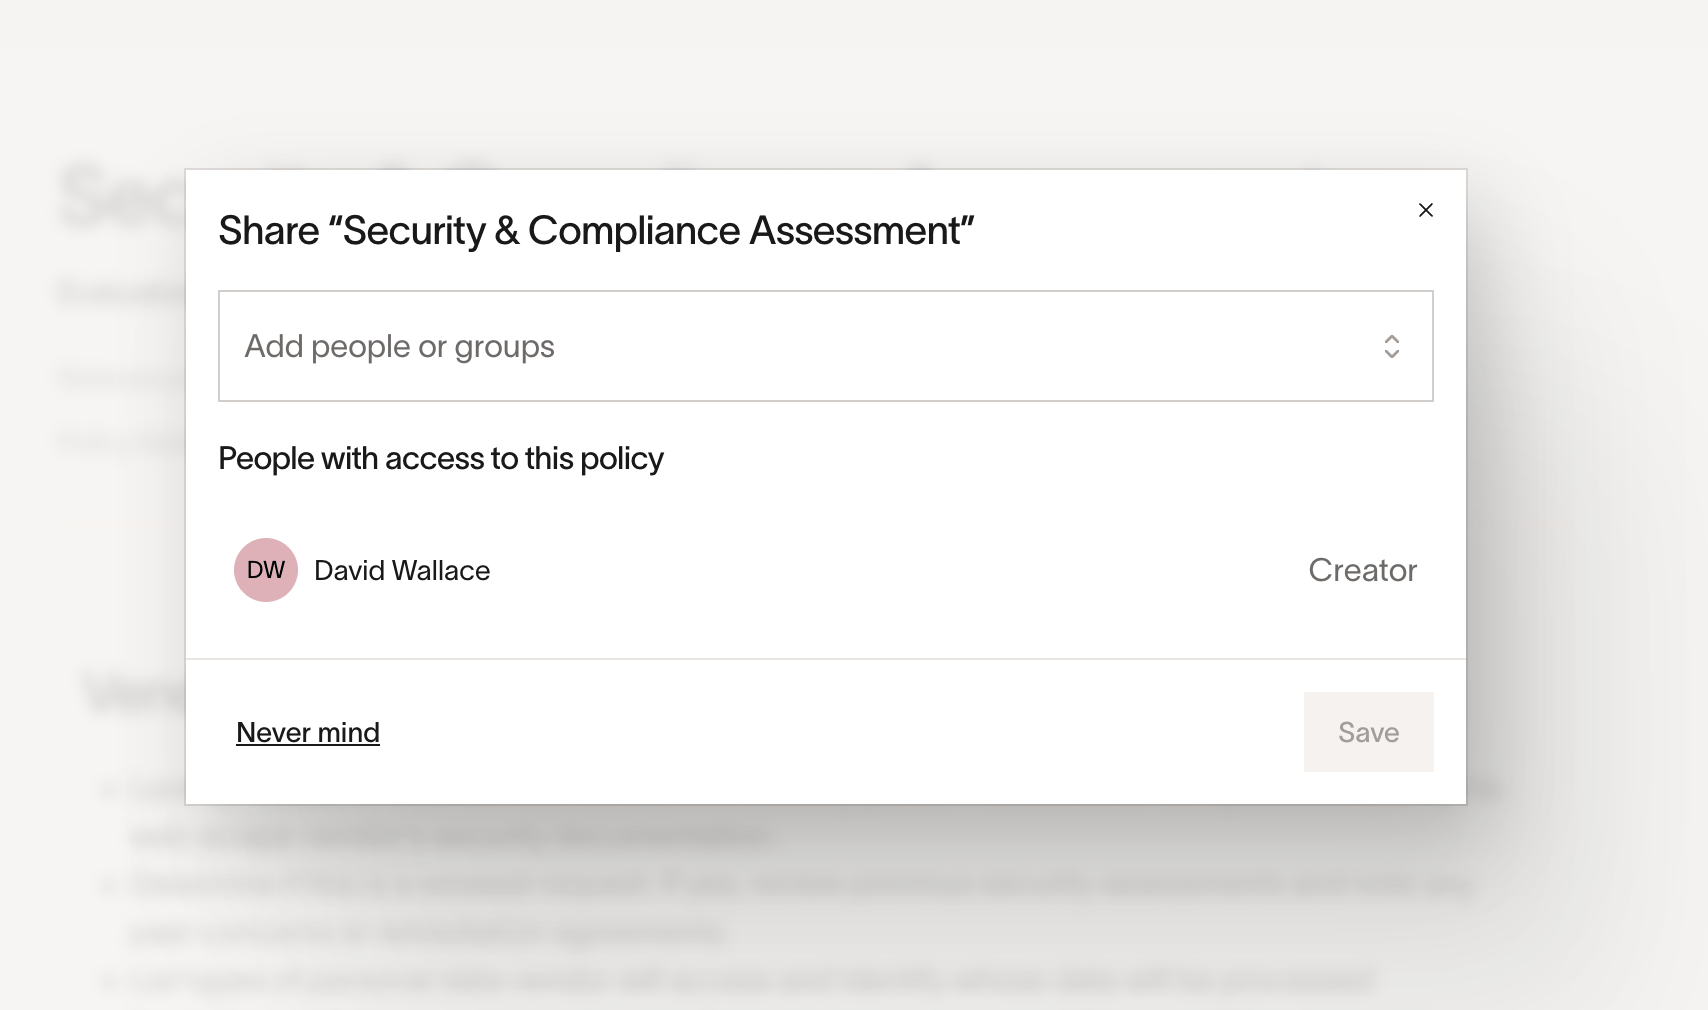
To share an agent, select the three-dot menu in the top right corner next to Test and Save.
-
Select Share.
-
Select which people or groups should have access.
-
Select what role you want to provide them with ( Viewer or Editor ).
-
Click
Share. -
Once you've provided access, share the direct URL with those users. Non-admins cannot access Procurement agents, so you will need to share the agent URL with them directly.
Add agents to workflows
Note: When you save an agent that is not yet linked to any workflow, Ramp displays an activation modal prompting you to set up the agent in a Spend Program. You can choose to add it to a program immediately or skip and do it later.
-
Go to the program where you want to add an agent.
-
Open the approval policy under
Who approves requests?. -
Select
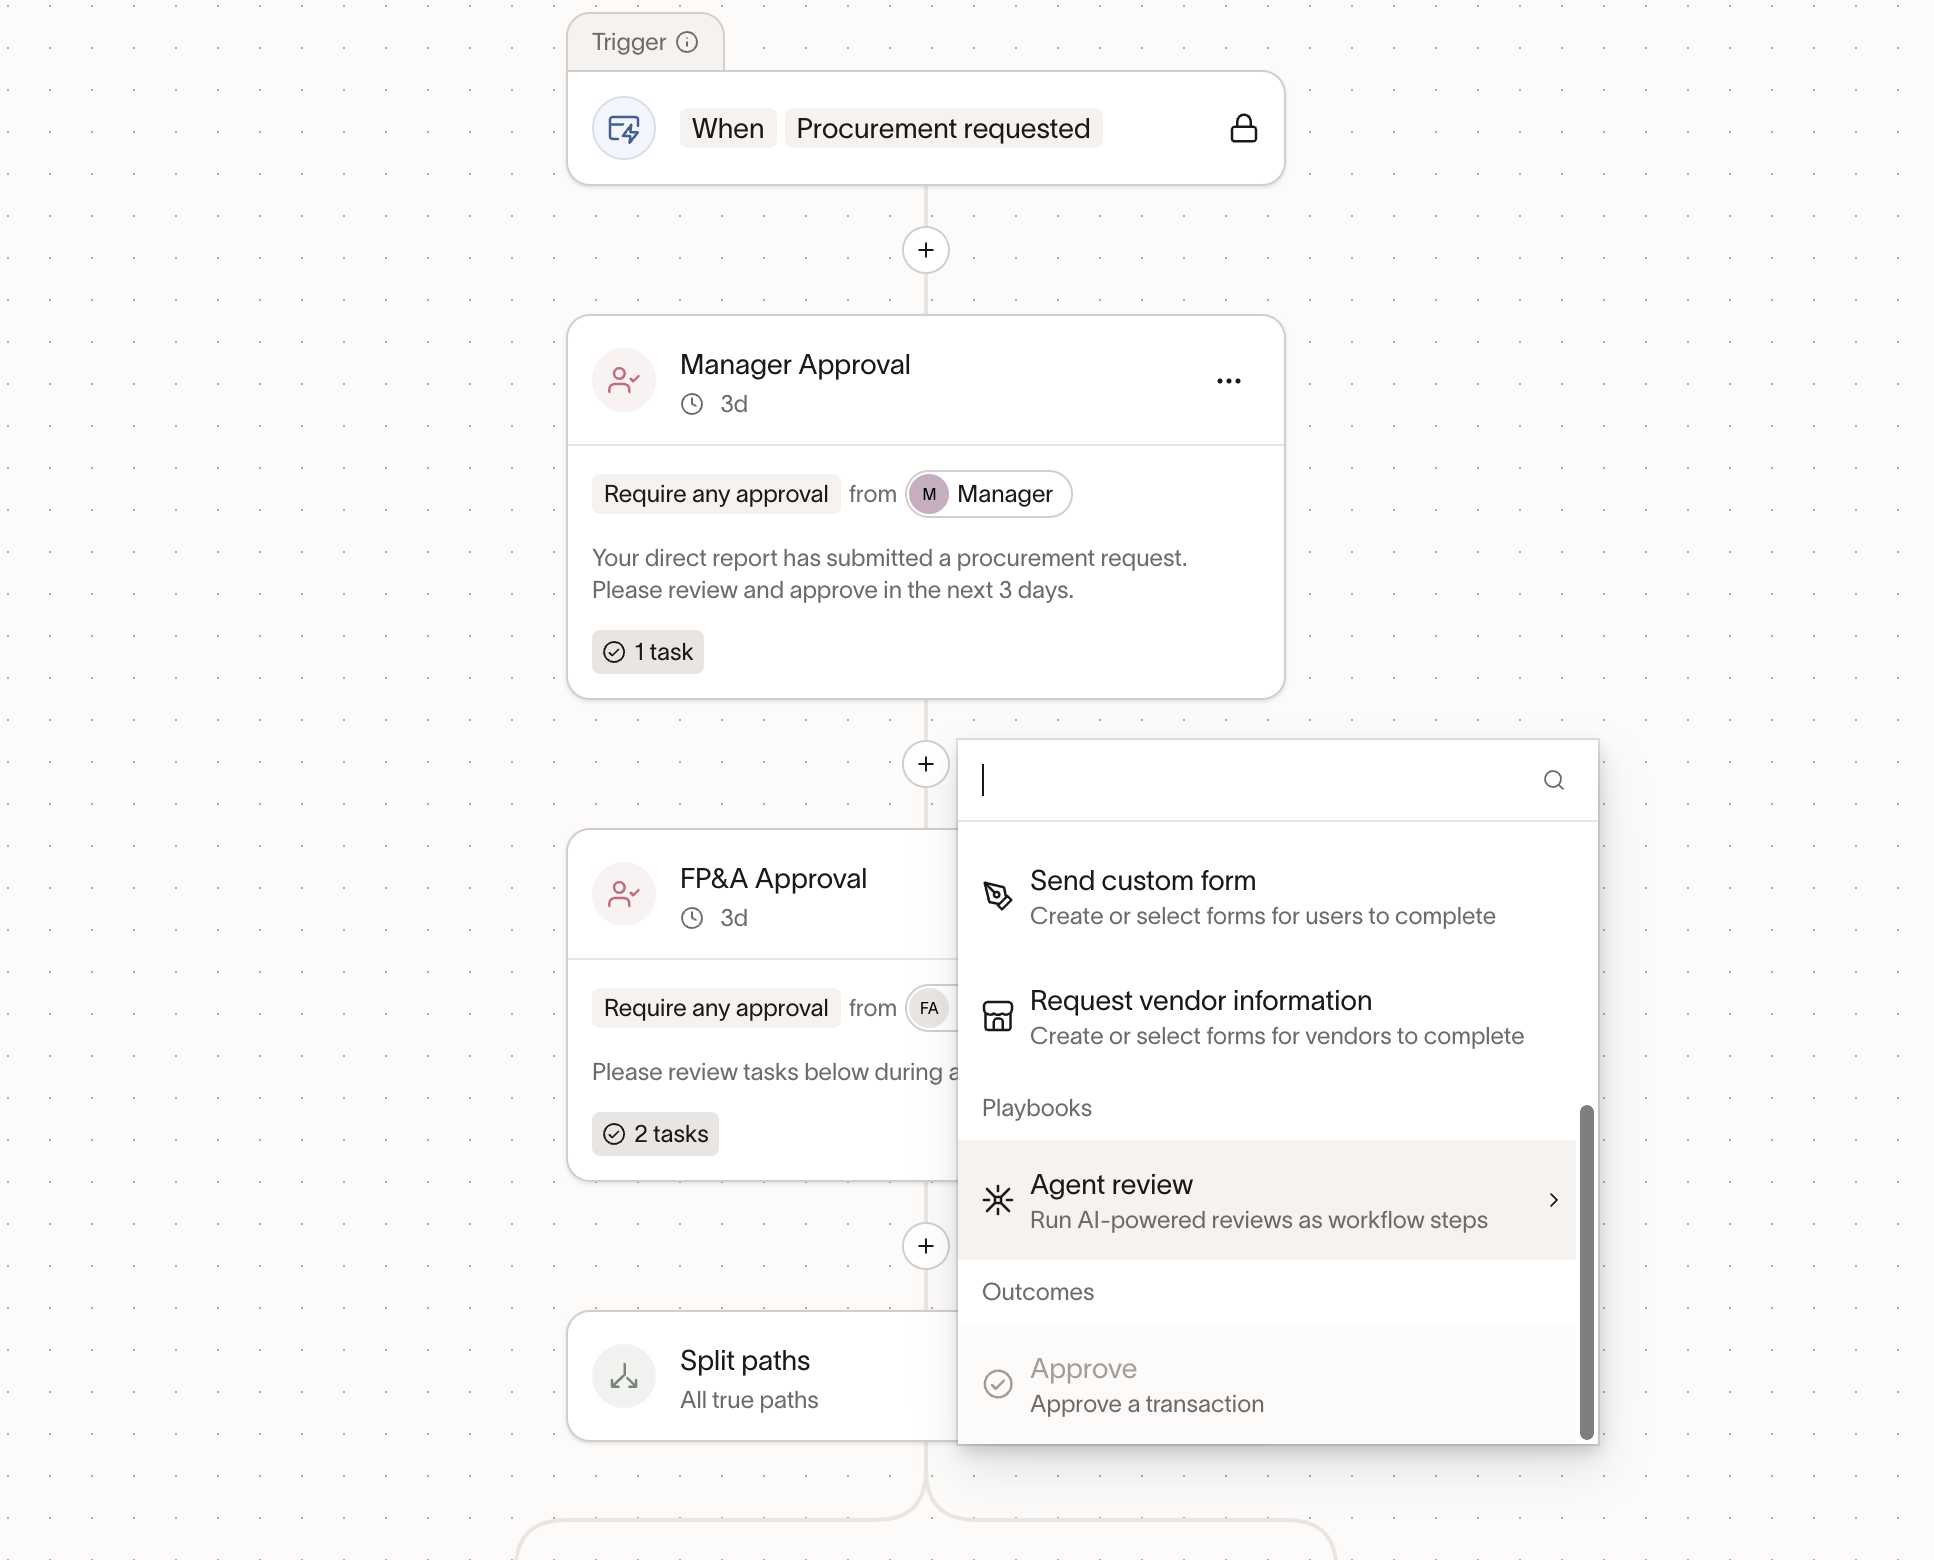
+at the point in your workflow where you want the agent to run. -
Under Agents, select Agent review.
-
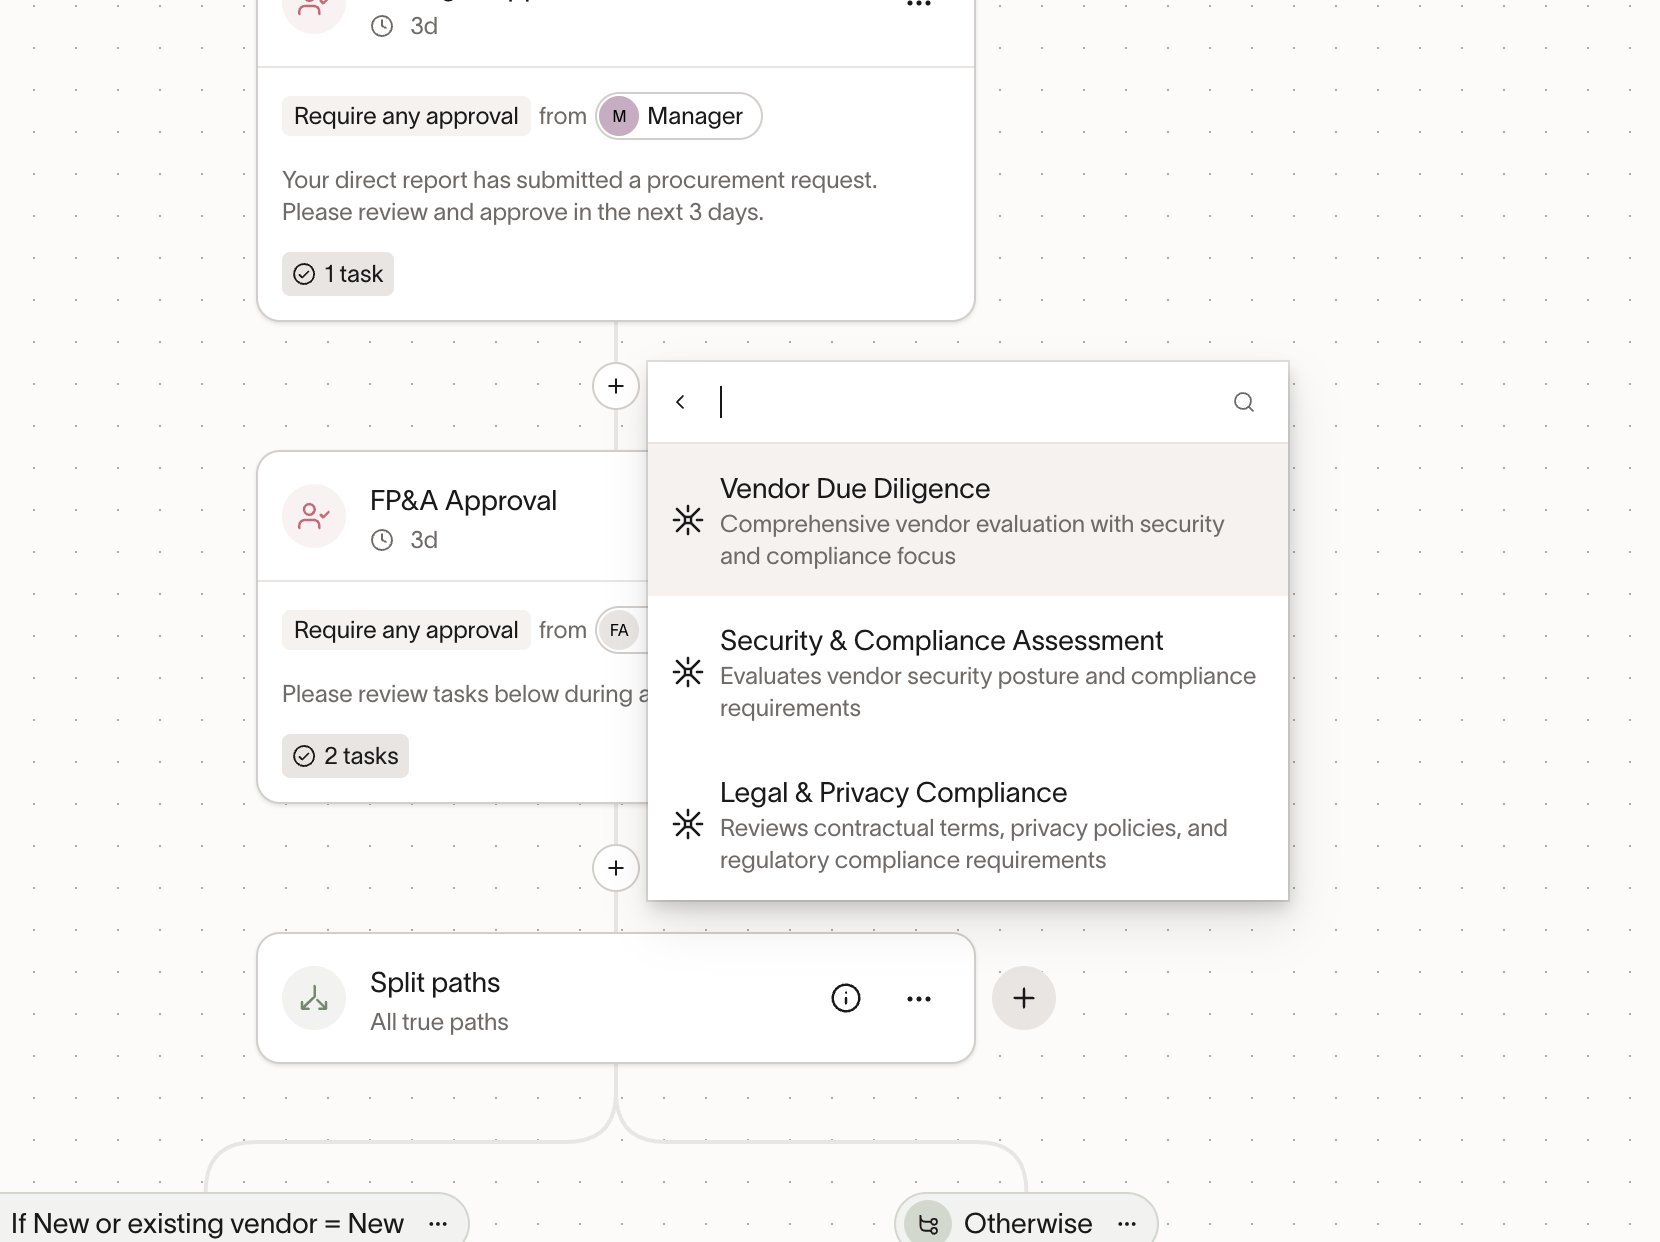
Select the agent you want to add. You can review all the tasks the agent will perform.
-
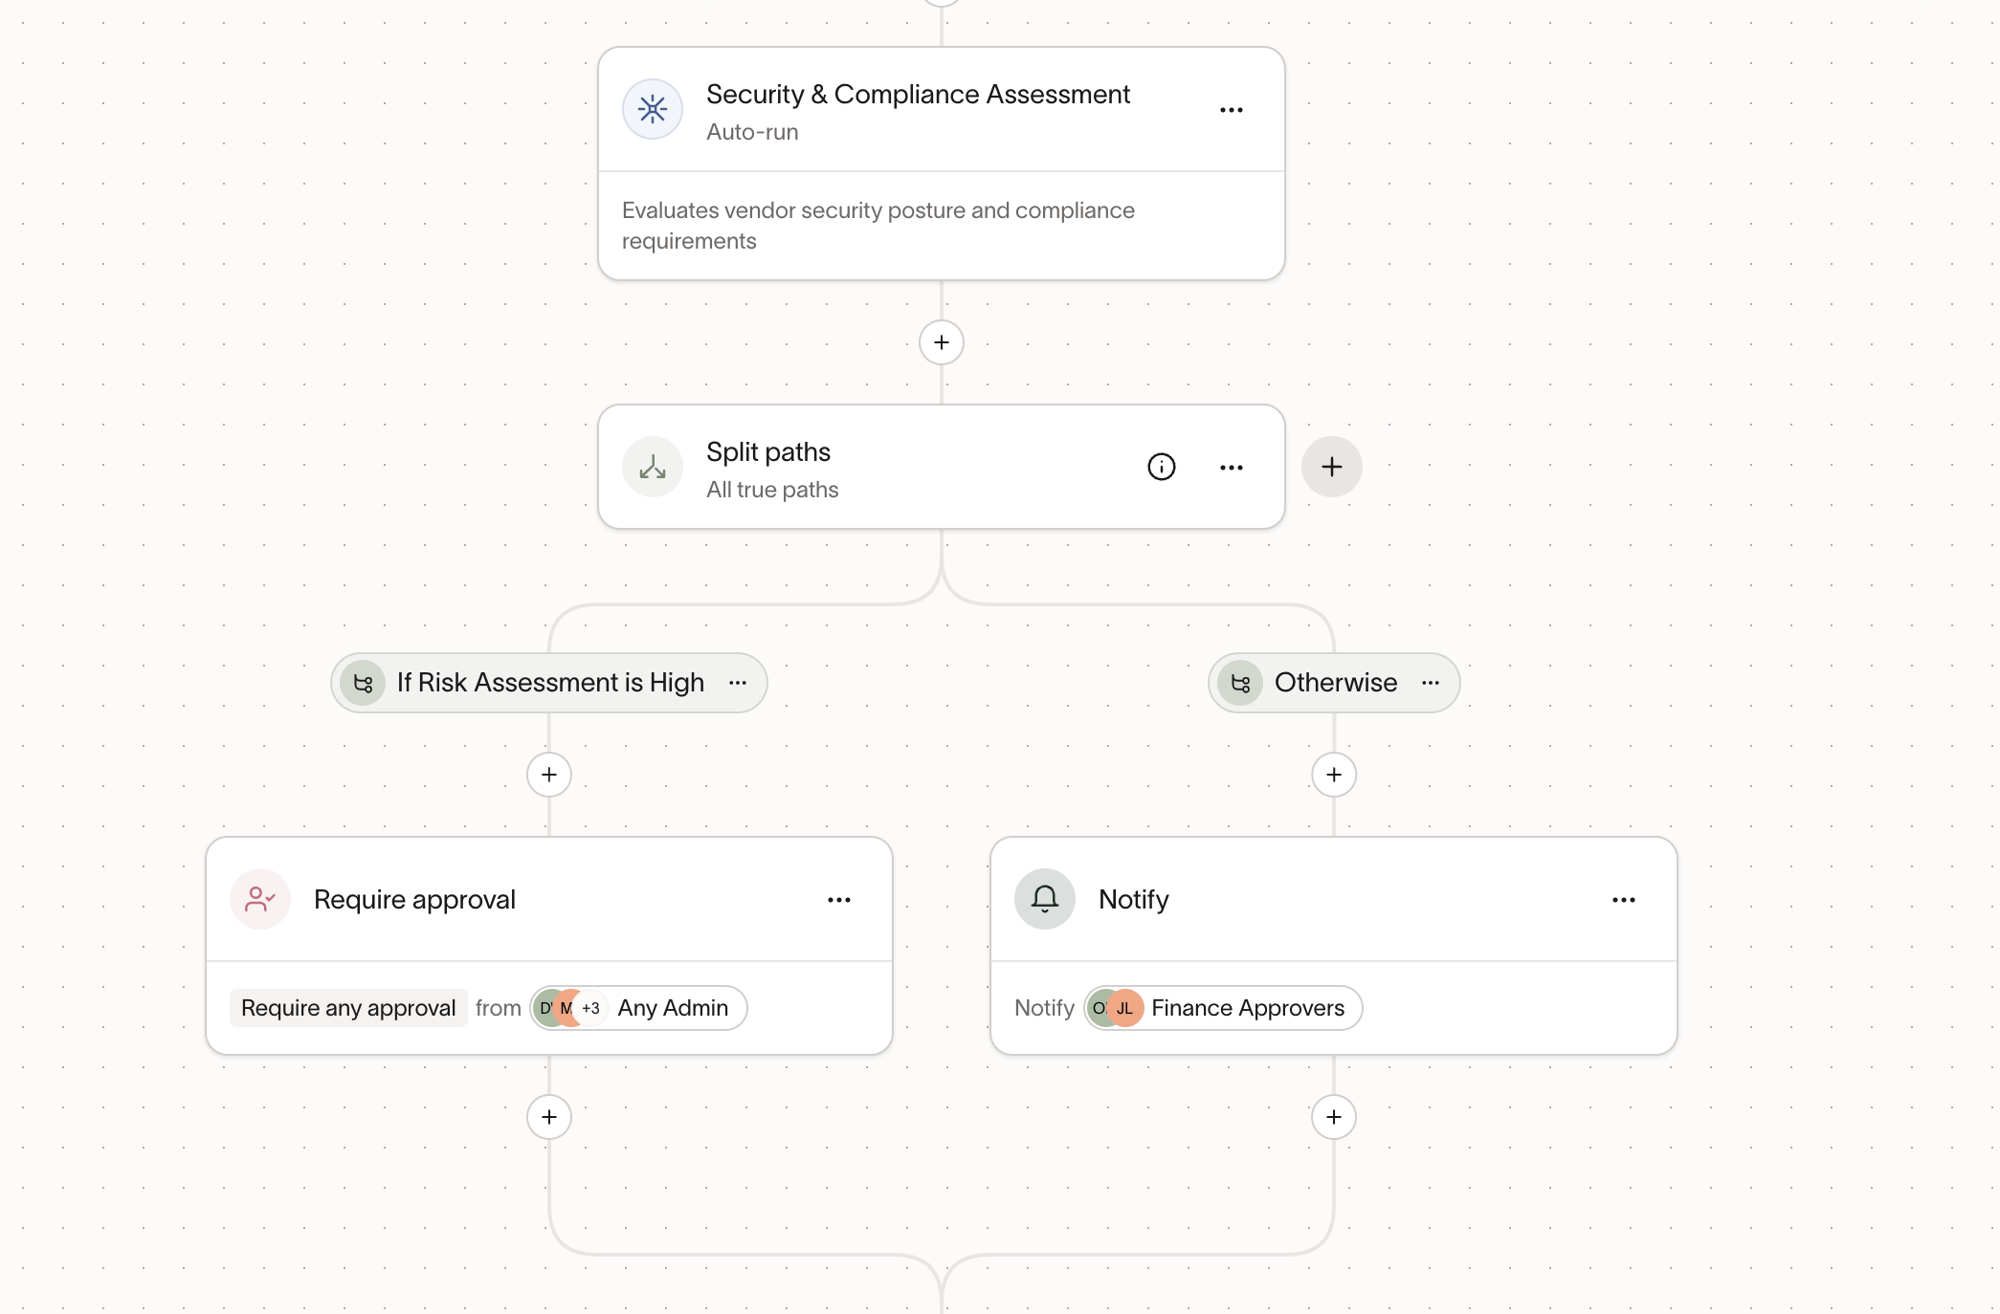
Once added, you can configure conditions to route workflow logic based on the Agent outputs. Ramp evaluates fields from your agent to return results. Use these to set conditions on downstream steps. For example, add a security agent, then use a Split paths condition to check whether the Risk Assessment is "High". If High, require approval from Security approvers. Otherwise, just notify them.

-
Click
Save.
Agent reports
Once finished running, agents generate a report. You can view this report under the Documents & Reports section of a request:
- Hover over individual bullets to see citations.
- Select citations to find the exact text in documents or visit the website the agent is referencing.
- Downstream approvers in the workflow can also see the agent's report, providing a transparent decision trail so every reviewer has the same context.
Common use cases for Procurement agents
Vendor due diligence (general)
- Vendor Due Diligence Summary: Research the vendor and summarize what they do, who typically uses them, and any notable risk signals. Analyze any attached vendor docs (security overview, pricing, proposal) and list any missing information needed to complete the review.
- New Vendor Intake Completeness Check: Review the request fields and attachments, then flag missing or inconsistent information (for example, no SOW, unclear scope, missing renewal date, missing pricing details). Output a checklist of follow-up questions for the requester.
Security and compliance
- Security Review (SOC 2 / DPA / Privacy): Check the vendor's public documentation (privacy policy, security page, trust center) and analyze attached files (SOC 2 report, DPA, security questionnaire). Summarize whether the key artifacts exist, what they cover, and any open questions for Security reviewers.
- Data Handling Risk Summary: Determine what data the vendor may access based on the request context and attached docs. Summarize potential concerns (PII, financial data, internal data), and recommend what a reviewer should validate before approving.
Legal and contract review
- Contract Clause Extraction: Analyze attached agreements (MSA, SOW, Order Form) and extract key terms like term length, auto-renewal, termination, liability caps, indemnification, governing law, and confidentiality. Summarize any unusual terms for Legal to review.
- Contract Standards Check (Escalations): Compare extracted contract terms to common "acceptable vs. escalate" standards (for example, auto-renewals, price escalators, term length). Flag which areas likely need escalation and why.
Insurance / COI
- COI Validation: If a Certificate of Insurance is attached, confirm coverage types and limits, and flag expiration dates that are too soon. If no COI is attached, clearly state that it is missing and should be requested before approval.
IT / systems integration review
- IT Integration Readiness: Research whether the vendor supports common IT requirements (SSO, SCIM, audit logs, API access, data export). Summarize integration requirements and implementation considerations for IT reviewers.
Pricing and cost analysis
- Pricing & Overage Risk Summary: Analyze attached pricing (proposal, order form, invoice, quote) and summarize pricing model (per seat, tiers, usage-based), overage terms, and renewal uplifts. Flag common cost risks and areas to confirm before signing.
- Procurement Compliance & Cost Optimization: Review the request for policy or process gaps (missing competitive quotes, missing justification, unclear scope), then summarize opportunities to reduce cost or tighten requirements before proceeding.
Duplicate / existing solution detection
- Duplicate Purchase Request Detector: Identify whether the request appears duplicative (similar vendor name, similar product category, or similar purpose stated in the request). If it seems duplicative, call it out and list what a reviewer should confirm before proceeding.
Conditional routing support (workflow-friendly outputs)
- Risk Tiering for Routing: Produce a clear risk tier (Low, Medium, High) based on the findings (for example, missing SOC 2, non-standard liability language, or unclear data access). Provide a short explanation so admins can use the output to route to the right approvers in the workflow.